Copying photographic film with the Nikon D810 and a shoe box by Anthony McKee (www.anthonymckee.com):
While many photographers are keenly waiting for the new Nikon ES2 film digitising adapter set to arrive in stores, I have been making use of my own Nikon film copying kit that I put together a while ago using a Nikon D810, a 105 micro lens – and a shoebox.
I was asked a couple of years ago by a friend if I could digitise some old slides for her, but I lacked one rather essential piece of equipment: a film scanner. Over the years I have had regular access to film scanners, from state-of-the-art drum scanners through to smaller desktop models, but over time the interfaces and software drivers have all become obsolete. And despite making regular scans, I found that many film scanners were not really that good at scanning film; some scanners struggled to capture the full dynamic range of negatives and slides, and others had occasional problems with banding.
I was about to tell my friend to take her 180 slides to a local photo lab when I started thinking through some other options. I owned a Nikon D810 camera, a Nikon 105mm micro lens and a couple of SB-700 speedlights, and I also remembered an old shoe box stored away in a cupboard. The box had a white interior and I realised that if I put the two Speedlight flash units into the box, each pointing towards opposites ends, the resulting light in the middle would be soft and even.
The set-up took me less than half an hour to put together. I cut a rectangular hole measuring 38mm x 26mm (just larger than the 35mm format) in the centre of the lid, and another smaller hole on the side of the shoe box through which to thread an SC17 sync cord. I then placed my two flash units into the shoe box, with one flash connected to the camera via the sync cord, and the other set to slave mode so that it would trigger every time the first flash fired. To ensure that both flashes had fired on each exposure, I turned on the beep function for the slaved flash; if I heard a beep with every exposure, I knew that everything was working ok.
To maintain consistent exposures, I set both flash units to manual mode, and then adjusted the power output of each flash to 1/8th power. Manual mode is not only more consistent than working in TTL mode, but with both flashes set to the same power output I was certain to get an even light across the interior of the shoe box. The medium power setting also meant that the flash units would not get too hot and my recycle times would be relatively short.
I then mounted my Nikon D810 onto a tripod with the main column mounted across the top rather than vertical, so the camera could point straight down.
The next step in the process was perhaps the most critical. To ensure that both the geometry of the copied image was accurate, and that the plane of focus was lying accurately across the slide as it was being copied, I needed to ensure that the camera was perpendicular to the slide. If the camera was not facing straight down, one side of the slide would appear larger than the other, and at the same time I would probably not get all the slide in focus.
The simplest way I have discovered for aligning a camera to the copy stand is, believe it or not, to use a smartphone. The iPhone not only has a built in compass, but if you swipe that to one side, you will discover an electronic spirit level. All you have to do is place the phone flat on top of the shoebox and then tap the phone’s screen so that you zero the level. At this point the phone’s screen should appear green and the level indicator should be showing 0º. Now place the phone flat on top of your camera’s LCD screen and adjust the tripod head so that the iPhone is again showing that is level (green screen with 0º showing); about now the camera should be perpendicular to the slide. All you need to do now is quietly move the shoe box so that the slide is perfectly centred in your viewfinder and you are ready to go.
The next step was to focus on the slide and determine the best exposure settings. With both flash units set to 1/8th power, and the ISO at 64, my optimum aperture setting was f11. If I discovered that the required aperture was going to be too wide (as in f2.8) or too small (as in f22 or even f32) I could either increase or decrease the power from the flash units, or adjust the ISO settings. Shutter-speed was set to 1/200th of a second.
The whole process of copying all 180 slides too less than an hour, and another hour was spent making some basic adjustments and converting the RAW files in Adobe Camera RAW.
Since copying the slides for my friend I have made a more permanent copy stand for the task.
A friend gave me an old enlarger that was easily converted into a copy stand, and with some pieces of Melamine that I found on the side of the road I created some wooden sides for a box that fitted neatly onto the base of the copy-stand. To create the white interior I bought some 3mm white Corflute that I folded to line the box and then I used a small sheet of Dibond to create the lid for my improved shoe-box.
In addition to the copy stand, my friend also gave a pair of negative carriers from an old Fujifilm processing lab; one was a 35mm mask and the other a 120 square mask. I made up some connections and this allowed the masks to fit squarely onto the lid of the box. The last addition to the box was a cheap strip of LED lights that I fitted around the upper interior to provide constant light within the box; although this has no effect on the flash exposure it is useful for aligning negatives and checking focus.
With my new shoe-box copy stand complete, I then set about on a project that I have put aside for more than twenty years; editing and digitising thousands of old black and white negatives that I had photographed during the days when I was still shooting film and making prints in a darkroom.
Ironically enough, these negatives have been living in shoe boxes for all this time.
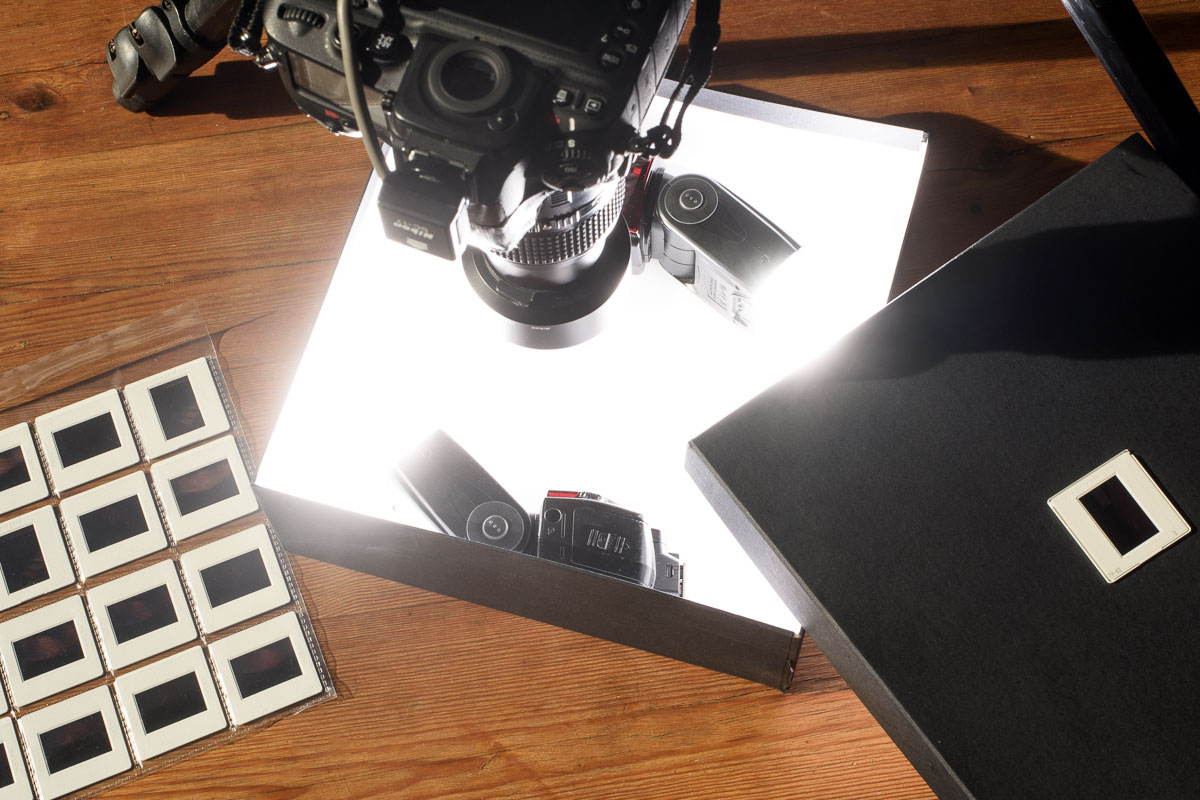
A view of my copy stand with the lid removed to reveal the two Speedlight flash units. The flashes are placed against the sides of box and are aimed towards the two ends so that only diffuse, reflected light is being scattered into the middle of the box.
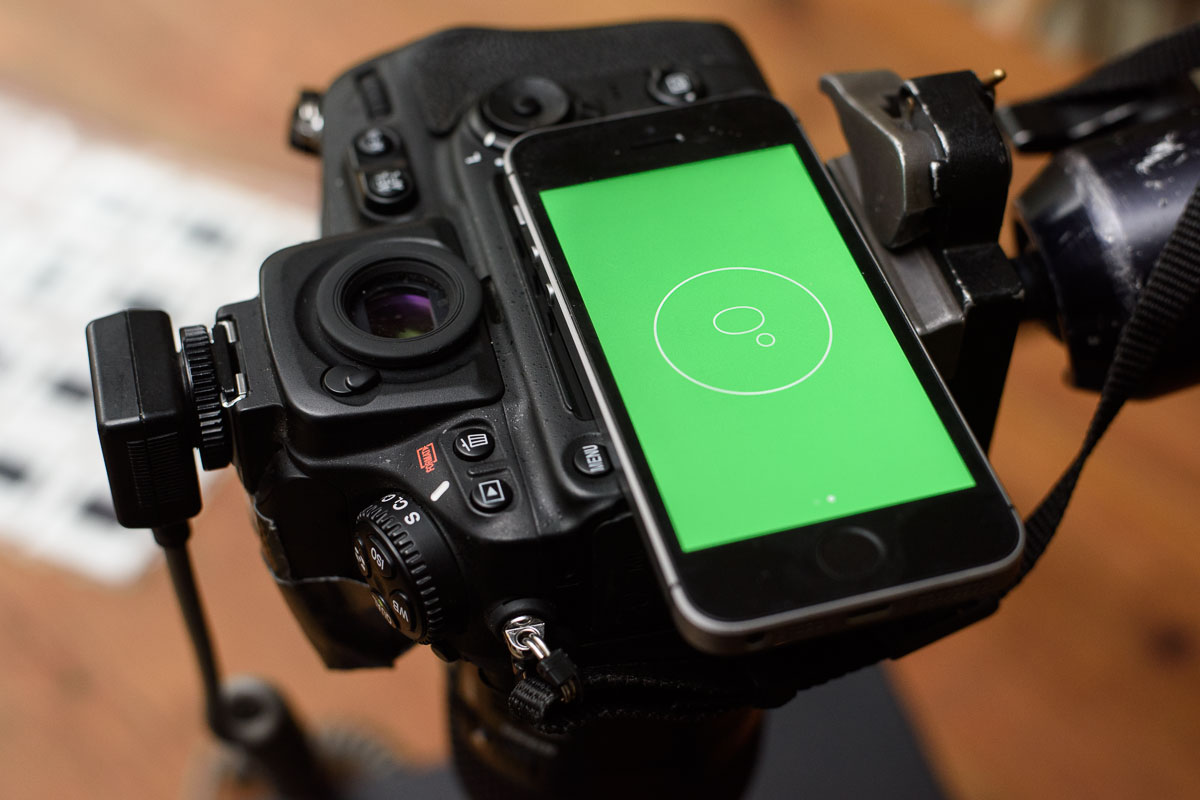
One important step in the process of setting up your shoebox copy stand is to ensure that your camera is absolutely perpendicular to the slide you are copying so that you maintain the geometry of the image, along with maintaining a perfectly flat plane of focus. One easy way to get your camera level with the copy stand is to use the “level” feature built into the compass on your smartphone. Simply place the phone in the level mode onto the top of the shoebox, calibrate it to this surface and then place the phone of the rear LCD screen of your camera; then you simply have to adjust the camera’s orientation until it to is showing level with the smartphone.

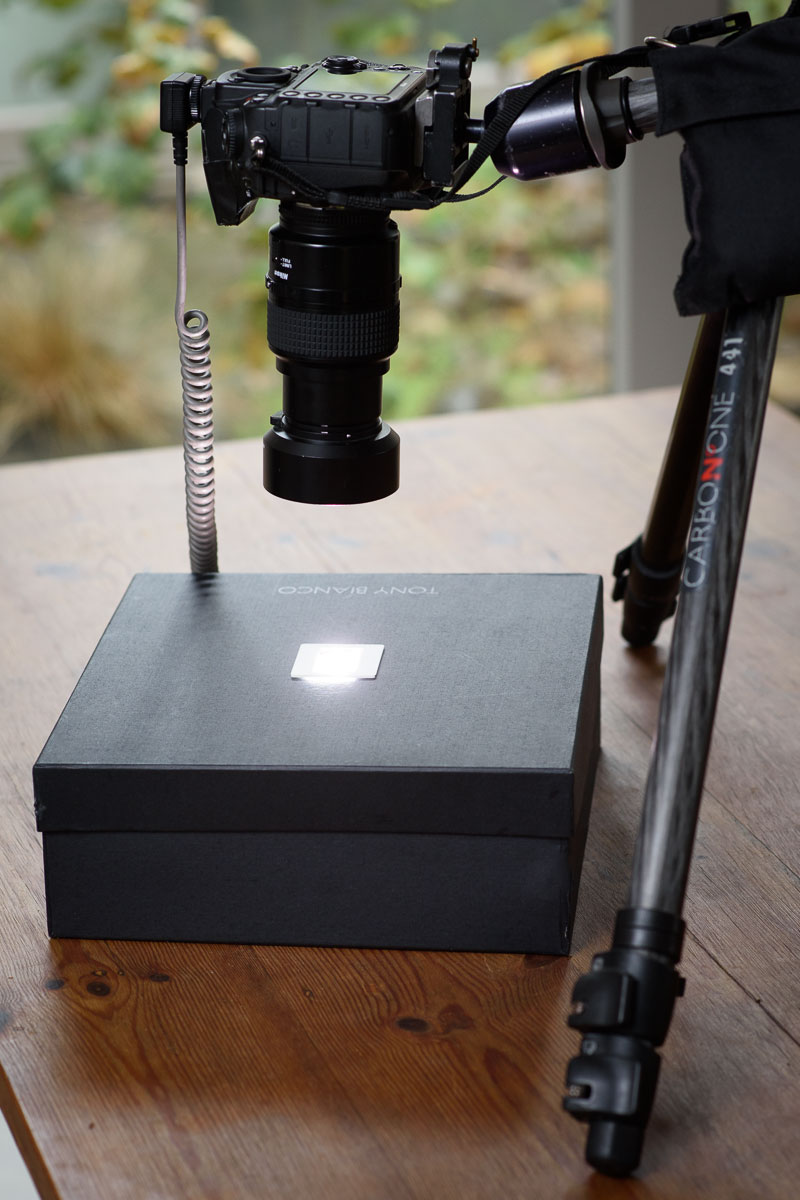
With the lid on the box, the light from the flash units is contained, reducing flair from the flashes to a minimum and making it possible to capture as much detail as possible from a slide or negative.
My shoebox copy stand ready for action. The tripod I am using allows me to put the centre column across the top of the tripod, which then lets me aim the camera straight down onto the shoebox. To keep the camera from tipping forward I place a small weight bag across the tripod for balance. Another option to using this setup is to find yourself an old copy stand.

Aside from slides and transparencies, I am also copying both colour and black and white negatives using this setup. To convert an image from a negative into a positive in RAW mode, open the photograph in Adobe Camera Raw (or whichever RAW processing software you prefer), go to the “curves” panel and then drag the low end of the curve to the top of the graph, and the top end to the bottom, thereby inverting the image. It is a really simple process. By moving the ends of the curve inwards and outwards, you can also adjust the exposure and contrast of the image.
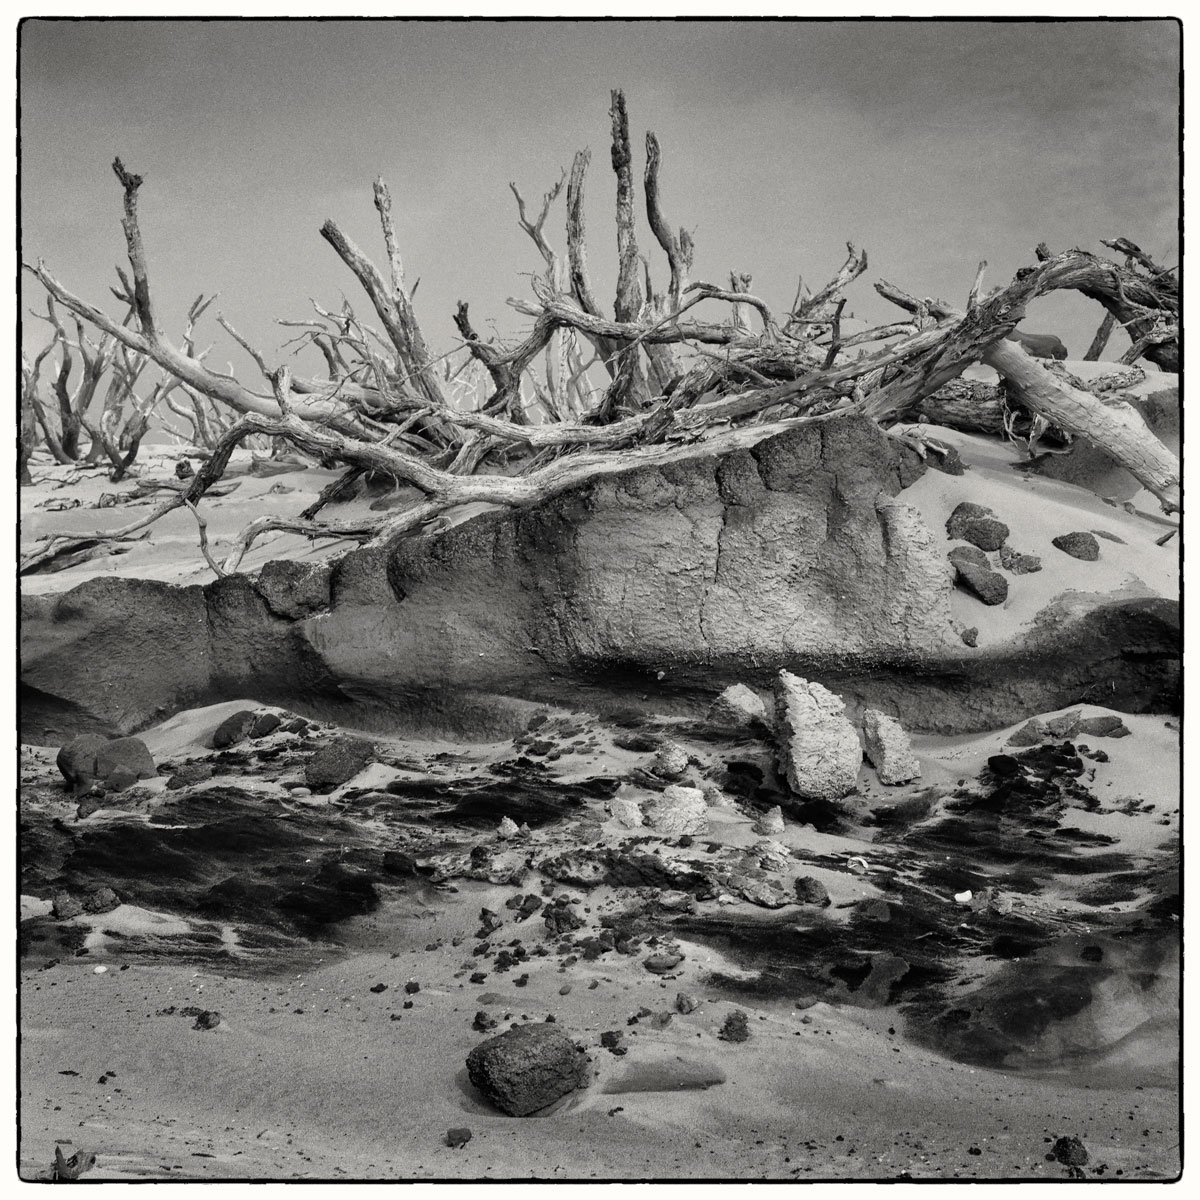
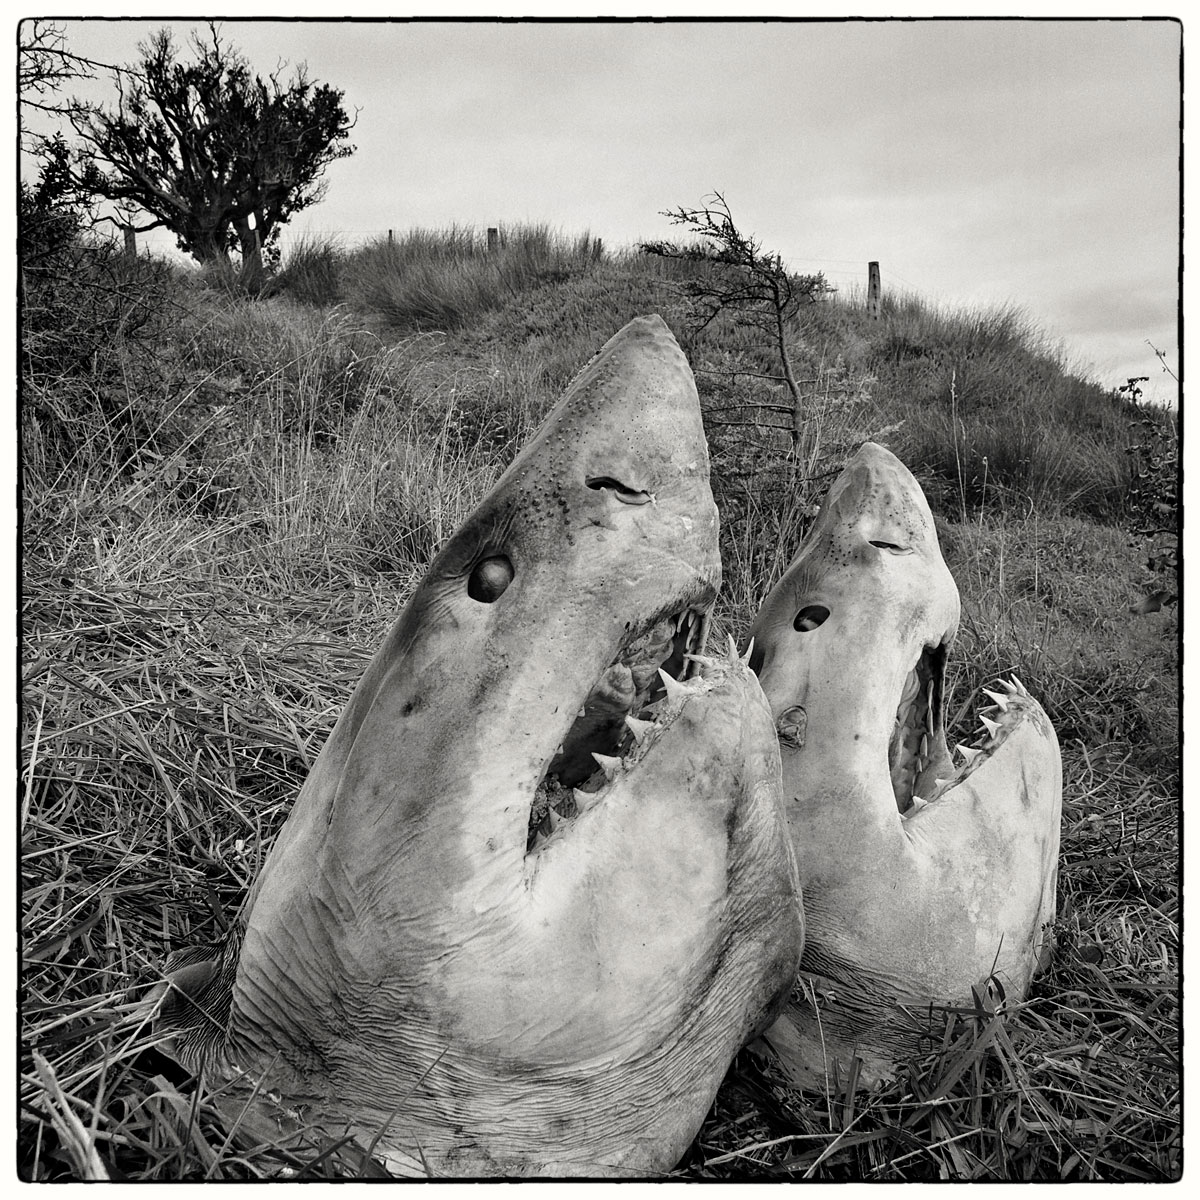
Some of the photographs that I have recently converted from a 120-format negative into a digital print using my shoe-box copy stand. This photograph of coastal erosion on the Chatham Islands (a small island 800 kilometres east of New Zealand) was one of about 1800 negatives that I converted into a digital RAW format over January.
The option to rephotograph rather than scan my negatives has made the whole process a lot faster and easier, and the broad dynamic range of the RAW files is allowing me to apply as much tonal control as I would have in the darkroom.


Anthony McKee is a New Zealand born professional photographer based in Melbourne, Australia. He is a contributing editor for Australian Photography magazine as well as working as a corporate and editorial photographer.
You can see more of his work at www.anthonymckee.com.
If you have an interesting idea for a guest post, you can contact me here.