Breaking the 30 minute video recording limit without breaking the bank by Leon Watkins (Website | Facebook):
Summary: I’ve built a portable, lightweight rig using a gaming recording device to record a clean HMDI feed straight from the camera for continuous takes of over 30 minutes.
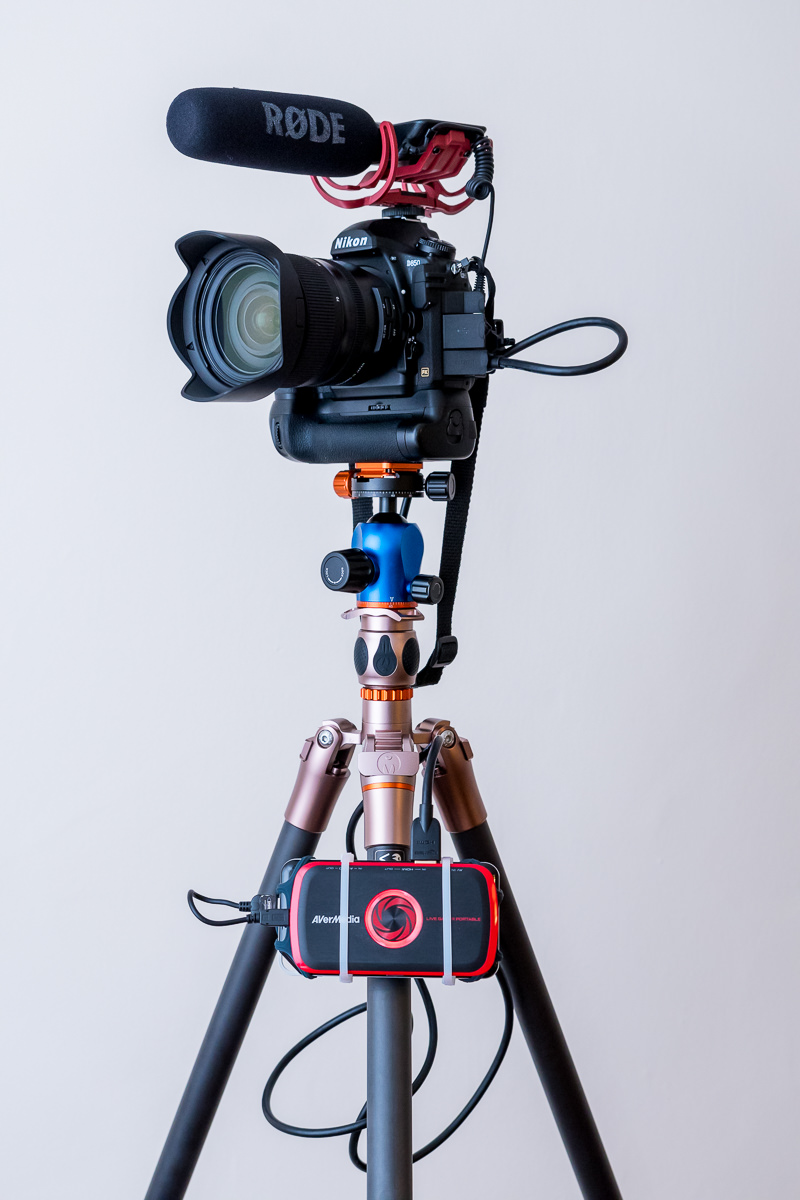
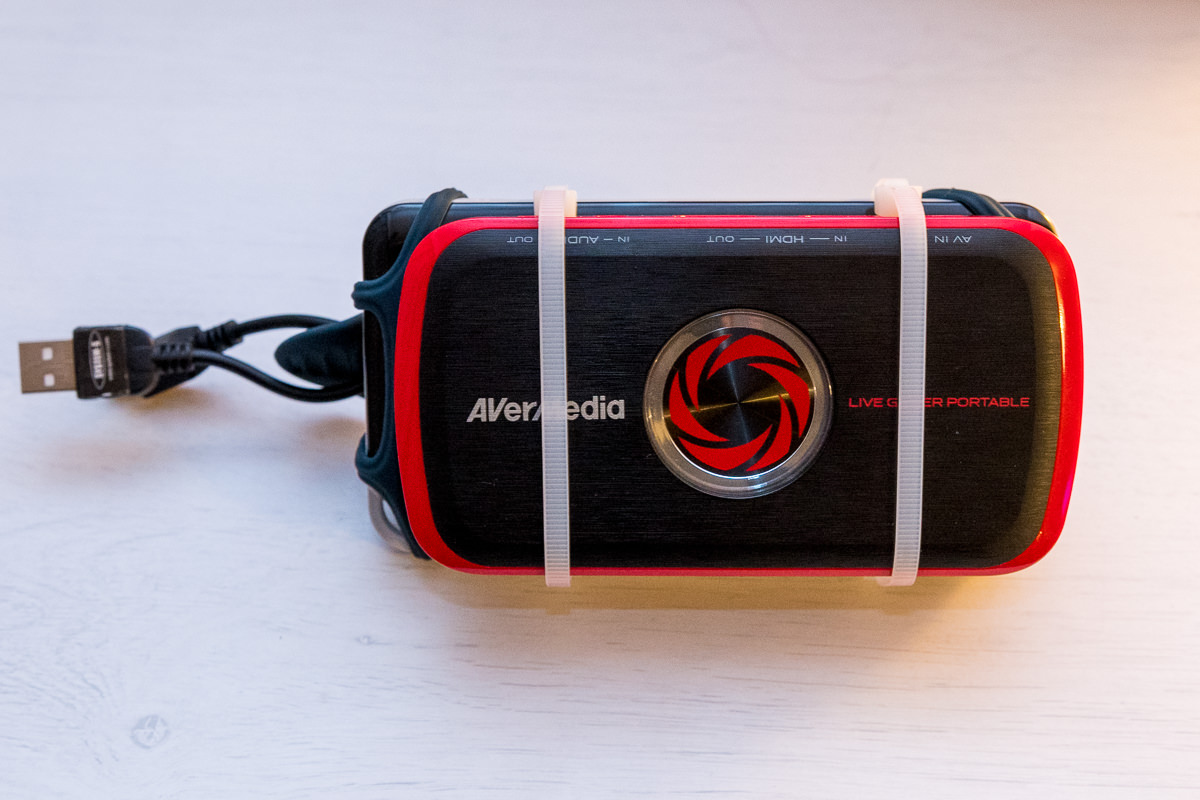
The rig in use
The rig mounted on a tripod and in use
One of the major frustrations I’ve had over the years is people asking me “do you do videos?”; to which I generally answer “no”, and then try to give them the number of someone who can do a decent job. However, there are occasions when I do want to do video, and for me these are usually long, static viewpoint events which last over the magic 30 minutes. For me these are personal events such as school plays or sermons at my church – but I see the need for lecture recording, or presentations amongst over situations. Historically, I’ve kept a firm eye on my watch whilst still trying to enjoy these events, jumping up 5 minutes before the end of the recording period and trying to find a suitable 2-3 second window to stop and restart recording whilst trying not to distract everyone else (including the speaker). It all feels a bit mission impossible and I felt there had to be a better way. I recently did a book launch where I was doing both stills and video which was a little bit of a nightmare of clock watching over a three-hour event.
Let me be clear – I’m not a video pro. I’m not demanding raw output with exotic codecs or doing much post processing, colour grading or any of that sort of thing. There are people who are much better placed than me to make high-quality productions for commercial use – and I will happily pass then work. But for personal and community stuff, all I really want is a clean image with clean sound and I’m happy. It’s for personal use and posting on youtube community groups. So please be aware that this solution is for those needs, not high-end professional output. With all that being said, I was pretty pleased with the results I got from my cheap setup.
Cost. This was my major concern. The sharper-eyed among you will see that the camera I’m using to model this setup is a D850. So, If I’ve got a D850, why wouldn’t I spent another few hundred $/£s on an Atomos Ninja Flame Ninja (B&H link; WEX Link) with SSDs, or get the slightly more affordable new Blackmagic Design Video Assist (HD) (B&H Link; WEX Link) along with associated batteries and mounting rigs? Why not indeed? Because I thought there must be a cheaper solution. It just seemed that jumping feet first into a fully professional setup for something I didn’t do professionally would be a huge leap of both faith and personal resources. So I decided to look for something which would do the job at a consumer/enthusiast level.
I knew what I was looking for – a device that would record a clean HDMI feed from the camera. I knew that with my bodies (D500 & D850) setting up a clean HDMI feed (i.e., an output without all the monitoring and menu text) would be fairly straightforward. To cut a long story short, there really isn’t anything available at consumer or enthusiast level marketed specifically at photographers. I’d be happy to be proved wrong, but I couldn’t find anything. However, in my research (Googling “HDMI external recorder”) I came across the gamer communities use of live streaming and game recording devices, which are basically hardware boxes which sit between the console and TV, mostly with a USB cable off to an attached computer. However, there were some that also included the ability to record directly to a USB host. And I found a particular range that recorded directly to a SD card. When I saw this I thought it was worth taking a risk and seeing if I could get it working to break the 30 minutes barrier.
The particular hardware that seemed to tick all the boxes, and also look fairly neat was the AverMedia Live Gamer Portable (product page); also known under the model number C875, a device with similar dimensions to a thick smartphone, with the added ability of being USB powered, which offered up the possibility of being run from a battery pack, rather than having trailing mains cables. It was an older model, only recording at 1080p (there is a newer v2 model which offers 4K recording): – however this was ideal I was only looking for HD recording.
So I decided to assemble the parts to get my little rig together, after a little trial and error and proving that the concept worked, my total parts and prices (UK sites in GBP, as I’m based in the UK) were:
|
Component |
Source |
Price |
Notes |
|
Avermedia C875 |
Used (Computer Exchange) |
£50.00 |
This model is discontinued but widely available used |
|
External 12 000 mAh battery pack |
£16.99 |
Bought mainly for form factor |
|
|
Generic 10cm Mini USB cable |
£4.50 |
The socket on the C875 is a slightly old style (mini) |
|
|
Silicone smartphone handlebar mount |
£15.95 |
I overspent on this, you can get far cheaper than this |
|
|
1.8m HDMI cable |
£5.99 |
This brought my total outlay to £93.43. I overspent on the handlebar mount – any generic silicone handlebar mount will work and the battery pack has a capacity well beyond what I need (on testing I think I can easily get >8 hours of recording from a full charge); I chose it mainly on the form factor – matching the C875 and able to fit in the handlebar mount. I chose the handlebar mount as I thought it would fit nicely on a tripod leg, which it does. I also considered hanging the lot in a net bag under tripod, but the handlebar mount looks a lot neater and is more secure. I fixed the C875 to the battery pack with a few zip ties I had lying around, which you can see in the photos. I’m sure black zip ties would be neater but white ones were what I had to hand.
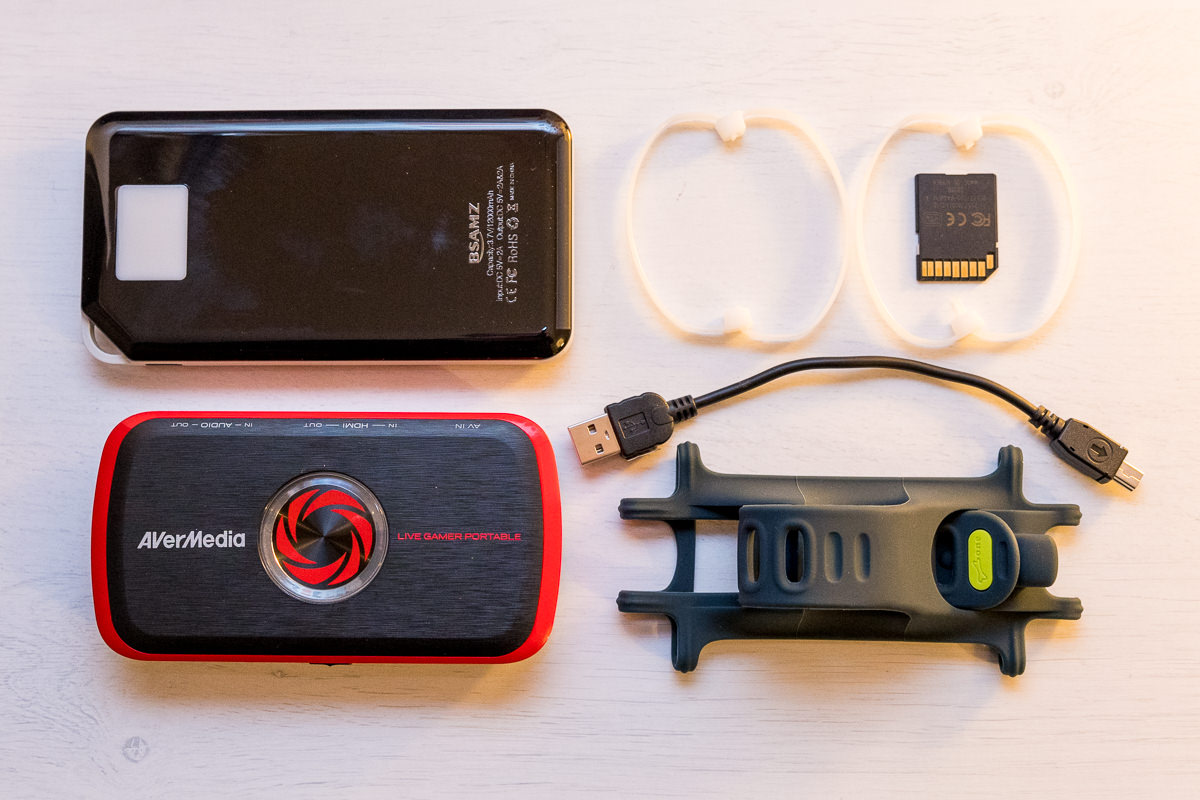
All the components for the rig build (excluding the HDMI cable)
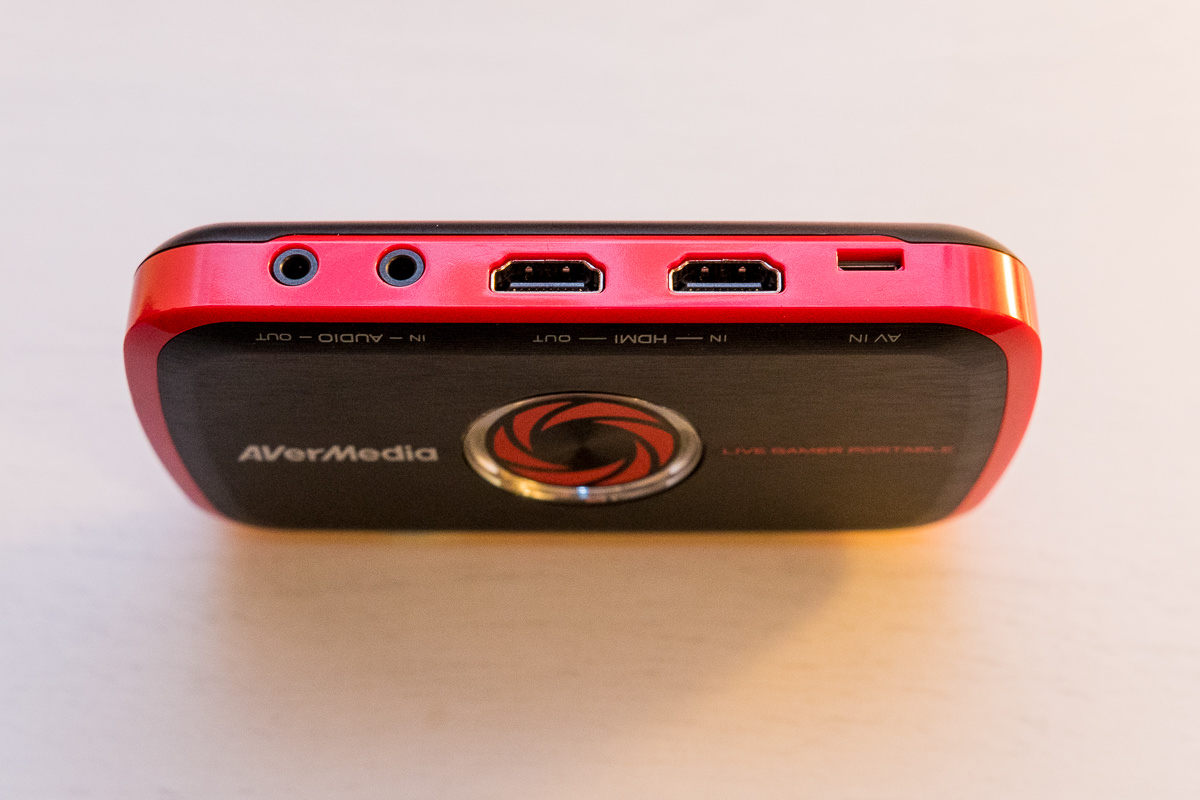
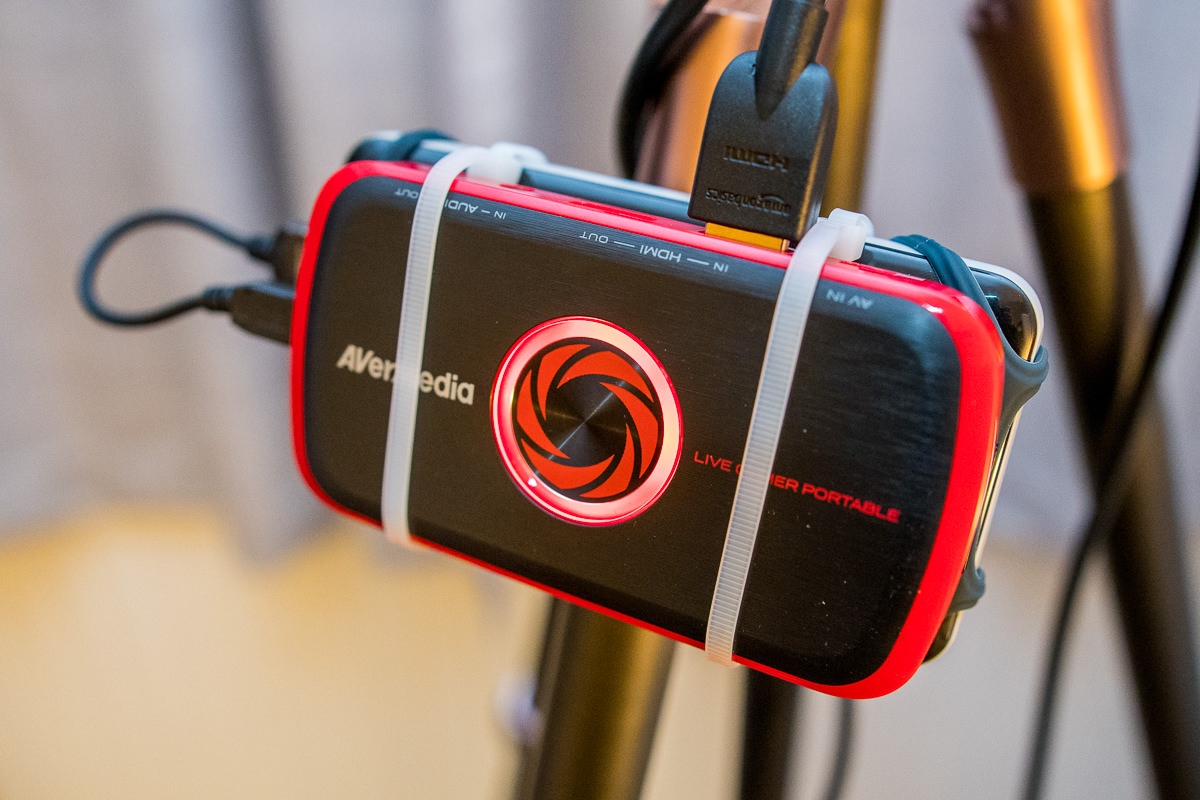
The connection ports
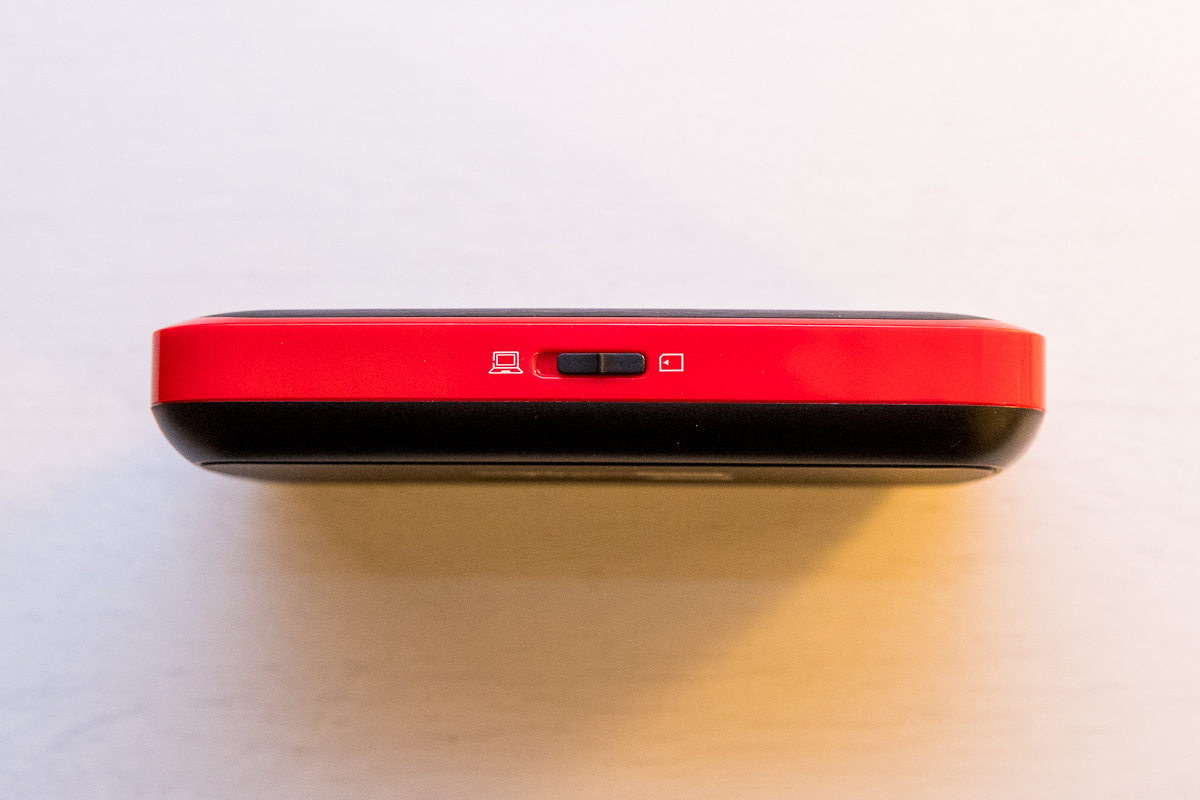
The selection switch for SD recording
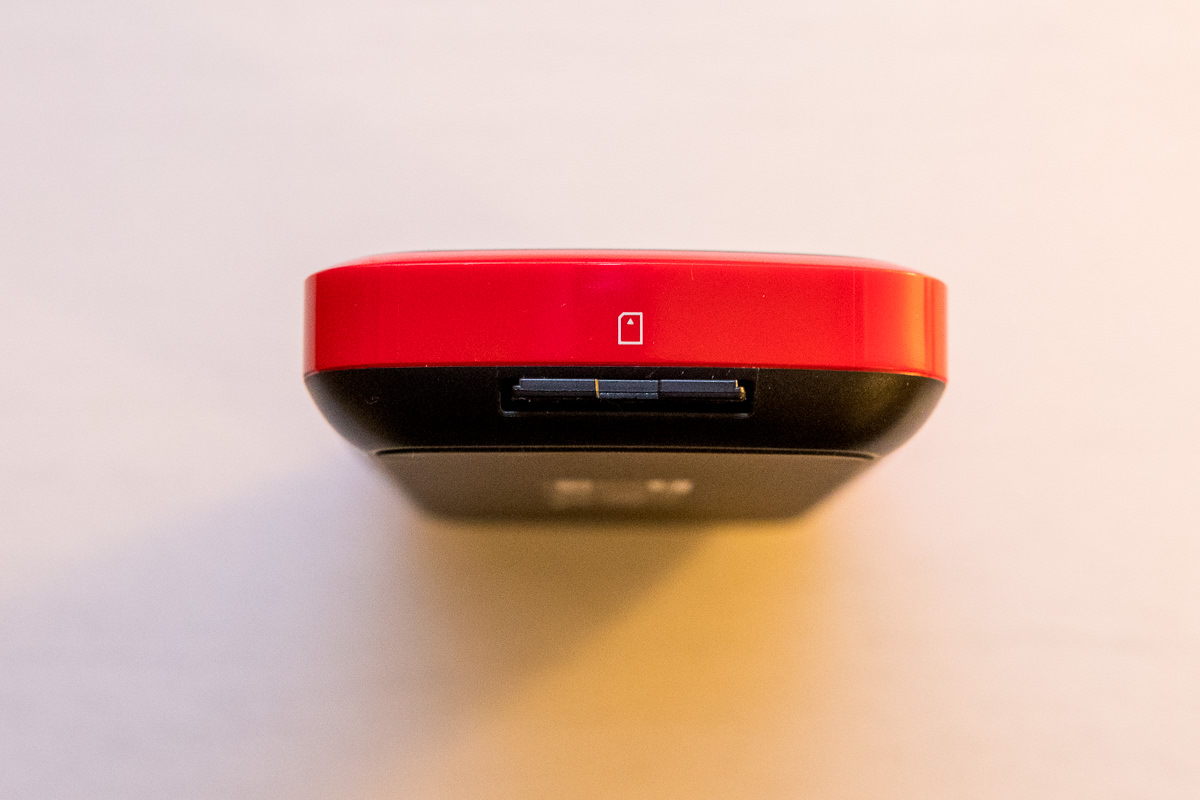
The SD card slot
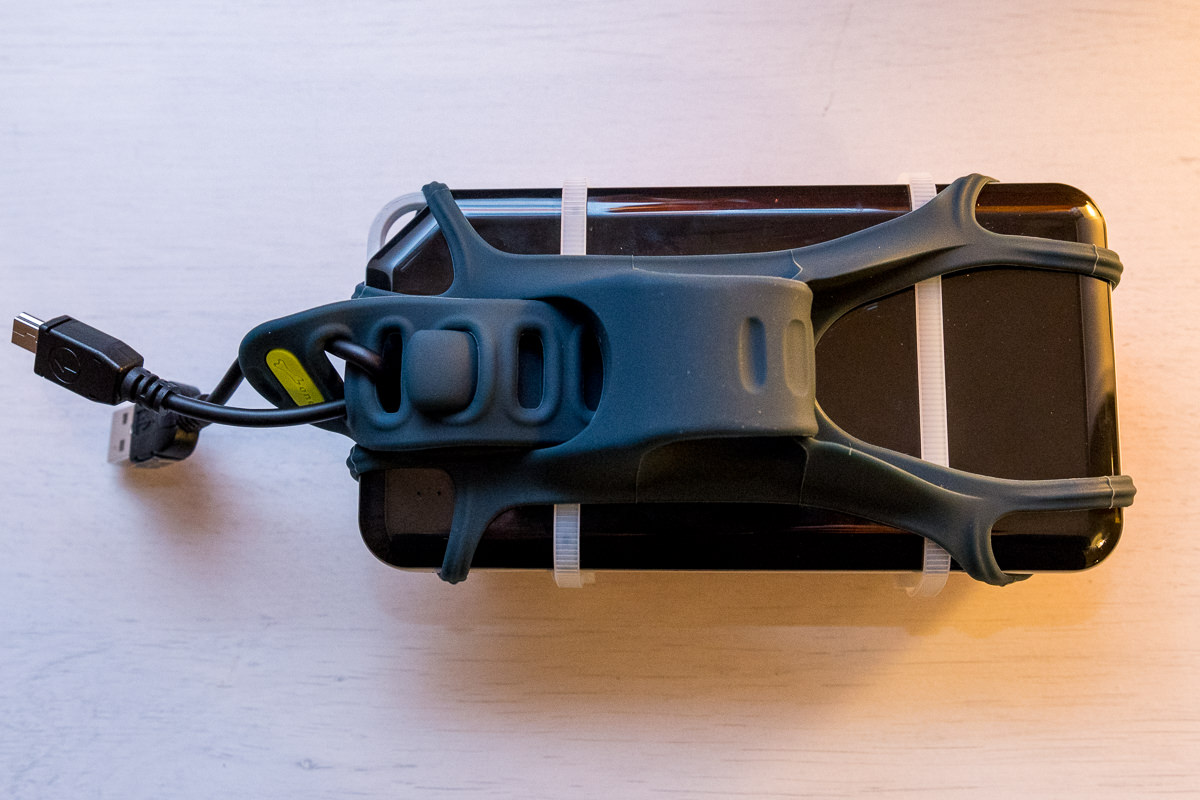
Reverse view of the rig prepared for stowing/travel

Reverse view of the rig mounted securely on a tripod
Setting up a clean HDMI output from the D850 for external recording is fairly simple – there’s a really concise YouTube guide for the D800, but if you want the menu basics it’s here:
Setup Menu > HDMI >
1) Output Resolution = AUTO (or 1080p);
2) External recording control = Off;
3) Advanced>
Output range = Auto;
Output display size = 100%;
Live view on-screen display = OFF;
Dual monitor = ON
The setup for the C875 proved a little trickier to get right. As it’s an old, discontinued model, the drivers for modern OS’s (especially Windows) seemed to be very temperamental, with plenty of forum users experiencing issues getting the interface working at all. I probably spend 4 hours to get 85% there before I worked out that I didn’t actually need to have an interface to get the recording working properly. So, I’ve not been able to do some of the subtler recording tweaks such as changing the default recording bitrate (which is 12Mbps) that are available if you get the client software working (tutorials can be found here), but I’ve found that the default settings that were on my device worked fine.
The main issue when troubleshooting the C875 is that it has pretty much one error indicator – a blue flashing ring. Which could mean multiple things. I found that the issue I had was a “mis formatted” SDXC card – I found the solution was to reformat the exFAT SDXC to FAT. Avermedia provides a link to a utility for this on this page. Once I’d done this the blue ring disappeared, and when powered up the C875 will flash red for about 10 seconds and then settle to a solid red ring, at which point it’s ready to start recording. When a HDMI feed is connected, a press on the central button will start recording (if the output switch is set to SD card) and this will be indicated by a pulsing red light on the ring. Any blue lights will indicate that you’ve got something wrong.
The C875 records to .ts files – any media player will recognise this format and play for review without problems; and most editing programs will be able to handle it natively. I’ve been told that iMovie does not recognise .ts files, but you can convert them in quicktime and import the results into iMovie for editing.
An example of the output files for an hour of recording as follows:
201804012037210.ts
201804012037210_00001.ts
The filenames seem to follow the naming convention yyyymmddhhmmss and then keeps the start time of the originating recording for all subsequent files. This timestamp does not seem to come from the camera. As it’s on a FAT formatted card, the file size limit is about 4Gb, which is where the file splits occur.
On playback, there is a ~0.3s freeze between files when stitched together in the chosen editing software; Obviously this is not perfect, but far better than the 1-3s break introduced when with a manual switch off/on in camera, and the impact can be minimised by transition management in editing.
The format of the files may mean that you manage to get over 30 minutes within the first file.
Other details:
- Recording lag on pressing hardware button: I tested this by filming a stopwatch and simultaneously trying to start the stopwatch and press the C875 record button. There seems to be a ~1 second lag from pressing the button from recording starting. This shouldn’t pose much of a problem in real life. There seems to be a similar delay on stopping the recording.
- Recording to camera media simultaneously: This can be done, but is not advisable, as when the recording to camera stops / starts there is a noticeable freeze in the video (although the audio seems largely unaffected).
- Accessing menus during recording: Any use of the menus will break the HDMI feed and the C875 will stop recording. You can access / change different liveview overlays without any issues though (eg virtual horizon, focus peaking etc.).
- There is the option to bypass HDMI audio and have an external audio feed directly to the C875 – I didn’t find a use for it but YMMV (Your Mileage May Vary).
- You do not need a headless HDMI dongle for the HDMI output socket. Other gaming recording devices may require this, but not the C875. On my initial build I thought I would need it and got one to be prepared, but as it did not emulate an audio receiver as well as a HD screen, when I used it my recordings were silent. I got rid of it (as you can see) and my video and audio streams recorded perfectly.
- The C875 also gives the opportunity to livestream in conjunction with an external connected computer – I’ve got no need of this but it might be a helpful additional feature if you’re doing live event coverage.
- As mentioned, the C875 is now discontinued and there is a 4K version (which also records 1080p); this is likely to be better supported but is more expensive (though still far cheaper than a Ninja) and I’m not convinced by the form factor, but if you need to get something with a warranty this is your best option in the Avermedia range.
If you really want to see what the output looks like I’ve taken an hour of riveting footage of my phones stopwatch without audio, which consists of a single take with the C875. This created the two files mentioned above, which were then very basically stitched together in NCH VideoPad Pro. The file transition point occurs at around the 36:40 time mark on the stopwatch.
Leon Watkins: I’m a photographer based in Buckinghamshire, United Kingdom who specialises in Children’s parties via agencies in London and gets most of my work through personal recommendations. Due to the nature of my work and clients, I have a very slim online portfolio, however you’re welcome to visit my facebook page here.