This Milky Way Photography post is by Nikhil Shahi website | Facebook | Instagram | YouTube – see also his previous posts here.
All attached photos shot with the Nikon D850 and the Nikon 14-24mm lens.
Photographing the Milky Way in beautiful and dark Utah, had been on my mind for many years. I had made several trips to Southern Utah in the past to visit Zion National Park and the GSENM – however, I was either visiting during the fall or winter months, when the Milky Way was not visible or during a full moon, when it was washed out by the moonlight. Well, in June of this year, I finally got a chance to go on a road trip across Utah and seized upon the opportunity, to finally photograph the Milky Way.
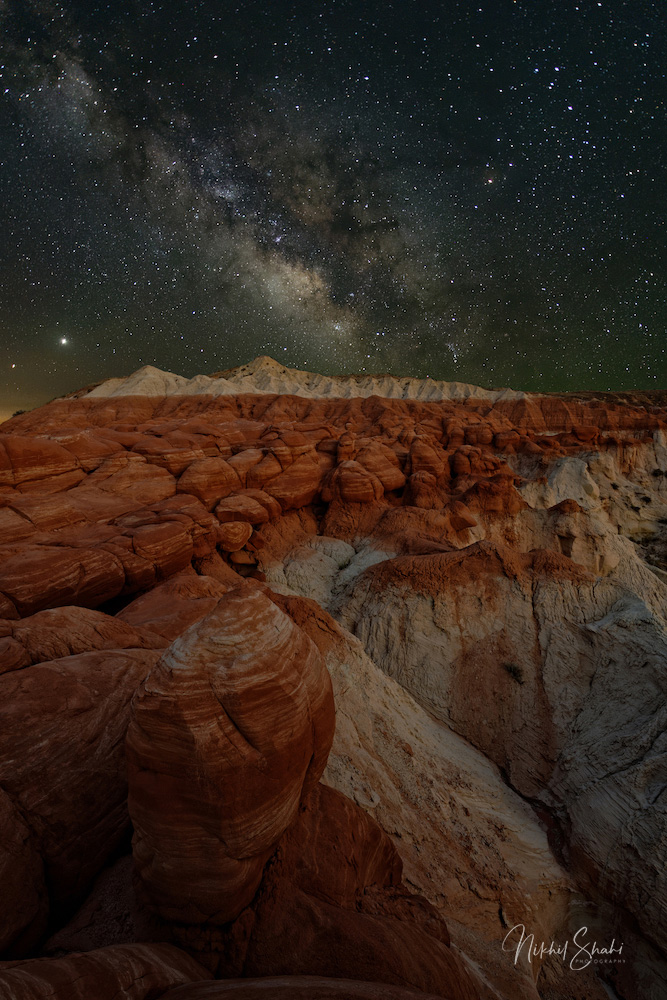
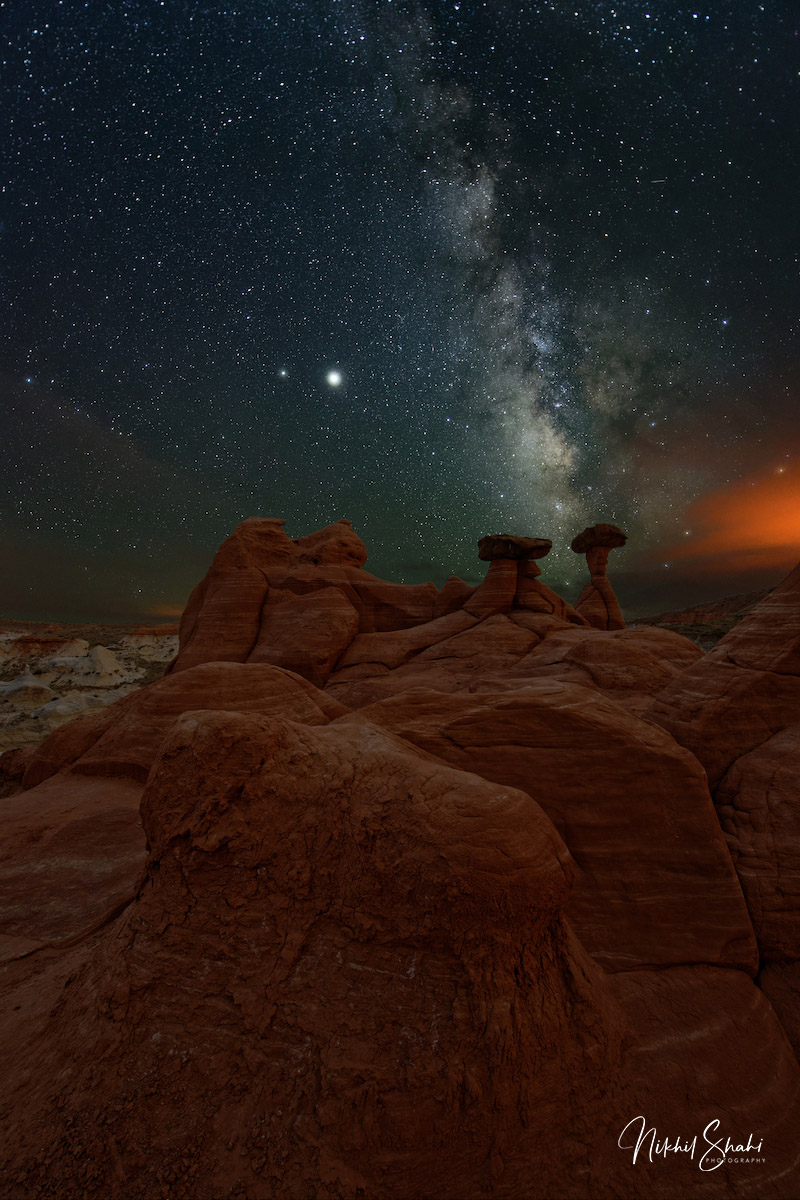
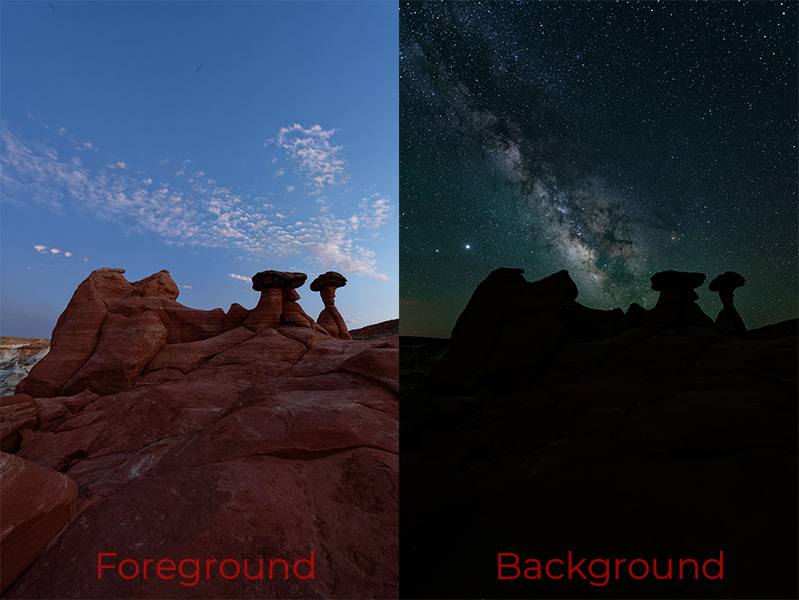
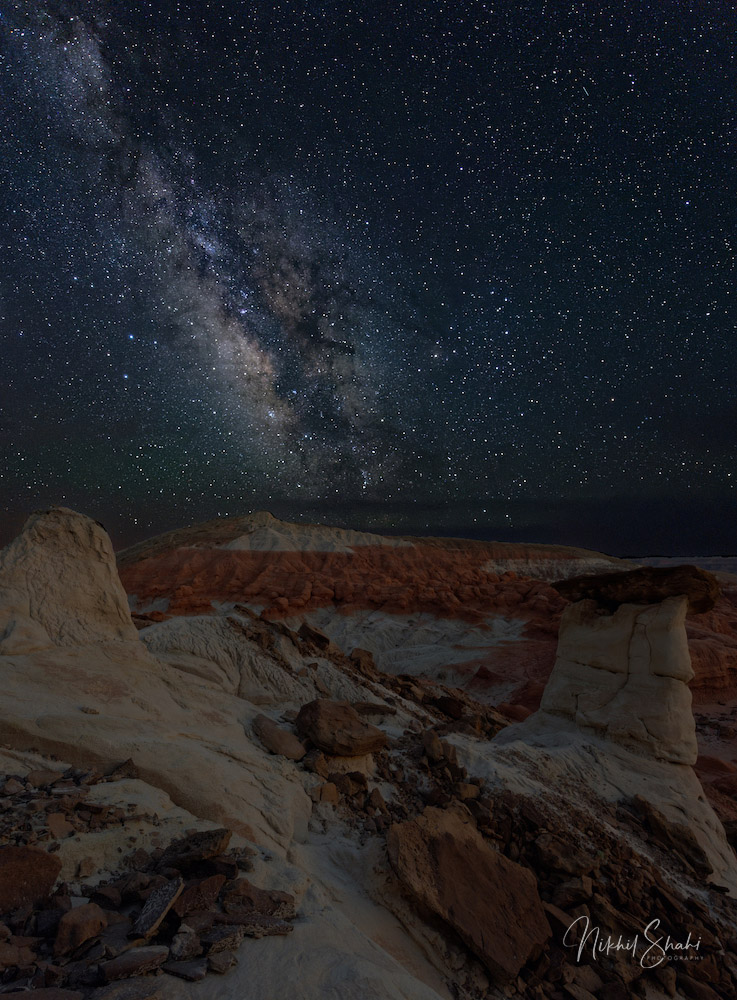
I decided to head to Kanab, Utah, as I wanted to photograph the Milky Way over Toadstool Hoodoos, which lie around 40 miles East of Kanab, on Highway 89. I had planned my 4 night stay in Kanab, to coincide with the new moon – doing so would ensure that I had dark skies to shoot the Milky Way. Since my style of photography doesn’t involve using light painting to light up the foreground, I had to rely on natural light for my foreground exposures. I thus needed to take a dual exposure for each of my compositions – one for the foreground, taken at dusk and the other for the Milky Way, taken at night, when it would be at an angle conducive to my composition. Naturally, this meant that I could only photograph one location every night, since I would have to shoot my foreground during dusk and then leave the camera on the tripod, until I could shoot the Milky Way at night from the same location. I would then bring in both the foreground and background shots into software like Photoshop and blend the two exposures together, to get the final image.
Every evening, around an hour and a half before sunset, I would leave Kanab and head towards the hoodoos to photograph the Milky Way. It took me around 45 minutes to drive to the parking lot of the trailhead, and another 15 minutes to hike to the actual location of the hoodoos. On my first day, I arrived at the hoodoos around 7 pm and walked around the area, to scout prospective locations to use as a foreground. I settled on 4 locations that I felt would allow compelling images – two of these locations were at the main hoodoo itself. I would then setup my camera at my location for that night, take the foreground shot at dusk, and then wait until around 2 am or so to get my background shot of the Milky Way. I honestly was a little concerned being all alone at night, but my doubts quickly dispelled once the stars came out on the first night – it was magical!
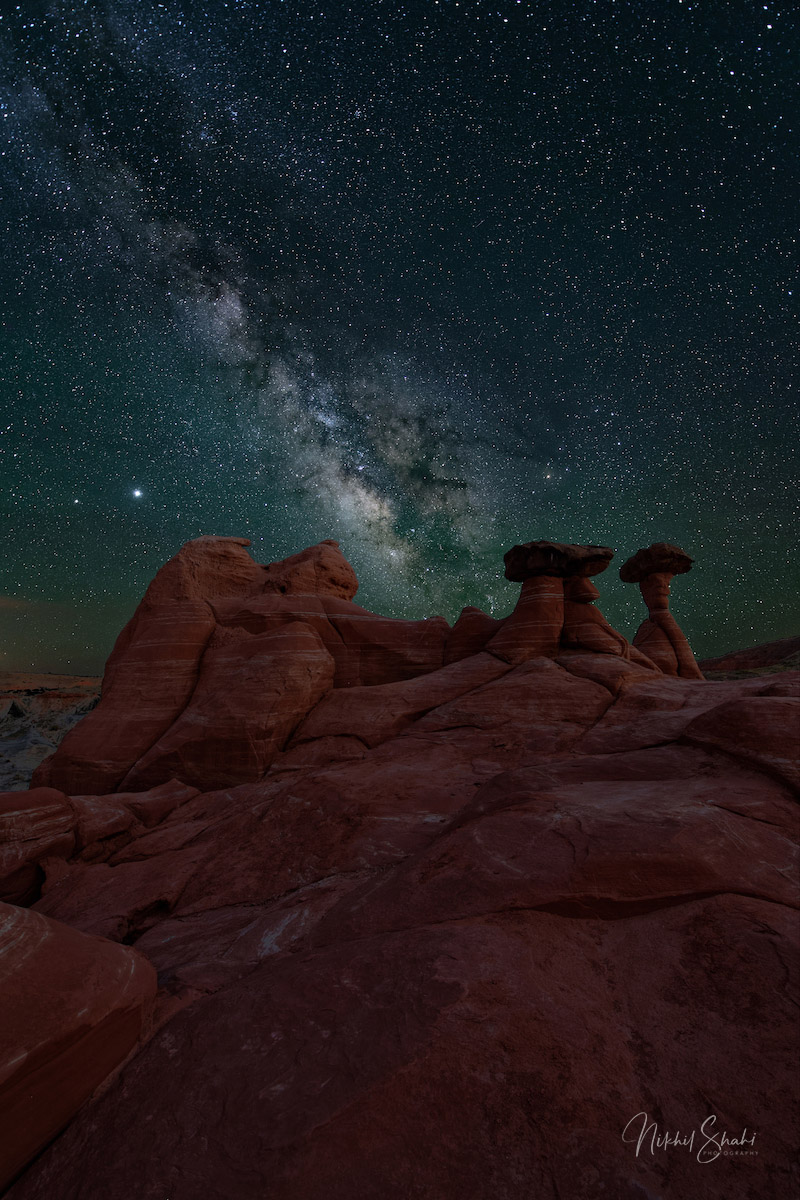
I used the PhotoPills app to determine the time that the Milky Way would be at the optimal angle for my composition. I would then take my foreground shot at dusk, underexposing by a stop or two so that it blended well with the darker, Milky Way image. For the Milky Way image, I used the 500 rule to determine the slowest, usable shutter speed – essentially divide the number 500, by the focal length of the lens, and keep the shutter speed faster than the computed value. This is to avoid getting star trails and to have pinpoint sharp stars in the background frame. I however found that 500 was too large a number to use with modern sensors – I thus used 300 as my number to compute the slowest, usable shutter speed. Most of my Milky Way photographs were taken using an ISO of 4000 or 5000, an aperture of f/2.8 and a shutter speed of 15 seconds. I found these settings gave me a very sharp image of the Milky Way.
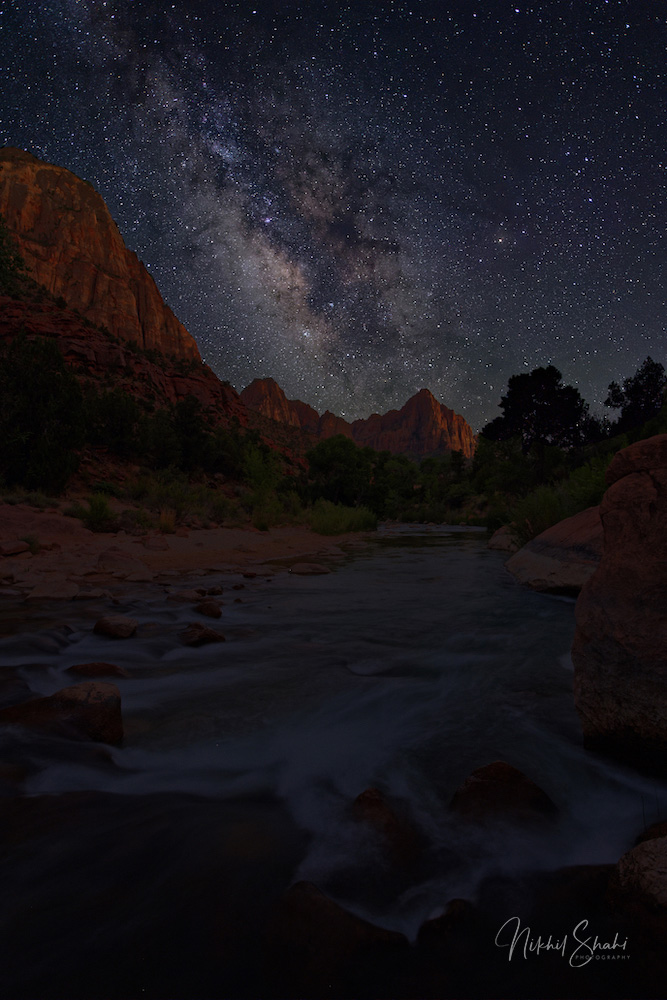
On the 5th day, I passed through Zion National Park, while heading to Hurricane, Utah. Since I was already in the park, I decided to stop at the famous bridge and take a Milky Way photograph at night. As I set up my tripod on the bridge, a ranger came by and told me that stopping at the bridge, was now considered illegal activity. I thus had to find another location for my photo at Zion. I decided to head down to the river and settled upon a location with a clear view of the Watchman. In retrospect, I was happy to have been compelled to find another location (rather than the cliched one on the bridge), as it gave me a photo with a slightly fresh perspective of the Watchman.
This was my first time photographing the Milky Way and needless to say, I am hooked. Southern Utah has some amazing landscapes, that make for compelling foregrounds to use in night photography, and I can’t wait to head out soon on another adventure to capture the Milky Way.
Below is a video outlining my thought process, with respect to determining optimal locations for well structured compositions and technique to capture great images of the Milky Way.
If you have an interesting idea for a guest post, you can contact me here.