Robert build his own Nikon1 hot shoe adapter based on the Nikon AS-N1000 for a fraction of the price of a new V1-F1A: two wires are going from ground-ground at pin#8 (on the left) to the center pin of a regular hot shoe. Here are the detailed steps:
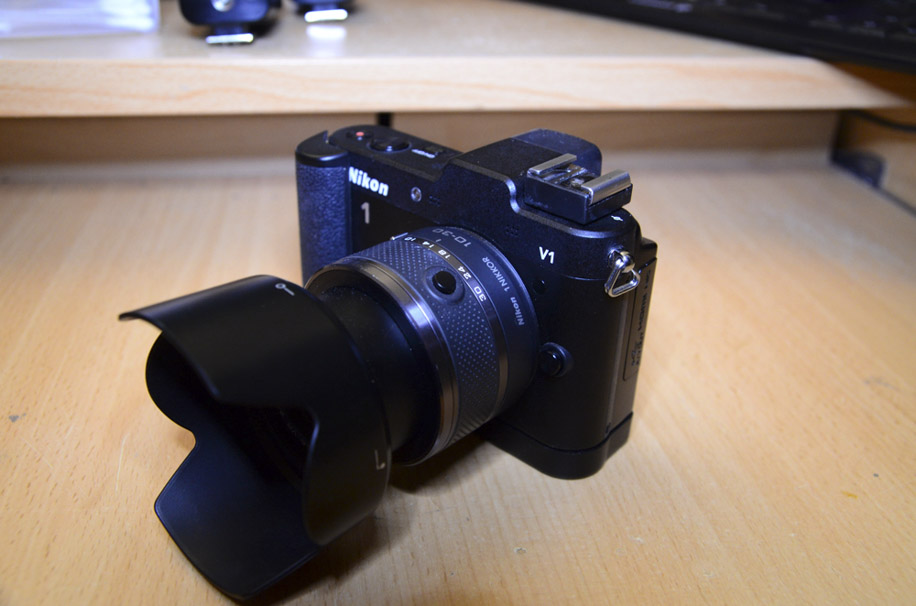
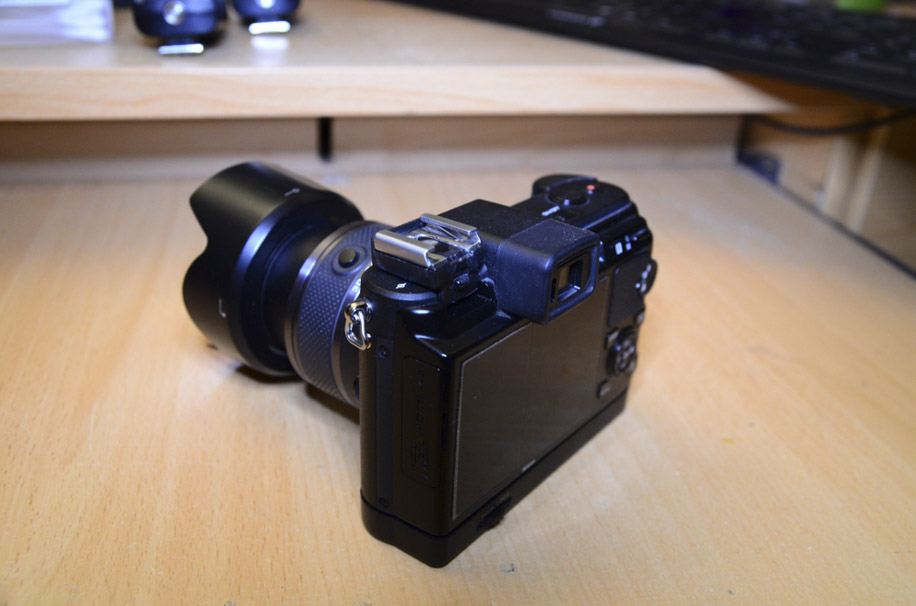
As you might know the Nikon 1 doesn’t have a normal hot shoe. Because of that you can’t use your normal flashes or radio triggers. There are some websites that sell adapters for this problem, but they cost approximately 100€ (~110$).
Luckily I’ve stumbled over a thread on the dpreview by the user erokitsune. I’ve contacted him and he told me that you basically only need 2 wires reaching from the 8th pin (from the left) to the center pin and another wire for the ground. He also encouraged me to write the detailed instructions.
First I want to clarify few points:
- With this adapter you won’t be able to use TTL. I’ve read somewhere that the Nikon1 uses a different TTL protocol so you would have to do some reverse engineering to build a chip that translates the protocols in both directions.
- I would advise you to NOT put heavy accessories on this adapter.
- Don’t use old flashes! They have a high-voltage triggering-circuit that will most likely kill your camera (same as with modern DSLRs, you know the deal). You could use an optocoupler to separate the circuit but with this you would have to build a bigger case for the adapter.
- The pictures are just here to visualize the steps and have no artistic claims 🙂
- I’ll discribe how I have done this. There might be better ways to build this adapter (e.g. use very thin cables in the adapter instead of resistor wires)
So let’s get started:
1) What is needed?
- Adapter AS-N1000 (doesn’t need to be the Nikon version)
- Center contact for the hot shoe (with a little bit of work a screw works too)
- Soldering iron with a long tip (there won’t be much space in the end)
- Wire (I used 1mm copper wire and some wires from resistors. It should also be possible to use a FFC with a wire distance of 0,5mm)
- Screwdriver
- Tweezers
- Glue (I used 2 component glue)
- Caliper
- 1mm and 5mm drills (or a size to sink the center contact in)
- Multimeter to ensure everything works correctly, clamps or a second person will be helpful
- File
2) Preparation of the top part
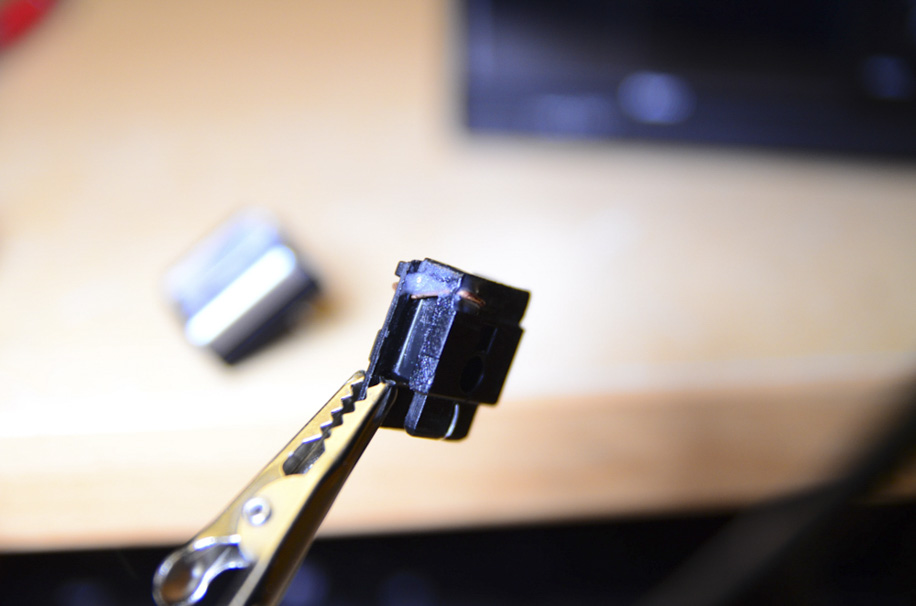
First you will need to disassemble the AS-N1000. Remove the screw and put all parts somewhere where you won’t lose them. Next you mark the center of the new center contact with the caliper. In my case the hole aligned with the socket of the screw.
Because I glued the pieces together, I removed the socket. I would advise you to first use a small drill so the larger drill won’t slip.
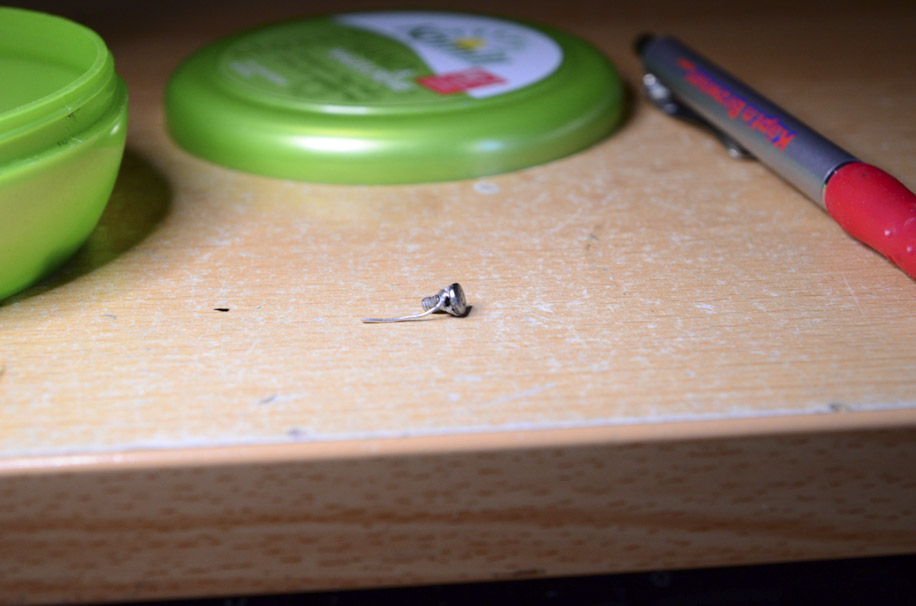
3) Preparation of the center contact
If you already have a center contact from another device you can solder a wire on it and skip to Step 4. If you want to use a screw, I would advise you to get some liquid rosin (or colophony). The first step is to remove the profile of the screw. It worked best for me when I put some rosin into the profile and held the soldering iron with drop of tin onto the screw head. The resin will vaporize and pull the tin into the profile.
Next, bend a thin wire (e.g. from a resistor) to a sling and put it on the screw. I soldered it by using rosin, too. If the wire sticks to the screw double check the screw head. The heat might have displaced the tin. If that happens, just add some more tin and use the file until you have a smooth surface.
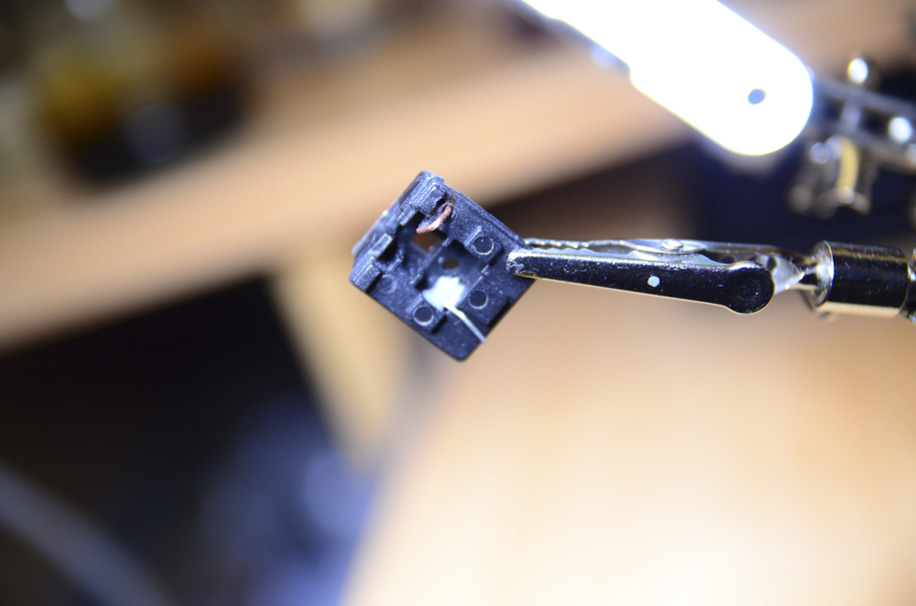
4) Assembly of the top part
The next step is to glue the center contact into the top part of the AS-N1000. Get some glue and use it to ensure the position of the center contact.

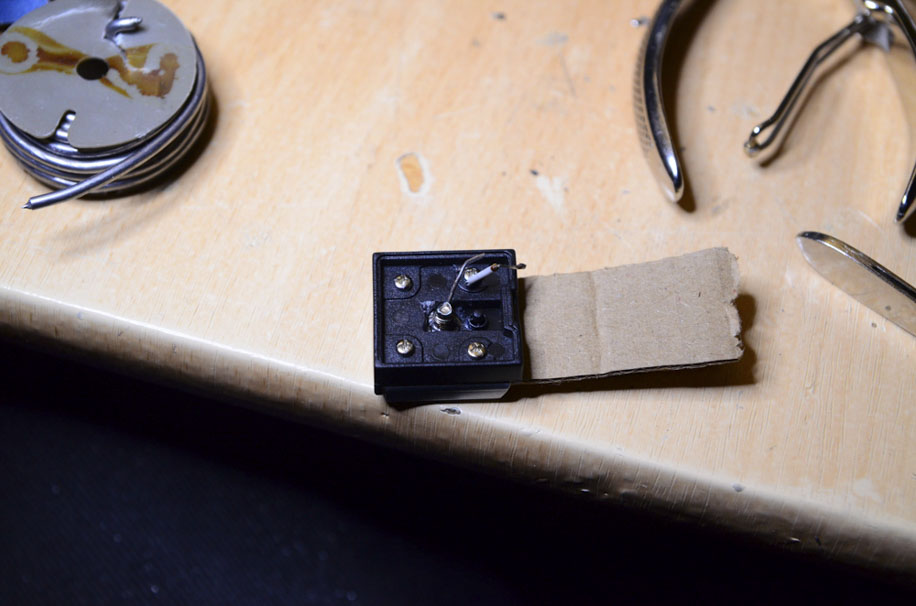
I tried to use some carton strips but in the end the center contact was a little bit higher than the surface. Because of that, I used some more glue so I’ll be able to put on the radio triggers.
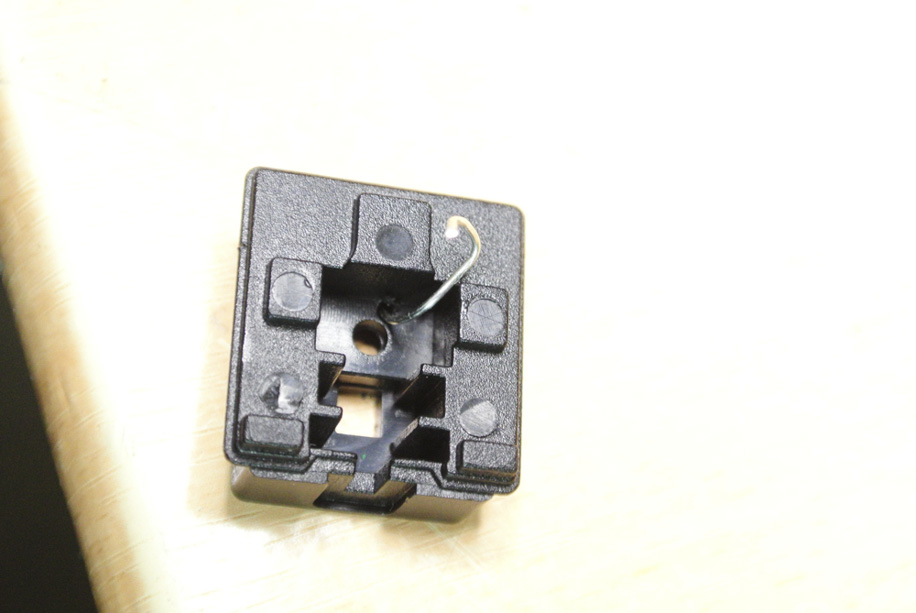
As you can see in picture number 4 I’ve put a little wire under a screw. This will be the wire that connects the ground.
5) Preparation of the lower part
This part is the most difficult of the whole process because you will need to work very accurately or the adapter might not work or even damage the cameras hot shoe! If you test the adapter and there is some resistance while putting it onto the camera, BE CAREFUL!
If you want to glue the adapter you can remove the 5 bumps on the top side. The wire that will be on the 8th pin (from the left) from the camera hot shoe is about 4,7mm apart from the edge of the adapter (in the picture measured from the edge to the center of the pin). I marked the position with the caliper and used the diamond blade of my Dremel to produce a small channel for the wire. I also cut a little gap in the front so the wire wont be able to move. Afterwards use the 1mm drill to drill a diagonally hole into the adapter. Now bend the wire like shown in the pictures.
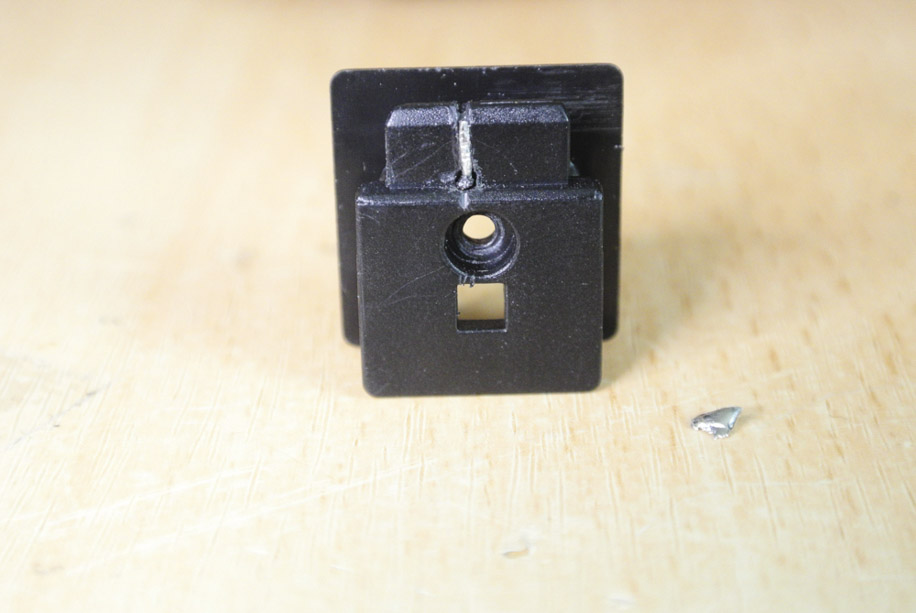
Use a file to make the front part of the wire (which connects to the camera) more shallow. In my case it’s only 0,2mm higher than the plastic part but that might differ. Just be carefully when trying to mount the adapter until it feels good.
If the adapter fits correctly use the multimeter to test if everything fits correctly. Connect one clamp to the wire already added and use a second wire to connect the second clamp with the metal part of the hot shoe. If everything works correctly, the multimeter should show you tat the circuit is closed when you take a picture. Depending on the multimeter the camera might show an error message but that should disappear when you remove the multimeter.
Next, you will have to build the ground contact. I differed the method a little bit from erokitsune’s adapter. You might already have noticed that you can move the AS-N1000 a little bit even when the little handle is assembled. Because of that I assembled the wire (1mm wire taken from a electromagnetic coil with removed paint) a little bit diagonally so the wire will ensue a tight fit and will always connect to the ground of the camera.

If both wires are assembled, check everything again with the multimeter. If everything is working, glue the wires in position.
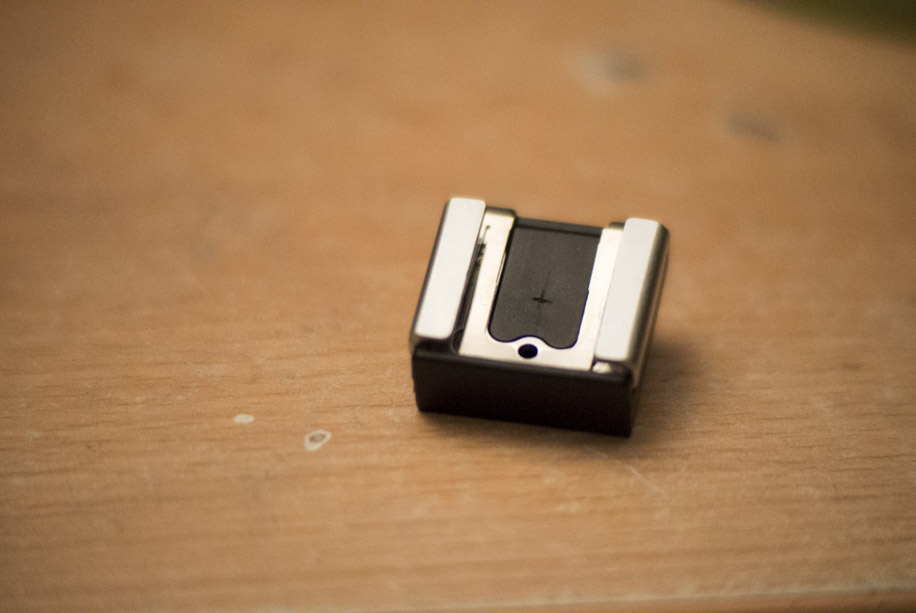
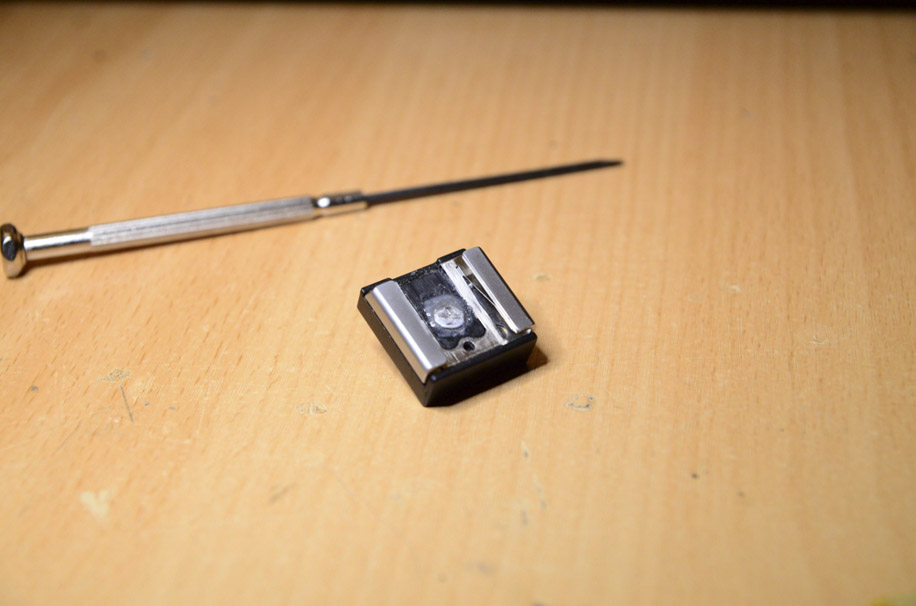
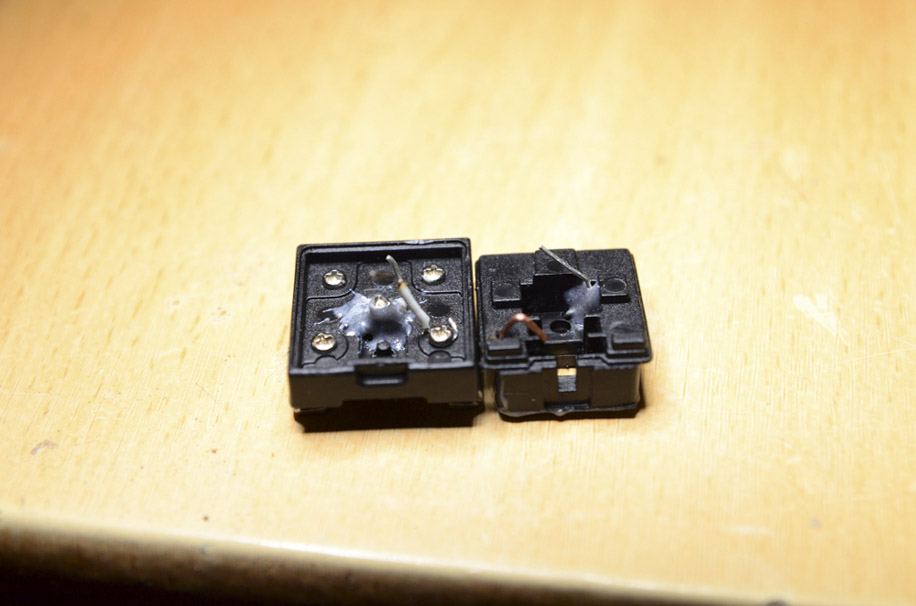
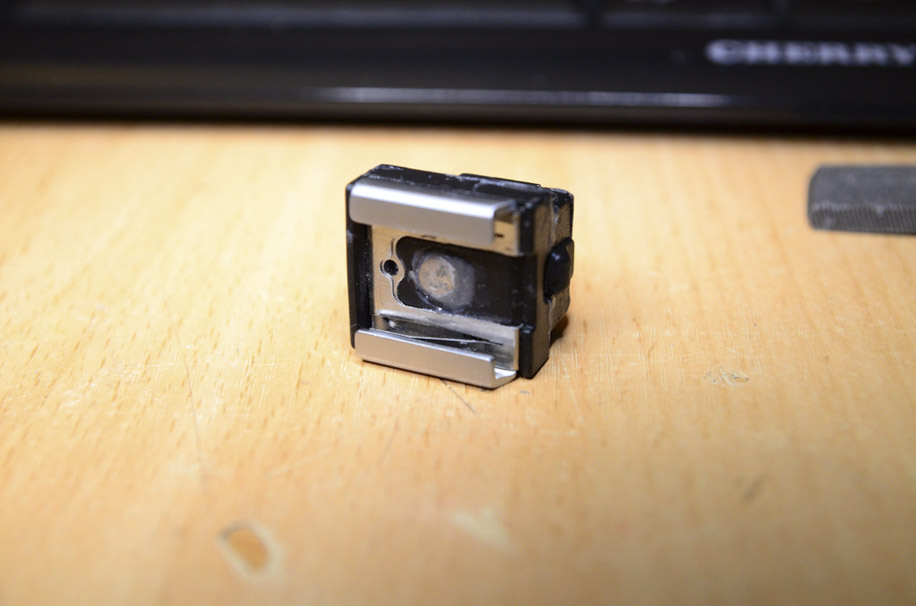
By now you should have the two adapter parts as shown in the next picture:
6) Assembly of the adapter
When you glue the two pieces together, you should check the connections with your multimeter as long as the glue hasn’t hardened. You will have a hard time to fix something afterwards.
Now you will need to solder the equivalent wires together. A long and thin tip on your soldering iron will make things a lot easier. Afterwards, use the tweezers to bend the wires where you want them to bend. Press the two adapter pieces together. If that works, do a last double check on the camera (you might also want to try a radio trigger at that point).
If it works correctly pull the two pieces a little bit apart, apply the glue and leave out the handle. Press the two pieces together and use your multimeter to double check if all solder points are working and if the handle still moves. After testing the adapter I used a bench vise to hold the pieces together until the glue hardened. I used some spare glue and put it into the joints (still leave out the handle).
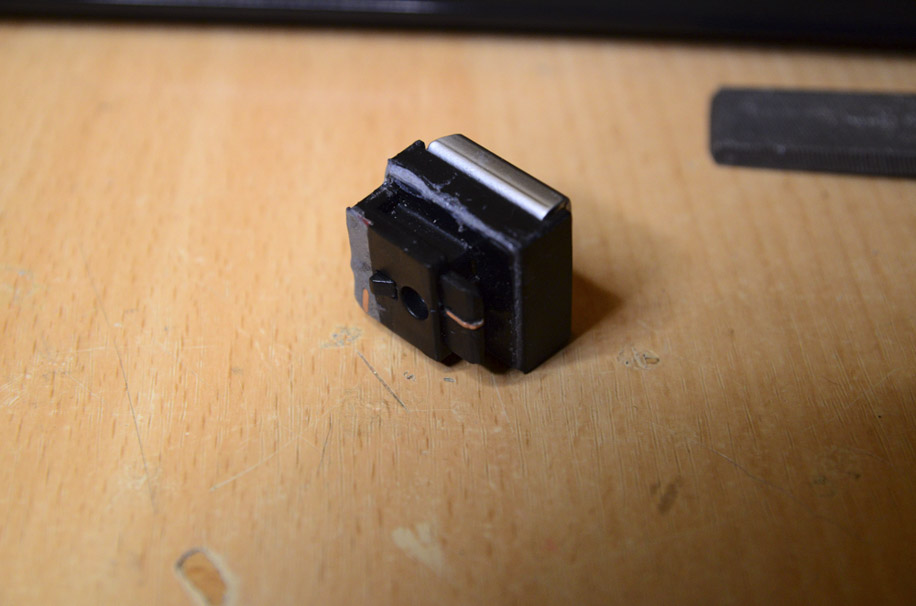
After the glue hardened, I used some paint to cover up the visible glue.
7) Conclusion
Because of the missing TTL (and the missing camera response) you will have to do a little work on the first version of the Yongnuo RF-603. But that is basically only a small leaver and a resistor. You can find the instructions over the Internet or at NikonRumors too. With the electronic shutter the shortest shutter time is 1/60s. At shorter times you will see a clear cut in the picture. With the mechanical shutter the shortest shutter time will be 1/250s (RF-603I) or 1/400s (HSS-flashes; YN-560 directly put on the camera; YN-560TX).