Nikon Z9 underwater review in Australia by Nicolas Remy (Instagram: @nicolaslenaremy) from The Underwater Club (see the full review here).
Introduction
As a long-term Nikon DSLR user, I was curious to see how the Nikon Z9 compared for underwater photography, in the low-light and low-visibility waters where I dive the most.
I want to thank Nikon Australia and Nauticam for the opportunity to try for myself, by lending me the camera, lenses, housings and ports for several weeks of testing, in Sydney’s temperate waters and a few others spots in New South Wales (Australia).
This review focuses on the 3 areas where DSLRs have traditionally outperformed mirrorless cameras in underwater photography: autofocus, viewfinder experience, and battery life.
I will also touch on burst shooting, and finally review the Nauticam NA-Z9 housing.
Before jumping in, I also want to thank The Underwater Club’s Members for sharing their thoughts and questions on the Z9, which have inspired some of the tests I report in this review. A more in-depth version of this review is available on The Underwater Club’s blog.


Autofocus performance
Overview of the Z9 autofocus
On paper, the Nikon Z9’s autofocus is well above the trusted D500 and D850 DSLRs. Its 493 detection points cover 90% of the frame, compared to 50% for the D500 and only 21% for the D850. Moreover, these focus points are meant to work in very low light, as low as -7 EV, compared to -4 EV, for the central focus point of the D500/D850.
Finally, the Z9 has an animal detection functionality, which can be activated “on-top” of the traditional autofocus modes that are found on the D500/D850 (AF-S, AF-C 3D, AF-C Auto-Area, etc.).
Macro and Close-ups Autofocus
For macro and close-ups testing, I paired the Z9 with the new Z-mount 105mm macro lens, which has better optical quality and also felt more reactive than its F-mount predecessor, courtesy of the dual-AF motor of the Z lens.
The Z9/Z105 pair was very good at tracking moving fish in low visibility and low ambient light, without needing a focus light.
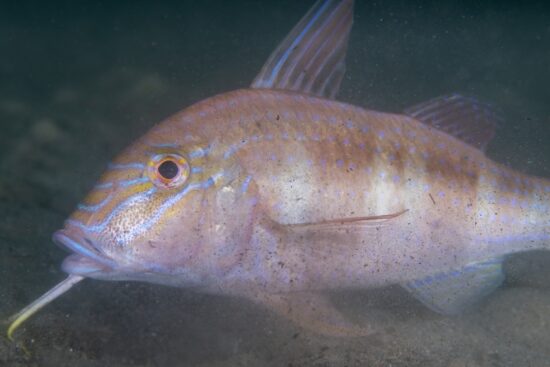
The eye of goatfish kept in focus despite the animal stirring up silt as it searched for food, in 4 meters visibility, on an overcast end-of-day. I had over 80% critical-focus success, in those conditions. Nikon Z9 with Z 105mm, 1/200th, F/11, ISO 400, 2x Retra Flash Pro
I was impressed how “sticky:” the autofocus (AF-C 3D) was, rarely losing the subject despite less-than-ideal conditions.
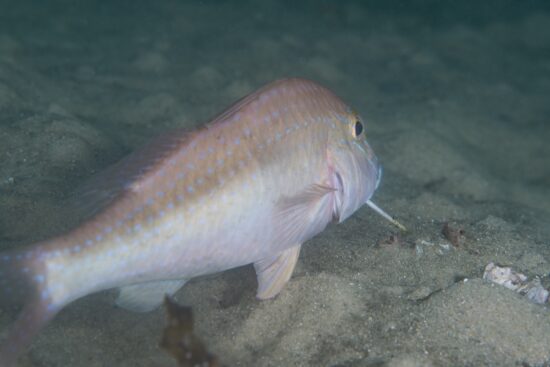
The eye was still tracked as the fish turned away (up to a 120 degrees angle), that’s how sticky the autofocus is! Nikon Z9 with Z 105mm, 1/200th, F/11, ISO 400, 2x Retra Flash Pro.
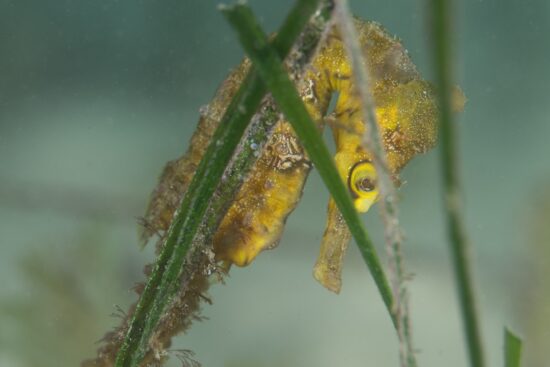
As the White’s seahorse moved behind pieces of algae, the Z9 kept the focus locked on its eye. I had set the a3 “block shot AF response” setting to 3 (intermediate). Nikon Z9 with Z 105mm, 1/200th, F/8, ISO 64, 2x Retra Flash Pro.
I only had to turn-on the focus light when it became so dark that my eyes, couldn’t discern fish, unless they were moving.
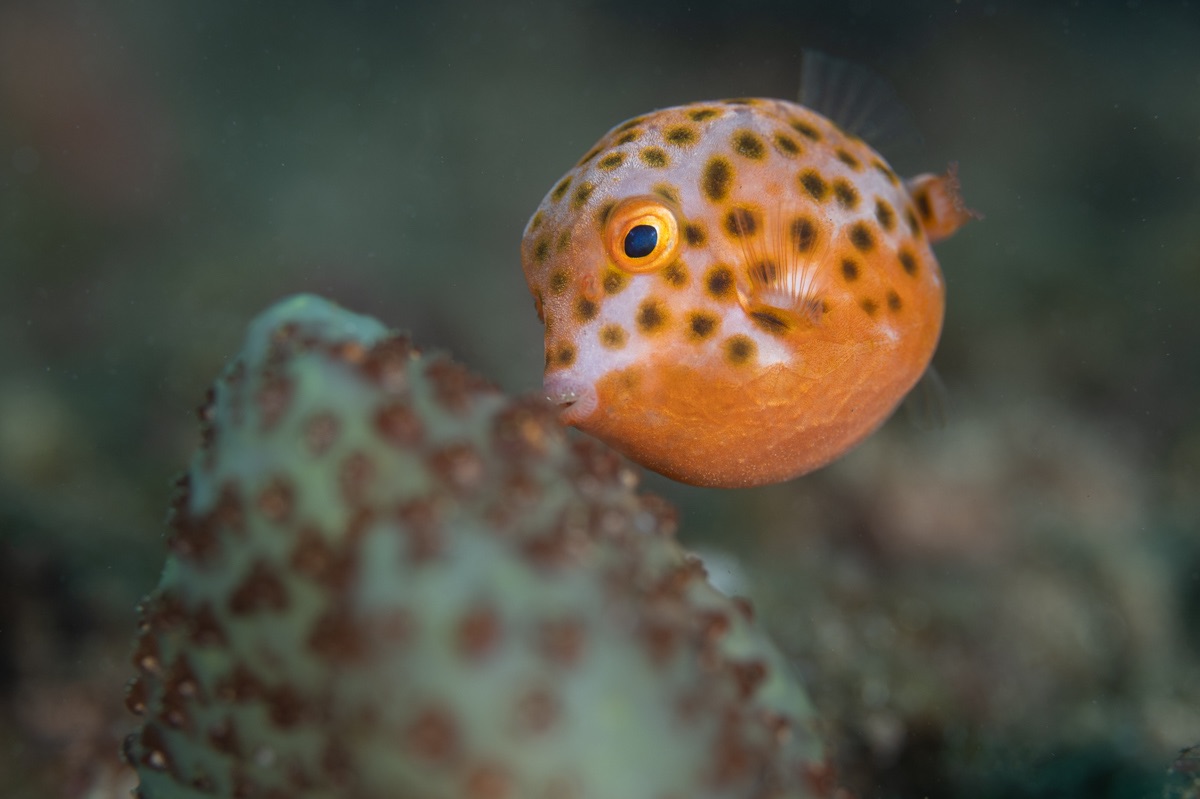
With the focus light still on, I tested erratic subject tracking with the tiny southern pygmy leatherjacket, a species who seemingly can’t stop buzzing around.
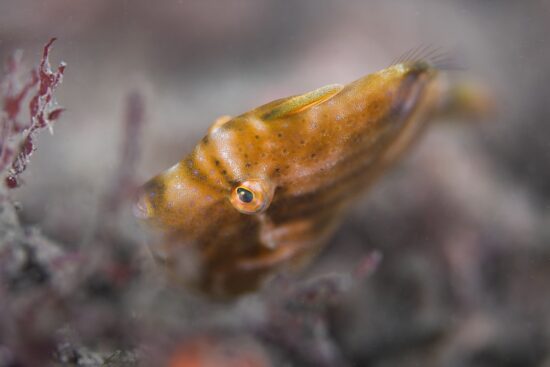
Southern pygmy leatherjacket Nikon Z9 with Z 105mm, 1/200th, F/4, ISO 100, 2x Retra Flash Pro
To raise the bar I picked an open aperture, AF-C 3D mode, selected the eye and then kept tracking while taking photos.
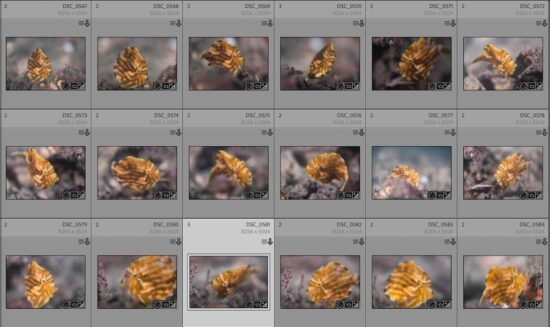
18 shots taken in 2 minutes at F/4 (uncropped), 16 of them tack-sharp on the eye, despite the floating particles in about 4 meters visibility!
Out of the 18 shots I took in 2 minutes of the same individual, 16 were sharp on the eye, an impressive 89% success rate!
Animal recognition
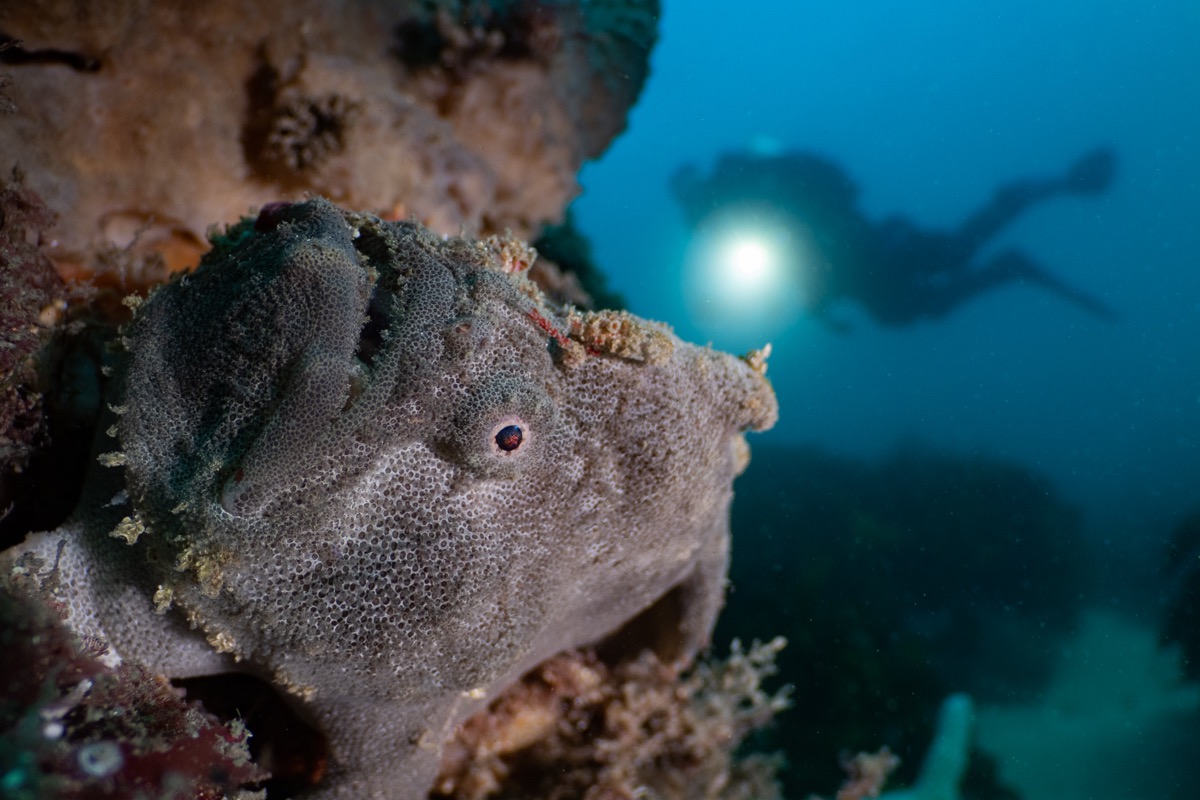
Most of the time, I had animal recognition tuned-on and the Z9 did manage to detect and recognize a number of species including goatfish, seabreams, wrasses, boxfish, seahorses and at times, octopi. This depends on conditions though: on some dives I had seahorses systematically detected, while on another one the seahorse didn’t inspire the Z9.
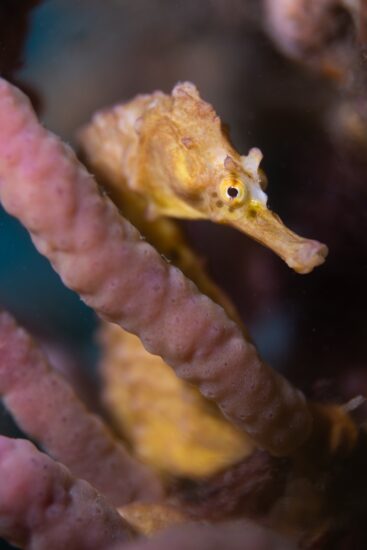
Animal recognition picked straight away this potbelly seahorse. Most of the time the whole head, sometimes narrowing down to the eye. The seahorse, the sponge and myself were all moving due to surge, and animal recognition spared me the effort to manually position my focus point over the eye, when initiating continuous tracking. Nikon Z9 with Z 105mm, AF-C 3D, 1/200th, F/4, ISO 64, 2x Retra Flash Pro
I feel that clearer water and more ambient light increase the chances of subject detection. It also helps to pre-focus near the subject, so that the Z9 can “see” more than a blurred shape.
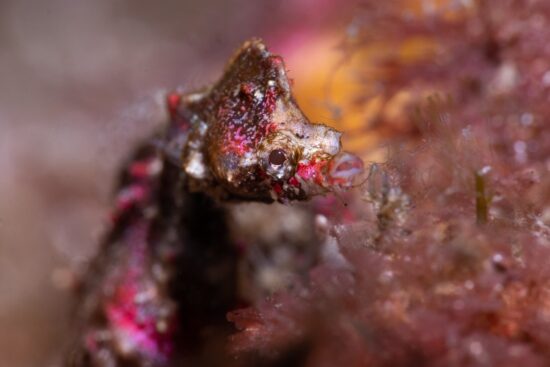
Kudos to Nikon on this one: the animal recognition reliably identified and tracked the eye, as soon as the Sydney Pygmy Pipehorse turned towards me and I pre-focused near its head. Nikon Z9 with Z 105mm, Nauticam SMC-1, 1/200th, F/29, ISO 800, 2x Retra Flash Pro, 10% crop.
I occasionally disabled animal detection, when I could see the Z9 was confused by an animal’s body. For example, the Z9 was mistaking pygmy leather jacket’s skin patterns for eyes and I switched it off, when shooting the above series.
Issue with red lights
I also took the Z9 night-diving, and unfortunately its autofocus performance dropped when I switched to my red focus light: the camera was generally slower and hunted for focus at times.
According to Thom Hogan, this is due to mirrorless cameras only using the blue & green photosites of their sensor, when it comes to focusing functions. This caused me to change the way I shoot at night, relying more on white light, which is ok for most subjects, but not all.
I have read reports of that problem impacting Sony users too, but I am unsure about Canon. I was told Nikon are looking into this, and it would be fantastic to see improvements with a firmware update, time will tell.
Side-by-side DSLR comparison
While I was giving the autofocus of the Nikon Z9 a hard time, it struck me that my testing routine was perhaps a bit over the top. Sure, I do use my DSLRs in low-light and low-visibility, I avoid turning on the focus light, but I am no masochist: I also try to make the camera’s job easier.
Before I could confidently write whether or not the Z9 had outperformed DSLRs for macro, I needed to give the long-timers a fair go.
I spent two long dives carrying both the Z9 and the D500, mounted with their respective 105mm macro lenses, looking for obliging subjects and swapping housings, to compare their performance in the exact same conditions, on the same individuals. These are both excellent cameras so I chose a demanding testing protocol, involving shadows, open aperture and no focus light, to “help them fail”.
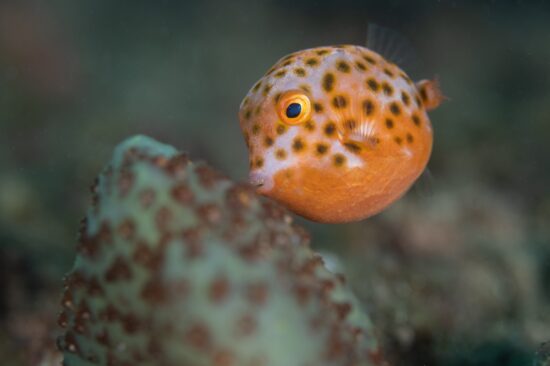
The erratic eastern smooth boxfish swirling in between rocks.
Nikon Z9 with Z 105mm, DX mode, 1/200th, F/5.6, ISO 200, AF-C 3D with animal recognition. 2x Retra Flash Pro.
Long story short: the Z9 achieved critical focus on 70% of the test shots vs only 44% for the D500 (both in AF-C 3D).
For the long story, with all details of the testing routing and results breakdown over 5 different subjects, check the long version of this review on The Underwater Club’s blog.
Putting numbers aside, I did notice D500 was a little faster at acquiring initial focus, but then was quicker to also drop focus, letting it slip from a fish’s eye to its flank. The “sticky” Z9 autofocus described above made quite a difference.
Wide-angle performance
My wide-angle testing focused on the Nikon 8-15mm fisheye, mounted on the FTZ II adaptor, behind a Nauticam 140mm glass dome. This was the most relevant comparison with my favorite wide-angle DSLR setup: Tokina 10-17mm fisheye, behind a 100mm Zen glass dome, with the Nikon D500.

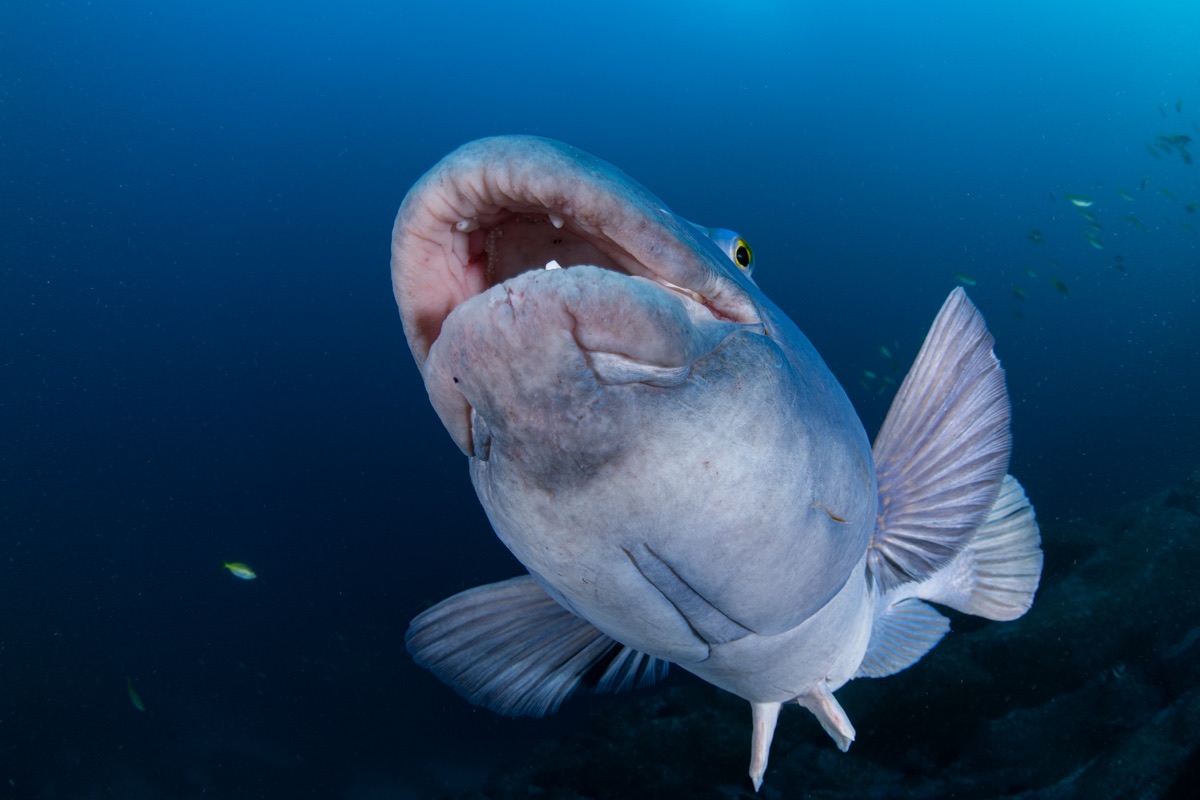
A friendly eastern blue groper follows divers in hope for a feed.
Nikon Z9 with 8-15mm fisheye. 1/100th, F/13, ISO 320, 2x Retra Flash Pro.
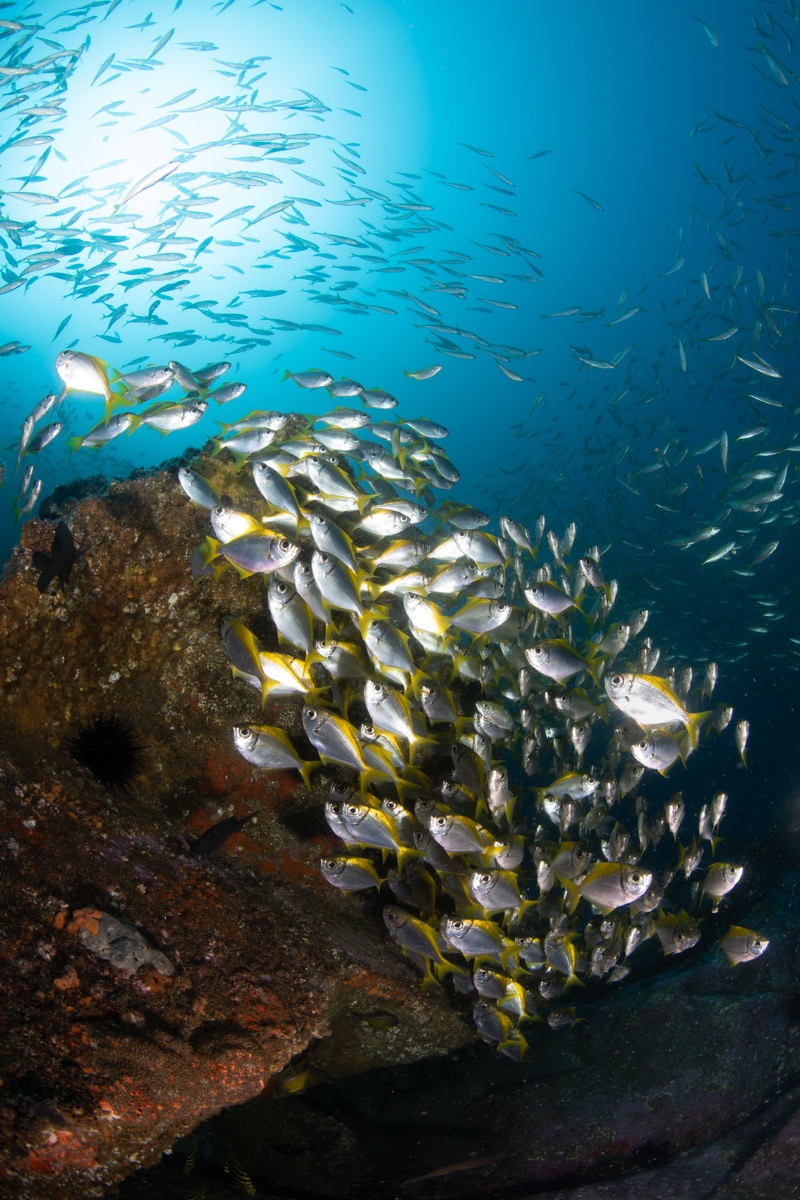
Overtime, I know my D500 / Tokina 10-17mm combo has had close to a 100% success rate in a variety of shooting conditions, and my feel is that the Z9 / 8-15mm combo is in the same league, with perhaps a slight edge for fast-action. This is based on 14 hours of diving, covering 9 dive sites, in visibilities ranging from 6 to 20 meters, shooting a mix of reefscapes, schooling fish, gropers and excited fur seals.
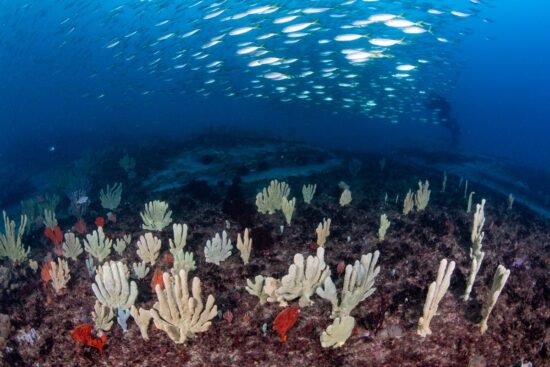
Sponges at the entrance of Sydney’s Botany Bay.
Nikon Z9 with 8-15mm fisheye, 1/100th, F/13, ISO 320, 2x Ikelite DS230.
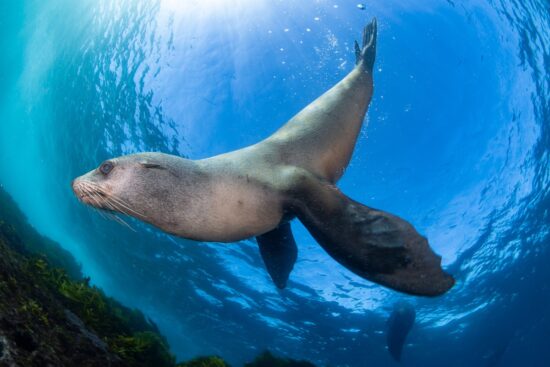
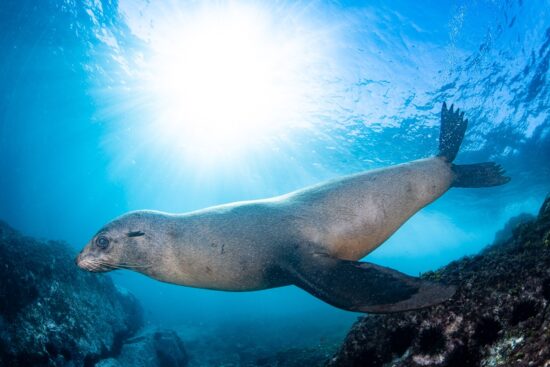
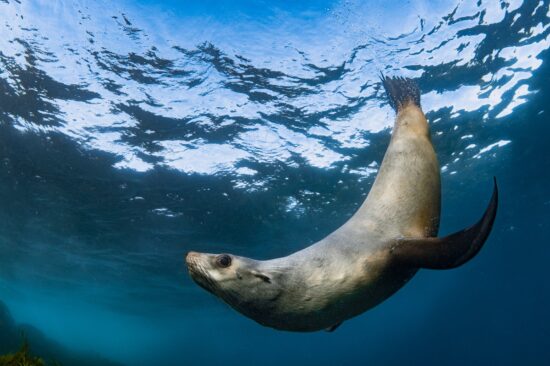
Over 1300 fur seal shots, I measured 99.6% of success. I recall my D500 was excellent too, but I don’t have previous years’ files anymore to confirm if it scored that high.
Nikon Z9 with 8-15mm fisheye. 1/200th, F/11, ISO 400, 2x Ikelite DS230.
For the seals, the Z9 was set to AF-C, Auto-area mode and Animal recognition was enabled, picking up seals and occasionally their eyes. For general wide-angle work, my go-to mode was AF-C 3D, with animal detection kept ON by default.

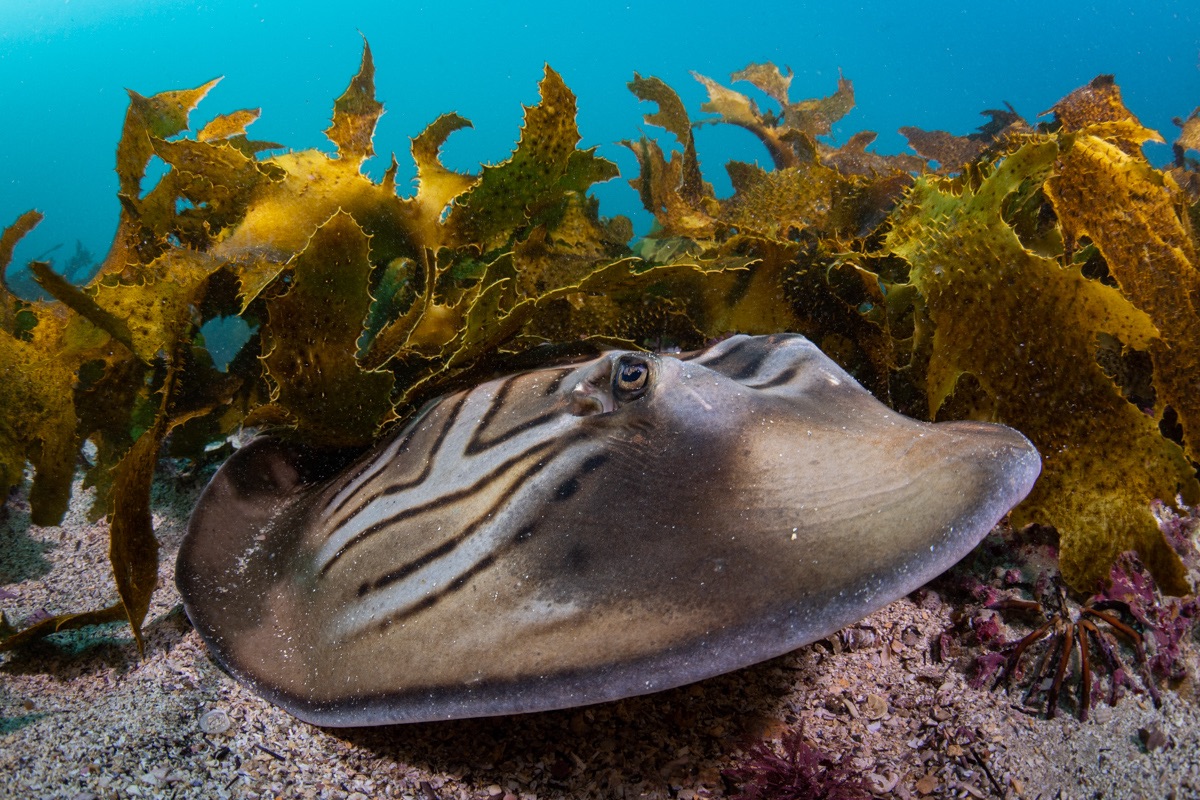
A fiddler ray swims in between kelp, no issue focusing in the low afternoon light and 6 meters visibility.
Nikon Z9 with 8-15mm fisheye, 1/40th, F/13, ISO 400, AF-C 3D mode. 2x Ikelite DS230.
Wrap-up: autofocus
I am liking the Z9’s autofocus very much. The wider 90% frame coverage and the “stickier” tracking enabled a new way of shooting: I position the focus point on my subject (AF-C 3D), and then re-compose and/or get closer, while having a high confidence that the subject will be tracked, even if it swims around and partially turns-away. Sometimes, animal recognition kicks-in, saving me the effort to position the focus point. In low ambient light, the continuous tracking accuracy was better than my D500 (with respective 105mm macro lenses), a commendable performance.
One negative is night diving with a red focus light, where I found my DSLRs still do a better job, but as soon as I revert to white light, the Z9 leads again. When using the optional Nauticam EMWL wet lens, the Z9 (and some other mirrorless cameras) currently suffers from a back-focus issue. See my EMWL article for details and ways to work-around that problem.
Viewfinder experience

The Nauticam 40 degrees/0.8:1 angled viewfinder, mounted on the Nauticam Z9 housing. It is designed specifically for the larger EVFs of mirrorless cameras. It can display the Z9’s EVF in full size. However, I prefer the “small” EVF size option, where I can more easily see the whole frame.
Compared with an optical viewfinder
When working under abundant ambient light and as long as I wasn’t framing into the sun, the EVF felt pretty close to an optical viewfinder. I think this has to do with the ample screen resolution (3.69 M dots) and especially the high 120 Hz refresh rate: the screen updates 120 times per second. Importantly: neither the resolution nor the refresh rate seem to drop as the camera focuses or shoots, which also helps keeping the experience “real”.
I started noticing the EVF in darker conditions, dark enough that I would have struggled to find the subject, through my DSLR’s viewfinder. In those conditions, the EVF would automatically brightens the scene (remember, “ease of viewing” mode), making it easier to frame photos, with subjects hiding in crevices or below a rocky ledge. Again, this helped do without a focus light, an advantage for shy subjects.
The other situation where the EVF becomes noticeable is wide-angle photography, when viewing scenes with a high contrast. This is a known constraint of EVFs that has kept many DSLRs users on the fence, but I haven’t faced any situation where the viewfinder stopped me from getting the shot.
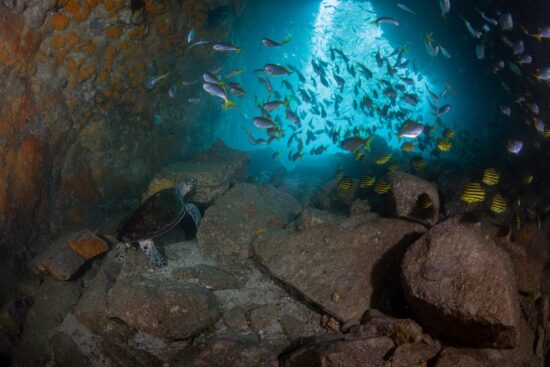
High contrasts at the entrance of the Fish Rock ocean cave (8 meters depth). With my focus light off, through the EVF I could see the turtle and rocks in the foreground (amplified), but the exit was blown out. I could see fish swimming in the middleground, but the schools at the background were hard to tell apart.

Shooting towards the sunball at depth (27 meters), with 15 to 20 meters visibility, this was a more manageable level of contrast for the EVF. I could still see details of the schooling fish (they appeared dark but not fully black), and in the background, only the area around the sun-ball was blow-out.
During 1h40 of packed action, I took 1300 shots in less than 5 meters depth, with 12-15 meters visibility and a bright sun. I followed the seals, shooting with either the sun on my back or in front of me. I also shot a lot the swell window, as seals were sunbathing above me. As I type those lines, I realize I can’t recall exactly what how the EVF performed, which is a good thing: I would have remembered if I was unable to frame my subjects.
During night dives
When I spot a subject during a night dive, I depress the shutter release to wake-up the EVF, then aim the macro lens towards the subject, then look into the EVF to compose the shot. On several occasions it took a moment to for the viewfinder to adjust its brightness: first I could only see a very bright display, then details appeared.
Even when the EVF had “settled down”, the contrast and details aren’t as good as what I am used to with the D500 and D810 DSLRs, making it harder to locate the subject, under a red focus light.
Mission control
With my Nikon DSLRs, I regularly have to “wake up” the camera so that it overlays my exposure parameters, on the optical viewfinder. As I change subjects, sometimes I also press the “info” button to quickly remind myself of all the settings I was using (exposure parameters, flash mode, autofocus mode, burst shooting speed, etc).
All of this is much simplified on the Z9: all the settings I possibly want to know about are laid-out in two rows in the EVF, above and below the subject. This allowed me to keep track of subject movements while checking those important parameters.
Image review
One great advantage of a mirrorless camera was being able to review photos without taking my eye away from the viewfinder.
This allowed me to work faster, making the most of any short-lived photo opportunity.

It took a while to line-up everything for that shot, including crawling in between two rocks, to reach the angle I was after. I was glad I could check my lighting and exposure without having to swim back.
The only circumstances where I prefer to review photos on the rear LCD screen is when there is a lot of action, or when it’s important to maintain situational awareness. It’s far too easy to forget the outer world when sticking to the EVF both for shooting and reviewing photos. With the fur seals, I missed some good opportunities because I was looking at the EVF, obnoxious about the seal pup which was looking at its reflection, on my dome port…
The FX/DX switch
As a long-term DX shooter, I knew I would miss the Tokina 10-17mm, and its useful zoom range of 180 to 100 degrees, in diagonal field of view. I felt it when seals were a little too shy to fill the frame, with my 180 degrees fisheye.
Well, that’s when I learnt to appreciate the option to switch from FX (full frame) to DX (APS-C format). Obviously this goes with a loss of resolution, where the image captured weighs 19 MP instead of the 46 MP produced in FX mode, but this is very close to the 21 MP images of my Nikon D500, which I know are sufficient for most of my needs. Besides, the EVF automatically adjusts to display the exact field-of-view that will be captured, so I am in full control of my composition, while still enjoying the Z9’s comfortable viewfinder, and a near 100% coverage of the frame, with autofocus points.
I realized I much preferred to shoot this way, whenever I saw that I lacked magnification in macro, or that my wide-angle subject was too shy for a 180 degrees fisheye. In this mode, the Z9 will produce a 19 MP raw file, which saves on storage and is good for competitions which look down on cropping.
On my Nauticam NA-Z9 housing, I have allocated the DX/FX switch to the Fn3 button, conveniently accessed by a lever near my left little finger, and this way I could “zoom out” of DX mode in a blink, when I saw a curious seal coming close enough.
Wrap-up: viewfinder experience
All-in-one, I prefer the Z9 viewfinder experience over that of high-end DSLRs. I can work faster with this viewfinder, I can see better those subjects hiding in the dark, and I can review photos immediately, in situations where I would have had to step back with my DSLR. Also, I love being able to toggle between FX and DX modes, whenever the need for a longer focal length arises. The only situation where I prefer composing a photo with a DSLR is at night, when using a red focus light.
Battery life
A short but important section: while we refer to DSLR battery life in terms of number of shots, interestingly the Z9 is more about duration of use, here is what I logged over a few dives:
- 2h20 of night diving (macro), 309 shots, 170 seconds of 4K/60p video => 33% battery use.
- 3h50 of diving (mix of night plus day, macro), 340 shots=> 50% used
- 3h47 of day diving (wide-angle), 400 shots + 100 seconds of 4K/60p video => 50% used
- 3h15 day diving (macro), 375 shots => 47% used
- 1h40 of fur seals diving (wide-angle), 1300 shots + 24 seconds of 4K/60p video, 29% used
All-in-one, I roughly expect to get 7 hours of diving, out of a fully charged Z9 battery, which is using mostly the EVF, shooting in AF-C 3D with animal recognition all the time, with the EVF set in size “small”.
Burst shooting
The cheeky fur seals of Montague island (NSW, Australia) were a good testing ground for the Z9’s burst shooting credentials, boasting 20 Frames-Per-Second (FPS), when recording full resolution, 14-bits RAW files.
I stayed near the surface in hope to shoot ambient light only, but there weren’t many close interactions where I had the sun on my back, properly lighting the seal.
A bit too many shadows to my taste, but the Z9’s metering system worked like a charm (ISO auto). DX mode, AF-C Auto-Area, 1/800, f/9, ISO 1400, 20 FPS, ambient light only.
So I decided it was time to return to strobes, and check if the two Ikelite DS230 which I had brought with me lived up to their impressive specifications (213 Watts, 120 degrees beam, 1.2 seconds recycle time at full power). I hoped they could cope with some level of burst shooting, that would do justice to ecstatic seal pups.
At 25% power and lower, I could shoot short bursts of 0.5 second at 20 FPS, producing 10 shots that all received some strobe light. The strobes gradually produced less light, but I found the decrease to be progressive, and it is moother at lower powers, or when “slowing down” to 10 FPS. I much prefer this behavior rather than seeing occasional black-outs, and the progressive light decrease suits pretty well an approaching subject.
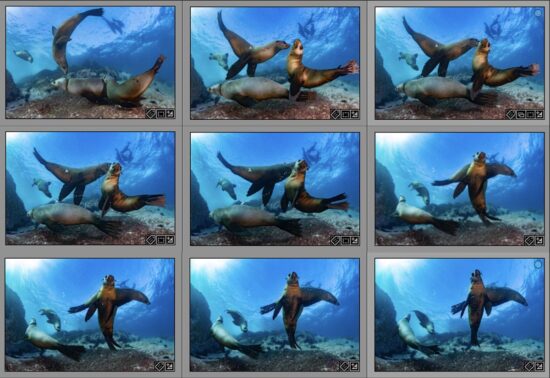
With 4 seals in the foreground and 5 in the background, burst shooting increases the odds to capture the moment when everything lines-up.
Back to the Z9 performance, I ended-up shooting bursts, either at 20 or 10 FPS, sometimes for 1 or 2 seconds in a row, as I followed a seal swirling around me. Despite using a mid-range memory card, I never had to wait, courtesy of the Z9’s humongous buffer. There is one negative in all that: my 64 GB card filled-up quicker than I thought, and I had to cut the dive short, after capturing 1300 images.
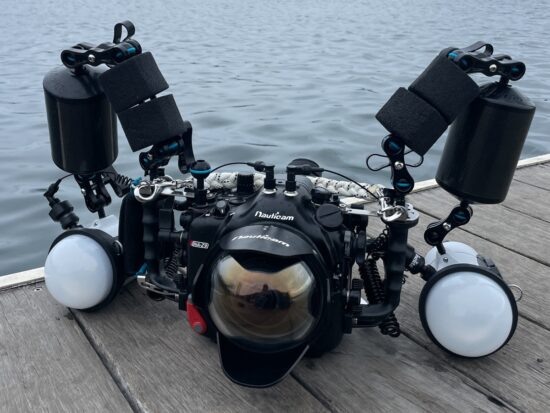
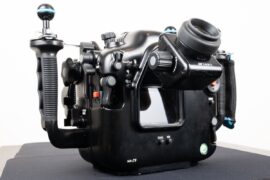
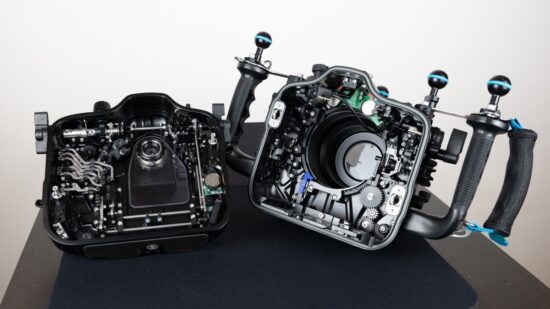
The Nauticam NA-Z9 housing
Before this review, I dove a total of 4 Nauticam housings, and what I liked most was:
- Ergonomics: handling, controls layout, ease of swapping ports
- The Nauticam vacuum check system
- Robustness: both the NA-D500 and NA-D810 have taken a fair amount of bashing, as I had to crawl on rocks to exit from some of Sydney’s dive sites, more often than I like to admit.
I tried my best to keep my loaned NA-Z9 away from the said rocks, so I can’t comment on its long-term robustness, but this housing felt as sturdy as all the Nauticam beasts I have previously dived with. Interestingly, the manual of my D500 housing recommended servicing it every 2 years / 200 dives, whereas the recommendation for the NA-Z9 housing is a longer 3 years / 500 dives surface interval.
The Nauticam vaccuum check is an excellent system, but it isn’t exactly news, so I’ll focus on the ergonomics of the new housing. Before that though, let’s have a word about the form factor and weight of the NA-Z9.
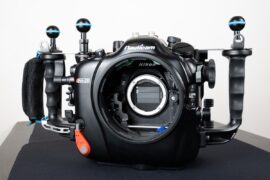
Form factor & weight
As a full-size pro-body with an integrated grip, the Z9 camera is bigger and heavier than the D810 and D500 DSLRs that I have used the most, but let’s how they compared, once wrapped-up in a housing:
|
Housing external dimensions |
Weight |
|||||
|
width with handles |
width without handles |
Height |
thickness |
housing only |
Housing +camera +battery |
|
|
NA-Z9 |
361mm |
258mm (approx) |
235mm |
165mm |
3.76kg |
5.10kg |
|
NA-D810 |
350mm |
248mm (approx) |
208mm |
134mm |
2.96kg |
3.84kg |
|
NA-D500 |
357mm |
255mm (approx) |
188mm |
134mm |
3.02kg |
3.88kg |
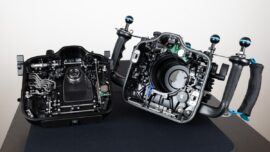
I’ll further discuss these differences now, focusing on the NA-D810 as it is a more relevant comparison to the NA-Z9, both cameras being full frame, resulting in similar sized lenses and ports being used.
Whilst a taller housing is no surprise, I didn’t expect the extra 31mm thickness, which is to fit the FTZ-II adaptor inside the housing. This allows re-using the exact same ports that worked with a DSLR, when mounting the same F-mount lens with the Z9. I would have preferred a thinner housing, but I find this trade-off acceptable, as the Z9 housing stills fits in the upper compartment of my Pelican 1637 air case, where my NA-D810 usually goes.
In terms of baggage allowance, the total penalty ads-up to 1.26 kg, and this is also the extra exercise I get when walking to dive site, as I am finding the NA-Z9 has a very similar buoyancy to my NA-D810.
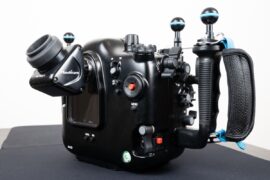
The other key change is having the lens further from the ground: on the Z9 housing, the N120 port sits 42mm away from the bottom of the housing, compared to a 10mm distance on the D810 housing. On a muck dive or when diving over sand, I knew this 32mm difference would limit my ability to get eye-level with the subject. Yet, during the 12 hours of muck-diving I have done with the Z9, I found this to be annoying just a couple of times. Indeed, the height difference won’t matter when the subject is swimming, hanging on a piece of sponge or rock or whenever the seafloor is sloping down.
All-in-one, If I was travelling to Lembeh for a week of muck diving, I would be very happy to only take the Z9 in the NA-Z9 housing.
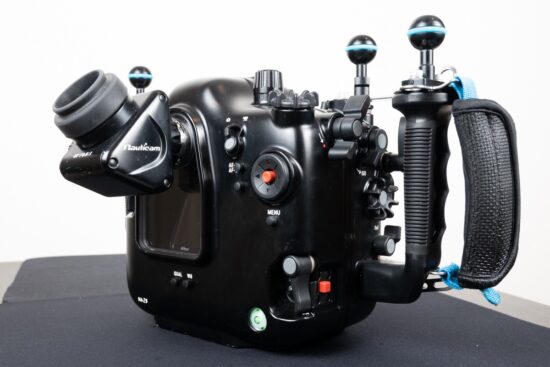
Housing ergonomics
The NA-Z9 housing allows easy access to the most useful camera controls, in the form of buttons and levers, positioned within reach from both handles.
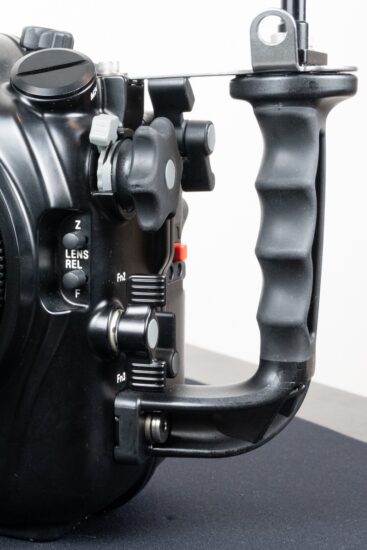
Key controls layout
Thanks to an intricate combination of levers and gears, some controls have been relocated quite far from where they sit on the camera. For example, the + and – zoom buttons which are located on the right of the rear LCD screen are accessed via two push buttons, located on the opposite side (near the left handle), which nicely balances the number of push buttons on either side.
The + and – zoom buttons are part of a cluster of four, on the left of the LCD screen, just below the monitor lever, which is where you toggle between EVF and rear LCD.
Another feat is the relocation of the three customizable fn1, fn2 and fn3 buttons: these are located in the front of the Z9, and Nauticam turned them into 3 levers (2 on the left side, 1 on the right).
An intimidating lot of gears and levers are involved in dispatching controls all around the housing. I wouldn’t feel confident enough to self-service such a housing, but in saying that, my previous Nauticam housings have spent over 1000 hours in the water (cumulated) and never had to be sent away for repairs.
I am also finding the multi-controller pad quite handy to move the focus point around the 493 available locations (AF-C 3D mode)…
The video switch
One great feat of mirrorless cameras is being able to switch from stills to videos without taking one’s eye away from the EVF.
The video switch, located just on the right of the 40 degrees mirrorless viewfinder, and the ISO lever, located just behind the video-recording lever.
Concretely, when I see that the subject or scenery would make for an interesting video, I push the video/stills switch from right to left, using my right thumb and without taking my eye away from the EVF. Instantly, the EVF shows me a preview of the exposure, and I will adjust the ISO setting to get the exposure right. Again, I do all this without taking my eyes away from the EVF, as the ISO lever is conveniently located near my left thumb, just behind the… video recording lever! Once done, I flick the video/stills switch in the opposite direction, and here I am, back with my stills photo exposure parameters and ready to fire my strobes.
Hairy frogfish illuminated with continuous lights at night. When I switched to video mode, the preview appeared way too dark. No worries: within seconds I bumped to 12800 ISOs and started recording 4K/60p at 1/125th and f/16. On the last sequence, the front lighting is the focus light of my Retra Flash Pro, through a Retra LSD snoot, at low power. The Z9 certainly copes better with low light than a GoPro!
Make it your own
In the Nikon parlance, “fn” buttons are those meant to be user-defined in terms of their function, and the Z9 has no less than 4 of them! If that’s not enough, the extensive menus let you change the function of several other controls too.
Considering that Nauticam has made all these controls accessible – literally at your fingertips – the levers and buttons of the NA-Z9 can be very much customized to very own liking.
The first day I used the camera, I customized the controls to an extent that felt right, but I kept making adjustments over time. Here are of the customizations I landed with:
- Fn1 lever (right little finger): disables flash, e.g. if I want to shoot a silhouette, check the appearance of my water background.
- Fn2 lever (left ring finger): toggles between FX and DX modes.
- Fn3 lever (left middle finger): enable/disable focus peaking.
The fn2 and fn3 controls are accessed with your left ring and middle fingers, while a chunky knob allows zooming or focus overrides with the left index.
Swapping lenses
As explained in The Underwater Club’s lesson on housing choices, I consider the ease of swapping lenses as a key criteria in deciding on a housing model. Good news with the NA-Z9: I could swap lenses and ports without having to open the rear housing door, and this applies to both F-mount and Z-mount lenses.

The Z9’s integrated shield protects the expensive 46 MP sensor and reduces my stress level, while the cap is away during a lens-swap.
Conclusion
The Nikon Z9 is a tremendously capable underwater camera, performing better than the long-established D850/D500 DSLRs in most areas, but it is a different kind of beast. Here is a recap of applicable pros & cons, when considering an upgrade.
Pros (vs DSLRs)
- More “sticky” autofocus: allowing to track subjects and re-compose while you approach, even in low light.
- Animal recognition: saves time by automatically selecting the subject. It works with some (but not all) underwater critters, and is less sensitive in low light/low visibility.
- Ability to quickly review photos in the EVF, without having to move away from the subject.
- Mission control : all the important settings are visible in the EVF.
- See in the dark: the EVF amplifies the scene, making it easier to see and compose, when the ambient light gets low.
- Seamless DX/FX switch: in DX mode, the full size of the EVF is used, making the shooting experience as comfortable as in FX mode.
- Higher configurability: customize the 4 fn controls and more, all available at your finger tips (in the Nauticam NA-Z9 housing)
Cons (vs DSLRs)
- Size and weight
- Autofocus performance under a red light
- Lower EVF contrast, under a red light
- Back-focus with the EMWL wet conversion lens
Final words
Before I started using the Z9 underwater, I had asked Members of The Underwater Club what they were curious to know about the Z9, and I answered all their questions in this review, except one.
That last question was whether the Z9 could take shots impossible to capture on a D850 or D500 DSLRs.
I reflected on this for a while, and couldn’t think of any underwater subject matter that is too hard for the best Nikon DSLRs to capture. As a rebreather diver, I routinely do 3 to 4 hours long dives, staying down for as long as necessary, whenever I find a great subject. I have time so I am able to wait minutes for the subject to come out of its den again, I don’t mind backing off to review photos, even if it will take another long, cautious approach to return to shooting position.
But here is the thing: when I jump on a commercial boat my bottom time becomes limited like everyone else’s. When I dive with other photographers, we’re taking turns and I can’t spend ages waiting on the subject. Also, some opportunities are short-lived by nature: it takes only seconds for two pipefish to exchange their eggs, there is no second chance.
When time is of the essence, the Z9 shines by letting me work quicker (ref. the first 4 “pros” above) and simply has a higher keepers rate than the best DSLRs, when it comes to critical focus (I measured 70% vs 44%, in challenging conditions).
Finally, if you’re finding the Z9 appealing but are unsure about the size and weight, consider the newly released Nikon Z8, which shares most of the Z9’s impressive features, in a smaller package. Personally, I look forward to seeing how it compares, for underwater photography.
About the author
Nicolas Remy is an Australia-based pro shooter and founder of online underwater photography Club & School The Underwater Club. His images have been widely published in print and digital media, and have won over 35 international photo awards.
Follow him on Instagram: @nicolaslenaremy:
If you have an interesting idea for a guest post, contact me here.