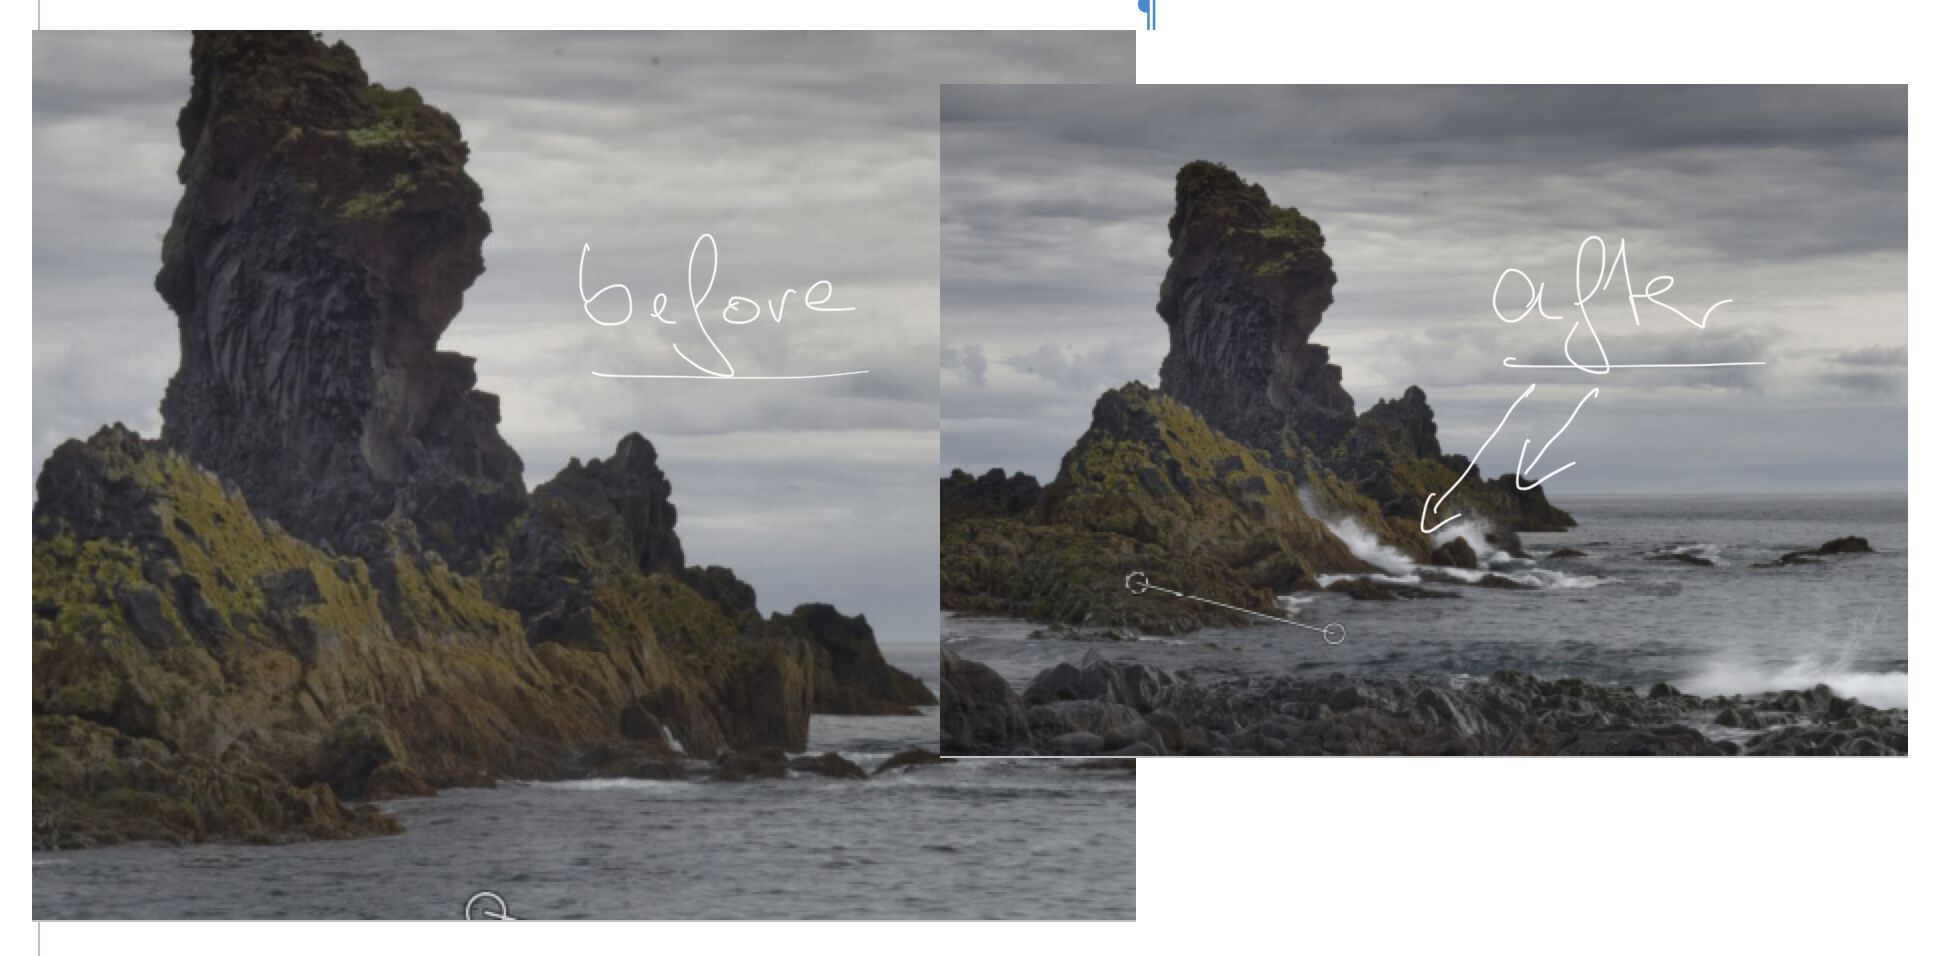
André Krajnik (Website | Blog | Facebook, Instagram) sent me this article about a “pseudo-HDR” technique he uses quite often: putting several almost identical images in one file, each as a separate layer and using layer-masks to make only certain parts of the different images visible. In this past, this technique was used for extending the dynamic range without HDR- or DRI- software. Nowadays this technique is still useful for landscape images when you want to show i.e. waves from more than one image.
When traveling, I love to be at the sea. I love the uneven coasts more than sandy beaches. I can spend hours photographing waves rolling in and the water sputtering between the rocks. These sprays, unfortunately, appear in different places but never together at the same time. So, I end up with many, many images of the same scene, but with differences in the details. Wouldn’t it be nice, combining these images?
When having taken the single images by using a tripod all of the frames are identical and could be merged by using an HDR- or DRI-software like i.e. Photomatix or AuroraHDR. But, these programs automatically remove those parts changing from frame to frame. So, what else can be done now?
In the early years of digital photography, the dynamic range of the sensors wasn’t as good as it is nowadays. To increase the dynamic range one took a series of identical frames by using a tripod with different shutter speeds to get images where certain parts were exposed correctly and accepting other parts either underexposed or overexposed. After a mild development in the digital darkroom and exporting the images in TIFF format to preserve the most possible information, the frames were imported into a group of layers in i.e. GIMP, Photoshop, or similar software able to work with layers and layer masks to create the final image. You usually don’t need to create your images with a higher dynamic range this way anymore, because of improved sensors and special software taking over the hard work for you. But this workflow is still useful.
In case, you are kind of discouraged now, because I’m talking about layers and masks, don’t stop reading. It’s easier than it seems to be 🙂
I’m describing the necessary steps by using The GIMP because everyone can download the software for free from here (http://gimp.org/downloads). It’s available for macOS, Windows, Linux. For Photoshop the steps are nearly identically.
First, create a folder on your disk and put the original images in this folder. This step isn’t necessary but eases the process and makes it more clear. I took three images for creating my final image, but you can include as many as you want to merge at least two. Keep in mind, the details you want to reveal shouldn’t overlap.
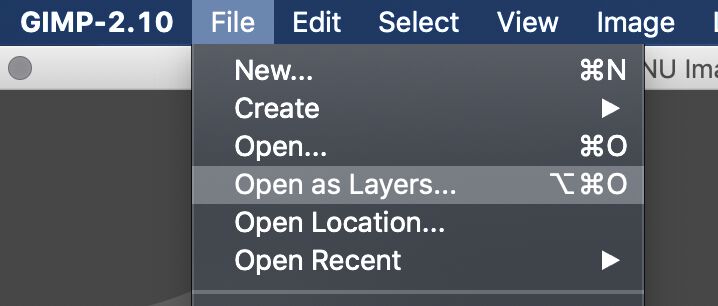
Now, you can start GIMP and click on “File” and choose “Open as Layers”. In the next dialog, navigate to the folder, you created in the first step and select all images in this folder, you want to merge. Now, you have a pile of images, but you only see the one on top of the pile. When clicking on the eye icon left to each image you can make a single (or more than one) image visible or invisible. You can always see only the uppermost one of the pile with the eye icon switched on. I recommend to re-sort the images now so that the image with the most details you want to preserve is the bottom image. For all of the other images, you have to add a mask: the layer mask.


There are two kinds of these masks: white (= full opacity) and black (= full transparency). What does this mean? Think of a sheet of paper you would lay on your photo. What do you see? Right, you only see the sheet of paper, but not the photo. Now, imagine taking scissors and cut a hole in the paper and lay it back on your photo. You can still see the while paper but through the hole, you can see a part of the image underneath the paper. That’s the principle of the layer masks. White means cover-up while black means the holes in the cover.

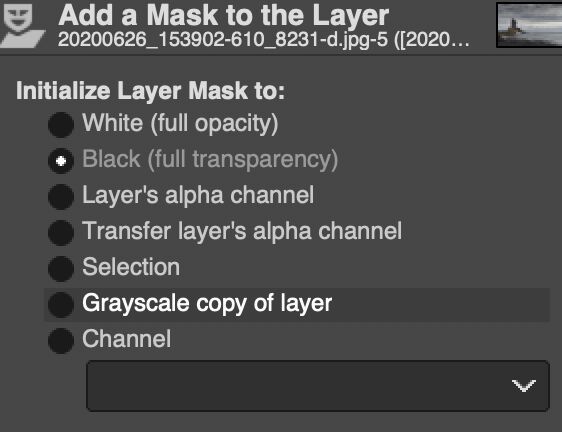
When adding a black layer mask to all image layers expect the background, you can only see the background. Make sure, all images are taken from a tripod and are neither cropped nor re-balanced along the horizon in post-processing. Otherwise, you must rearrange them now to make sure, they are laying exactly one over another. There are tools available to do so. Adjust the opacity of the upper (= moving) image and switch to the 100% view to do so. There are tutorials available online explaining these steps in detail, so check them out if necessary. I recommend leaving these steps to the final image and do as little as possible to the source images.
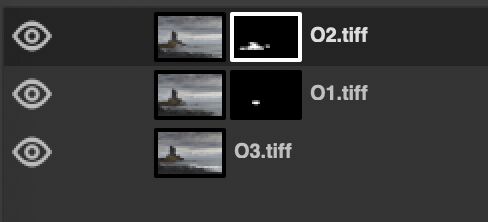
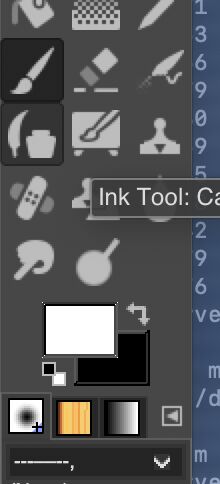
Pick the brush tool from the toolbox and select white color. Click in the black layer mask and paint the white color, where you want to make an additional detail visible. Do this for all details and on all layers masks. Simply paint the white color where a certain detail is located you want to discover and be included in the final image. You only need to paint upon the detail included in the image where you’re working on the layer mask. In case, you painted too much and want to revert it, change the color to black and paint over the white, or use the eraser tool. Imagine of doing a collage where you cut out different parts of other media and stick them on a background image.
After discovering all the details you want to include in your final image, save your work file as XCF (the native file format of GIMP) or PSD and then export it to TIFF. Despite you could also merge all layers to one and work further with this file, I recommend exporting and do the final work on this resulting TIFF file like removing dust spots with the stamp tool, balancing the horizon, and cropping the image. So, you could come back and adjust your work without the need of starting from the beginning.
When everything is fine, export it to JPG and you’re done:

(c) by Andre Krajnik
André Krajnik is an experienced photographer based in Germany. Besides landscape and travel photography, he loves wildlife, portrait, and wedding photography. He started photography in the early 1980s when he was in his senior years at school and run a parttime photo studio with his own lab for advertisement companies after finishing school for a couple of years. In 2008 he switched to digital. Because of the limited dynamic range of the sensors at that time, certain techniques were needed to avoid dull images because of areas either burnt-out or completely underexposed (= black and without any details) or both together in one frame. So, the digital darkroom became very important.
You can find him online at http://www.krajnik.de (in German) and at http://solaner.wordpress.com where he blogs in English.
Facebook = https://www.facebook.com/andre.krajnik
Instagram = https://www.instagram.com/solaner_/