Fotopro Eagle E6 and E9 Tripod / Gimbal-Head / Leveling Base Review by Paul Richman
All images © Pixels By Paul www.PixelsByPaul.com. Availability and pricing of Fotopro Eagle: Adorama | B&H.
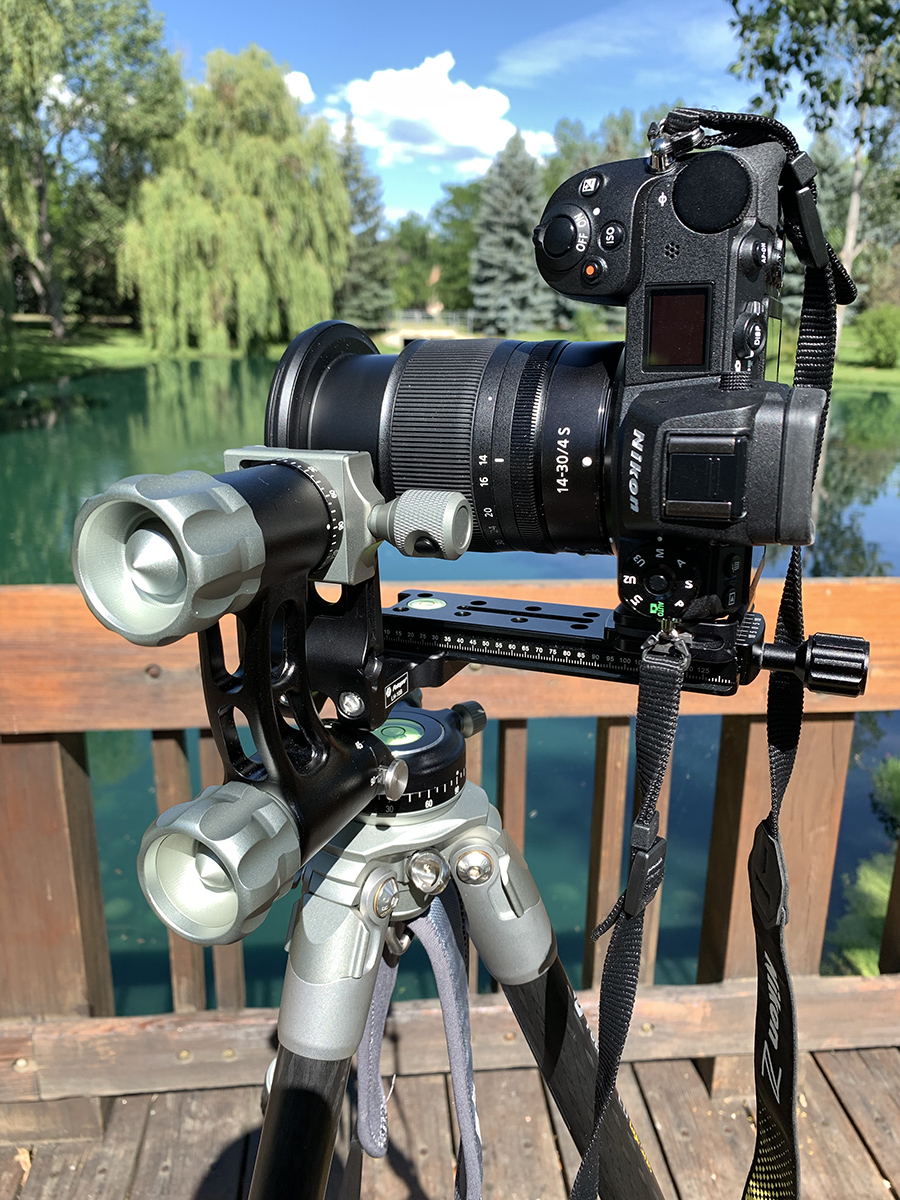
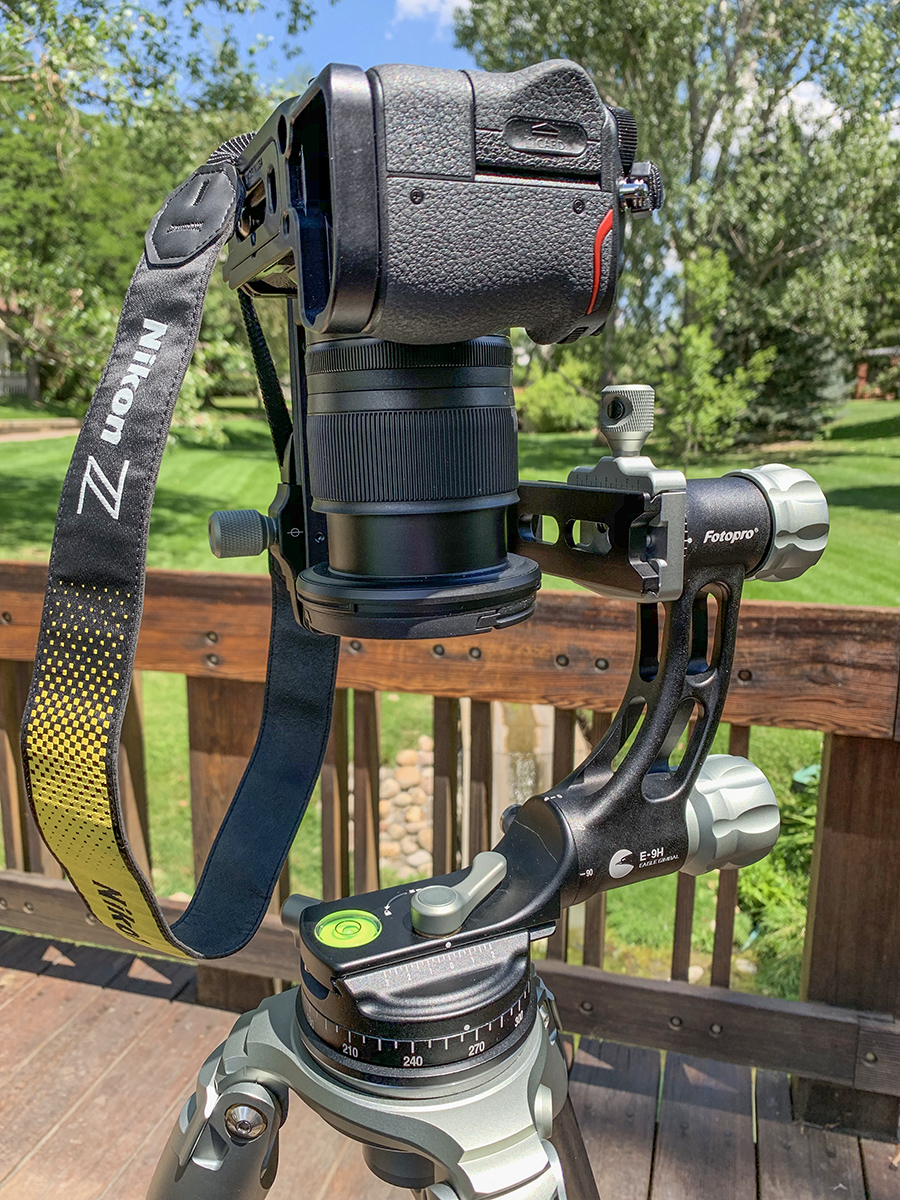
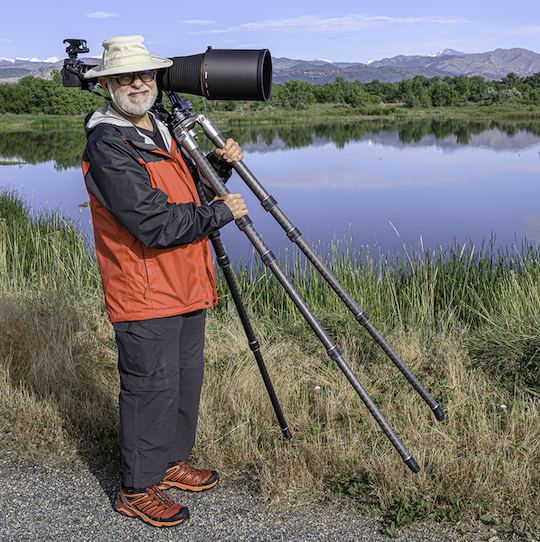
Nikon z7 + Nikkor 14-30mm F4 S lens on the Fotopro E6
INTRODUCTION
The Fotopro Eagle E6 and E9 packages each consist of a carbon fiber tripod integrated with a gimbal-head and a leveling-base, topped off with a custom carrying case. These packages are well thought-through and come with many useful innovations. The E6 hardware is lightweight and yet sturdy, beautifully designed and machined, and so nice to have and use. The E9 is big brother to the E6, being twice as heavy but otherwise quite similar.
Gimbal heads are typically used for action and nature photography, to follow both slow and fast movement especially when using long heavy lenses. Smooth panning with just the right amount of tension is essential for this. I find the tension on both setups just perfect, although one can adjust tension with the two panning knobs if desired. Here are example shots with fast movement:


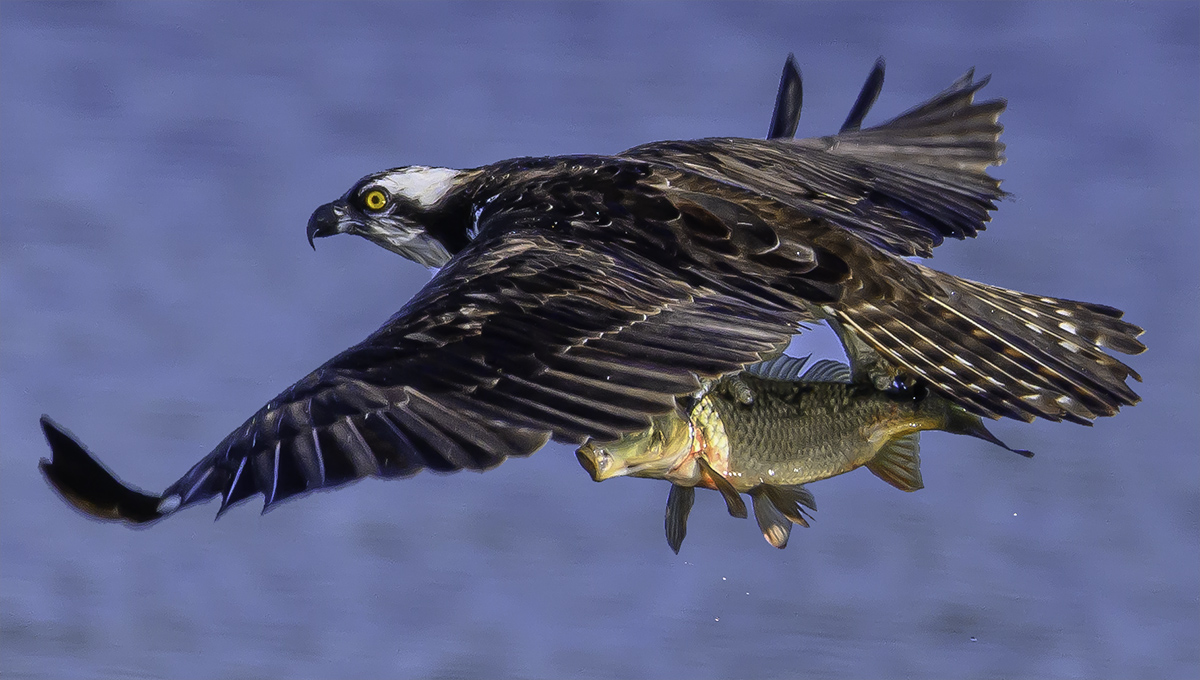
Osprey catches carp — E9 with Nikon z7 + Nikkor 600mm F4E + TC-17e ii
Even for slow to stationary subjects, if you’re shooting with a very long and heavy lens, solid support is needed both just to hold the heavy setup for long periods of time, as well as eliminate camera shake, which is magnified by long telephoto lenses. Here are examples of a slow subjects shot at 1030mm (Nikon z7 + Nikkor 600mm F4E + TC-17e ii), which would be equivalent to 1545mm on a crop sensor camera such as the Olympus E-M1 Mark 2, or 31x on a telescope:
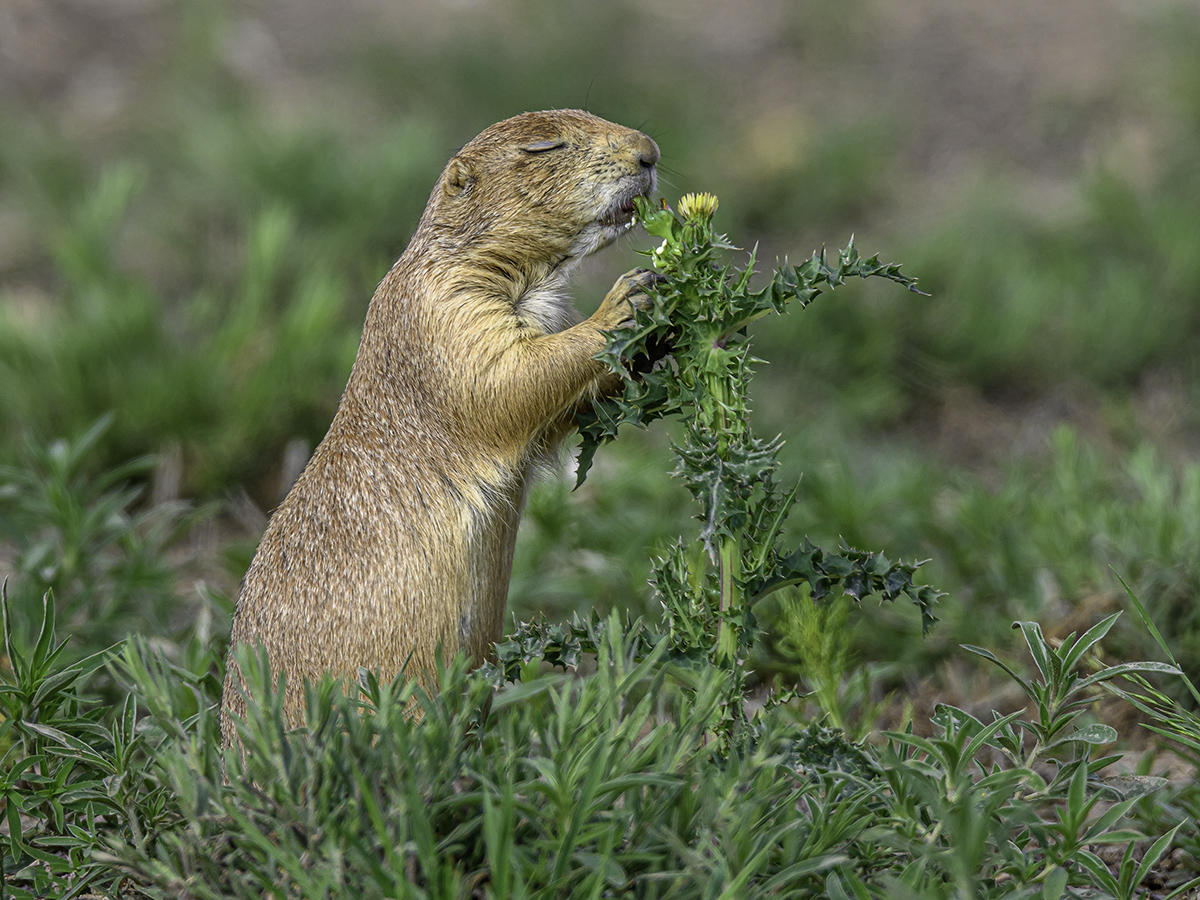
Prairie Dog Enjoys a flower — E9 with Nikon z7 + Nikkor 600mm F4E + TC-17e ii

White Pelican Group — E6 with Nikon z7 + Nikkor 600mm F4E + TC-17e ii

Great Blue Heron Parents 💔 and Young Baby — E6 with Nikon z7 + Nikkor 600mm F4E + TC-17e ii
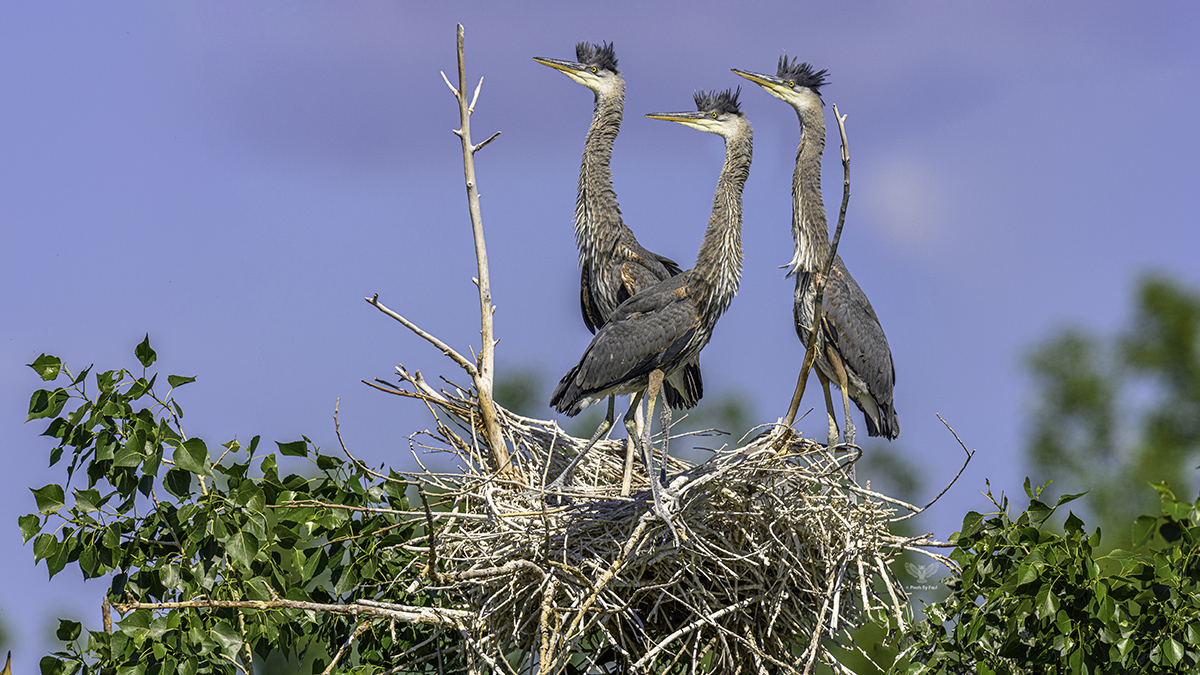
Great Blue Heron Babies 4½ weeks later, with “mowhawk haircuts” — E6 with Nikon z7 + Nikkor 600mm F4E + TC-17e ii

Great Blue Heron Fishing — E6 with Nikon z7 + Nikkor 600mm F4E + TC-17e ii
Reducing camera shake with long telephoto lenses is especially important when slower shutter speeds are used (perhaps at sunrise and/or to reduce ISO). When doing this, I use the Nikon WR-R10 / WR-T10 wireless shutter release as well. Here are some examples:

Burrowing Owl Baby — E9 with Nikon z7 + Nikkor 600mm F4E + TC-17e ii — Shot at F6.7 1/160th sec ISO1600 shortly after sunrise — This was cropped to 4436 x 3327px from 8256 x 5504 px
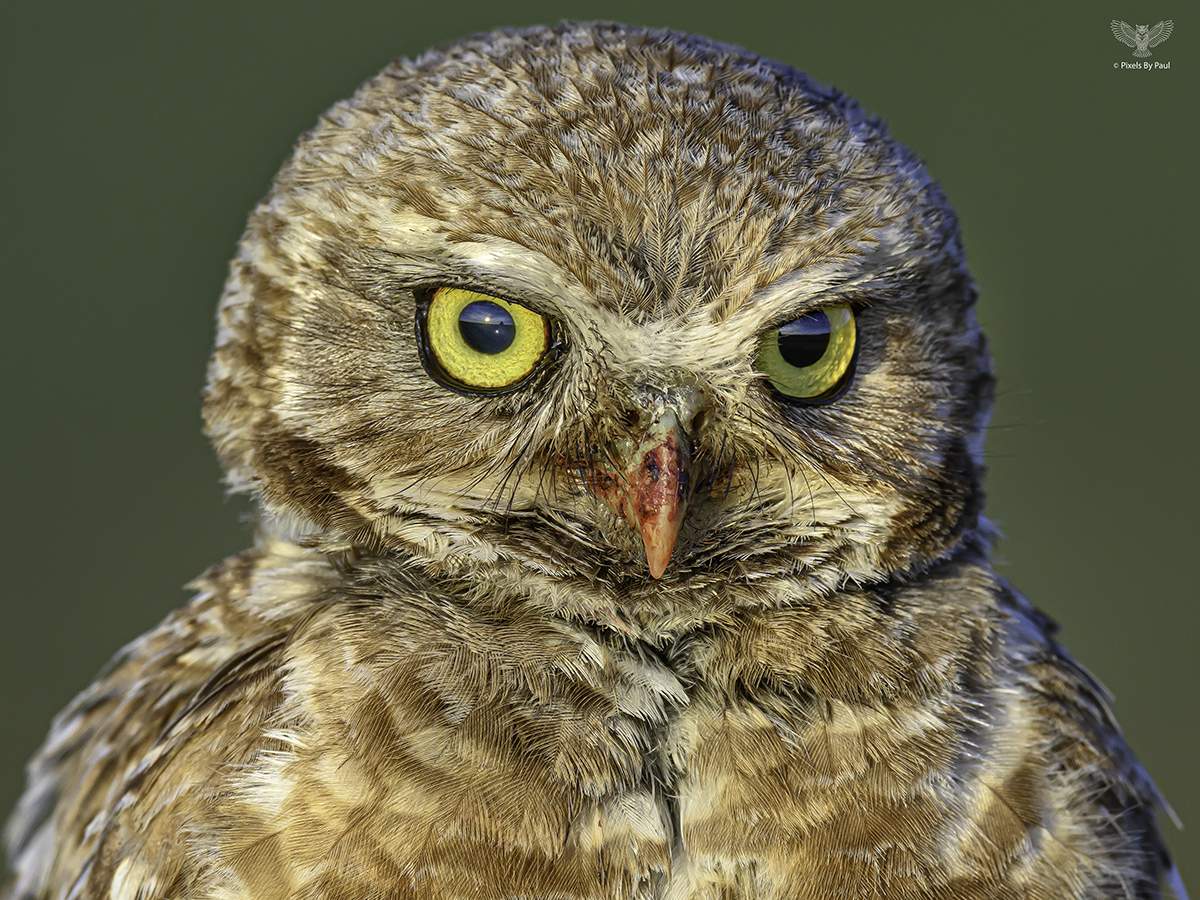
Burrowing Owl Mom — E9 with Nikon z7 + Nikkor 600mm F4E + TC-17e ii — Shot at F10 1/500th sec ISO640 shortly after sunrise (4313 x 3235 px crop)
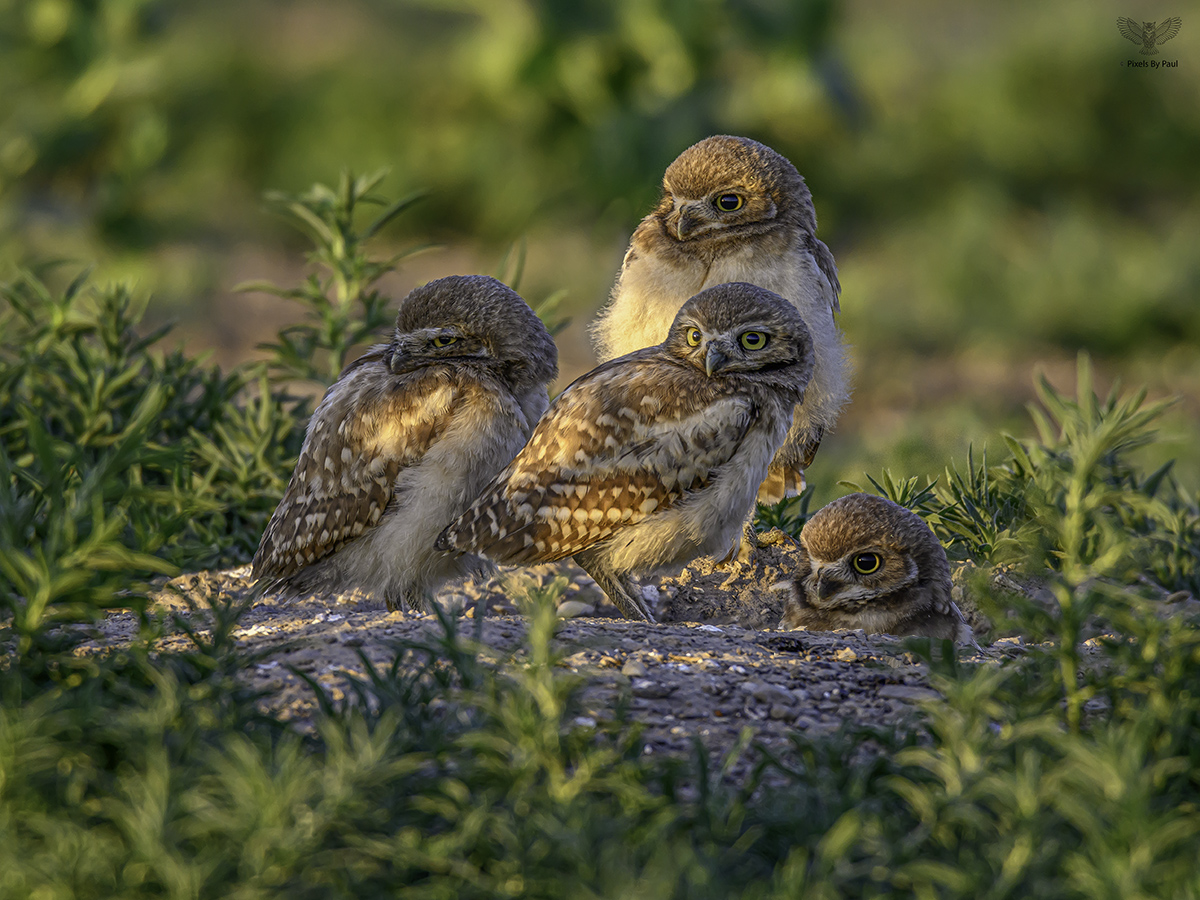
Burrowing Owl Babies — E9 with Nikon z7 + Nikkor 600mm F4E + TC-17e ii — Shot at F6.7 1/320th sec ISO640 shortly after sunrise (4937 x 3703px crop)
Gimbal heads can also be used with any lens in multi-shot-stitched photography to produce high resolution images such as panoramas. They are better suited to this than ball heads because ball heads can’t be nodal aligned. Nodal alignment is needed when there are near and far subjects involved in such images. This is discussed further below. Here is an example panorama:
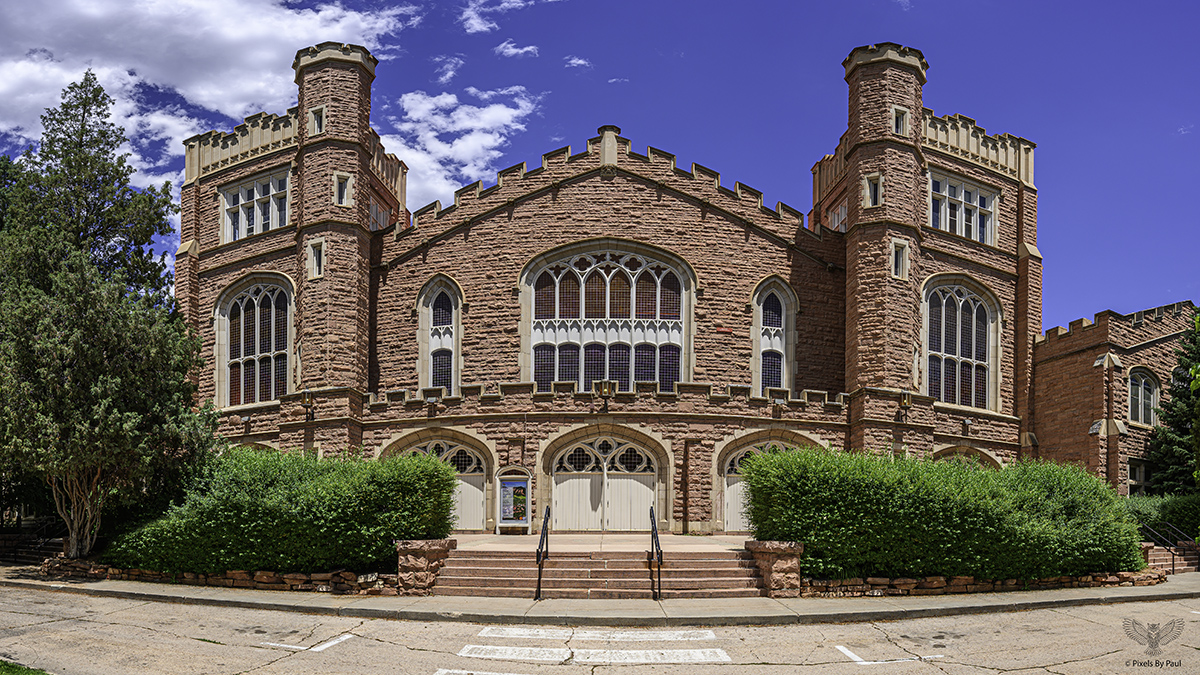
10 shot 2 row panorama — E6 with Nikon z7 + Nikon S 14-30mm F4 at 14mm
I had to shoot this image close up to avoid trees that would have blocked parts of the building. Hence I used 14mm shot vertically in a multi-row panorama and stitched it together in Lightroom. The first row of the panorama was shot level (with the face of the building parallel to the sensor in the middle shot) so that vertical lines would be straight. The second row was aimed up to get the tops of the towers, which were cut off in the first row of shots. Quite a bit of the bottom was cropped away in the final image above.
Gimbal heads are often big and heavy, and often used with heavy tripod support. Tripod bags generally can’t carry a gimbal head fully assembled and mounted on a tripod / leveling base. Hence one must carry such a setup in separate parts and put it together for use, or carry an assembled setup in a large, typically oversized bag of some sort. The E6 / E9 gimbal design and custom cases solve this problem nicely.
Disclosure: I paid retail for my Fotopro gear and get nothing for this review. I just love the E6 and E9, and think the E6 is the perfect companion of compact mirrorless cameras like the z7. When I get this excited about a product, I like to share the excitement, especially when the product has not yet received a proper review. You can google “Fotopro E6” or “Fotopro E9” to find buying options.
INNOVATIONS
The E6 and E9 come with many innovations:
1) The gimbal head swings up or down in 45⁰ increments with click-stops. This is a first-ever for gimbal heads.
2) This swing enables shooting straight up or down.
3) Most importantly, it reduces the overall “folded” length to ~19” (E6) and ~25” (E9), for compact storage and carry of the gimbal mounted on tripod and leveling base.
4) Safety buttons on the quick release knobs offer a second level of secure camera-hold, kinda’ like an Arca Swiss Fliplock, but different and somewhat easier to operate.
5) Horizontal rotation click points every 15⁰ can be enabled by turning a small knob on the gimbal (E6 only). This is quite helpful when doing panoramas. The E9 gimbal base has clear markings every 7.5⁰ for this purpose.
6) The tripod legs are superbly crafted and operate easily, with firmly felt, large tightening rings that are quick and easy to work.
7) The included leveling base built into the tripod operates better than any other I’ve used. It is integrated so well into the tripod base that it adds very little height to the leg assembly, which helps folded-down compactness for carry.
8) The fitted cases are top quality in materials and design, and a sorely needed first-ever for tripod / gimbal-head / leveling-base fully-assembled carry:
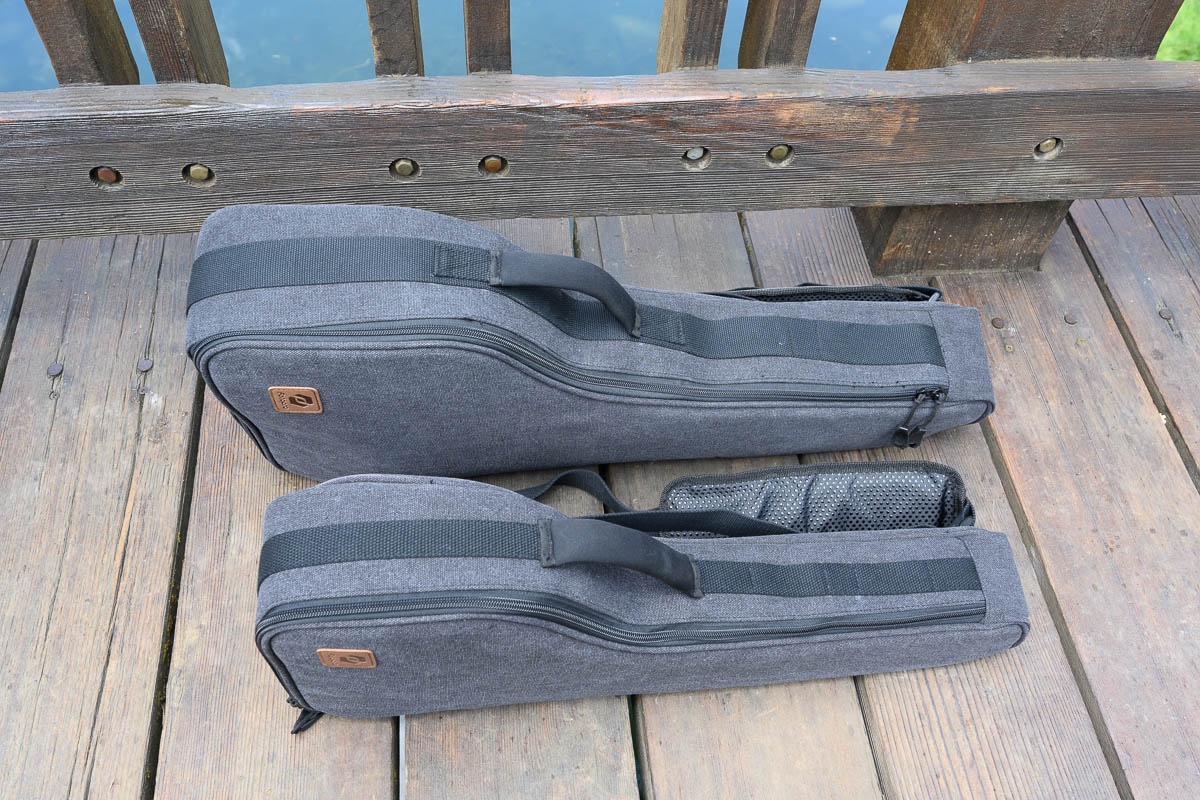
E9 and E6 Cases

E9 and E6 Cases

E9 and E6 Cases
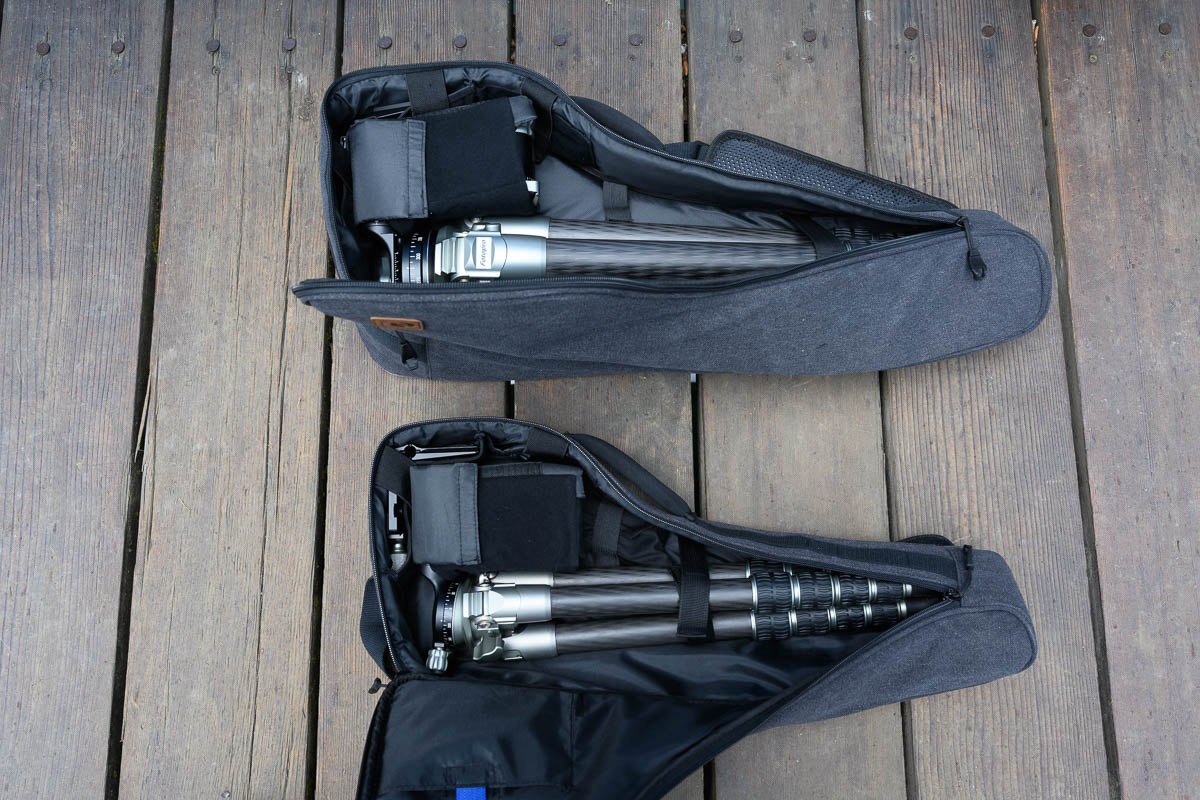
E9 and E6 Cases
This E6 and E9 packages get high marks for extreme ease of setup / tear down, making them a pleasure use. The E6 is especially easy to carry because it is so very lightweight. The E9 with its compact carry case is heavy but still ok to carry.
WHY I LIKE THEM SO MUCH
I dislike disassembling a gimbal head from tripod, especially if I’ve locked it down with 3 underside Allan screws. To avoid this, I’d been carrying my fully assembled RRS FG-02 gimbal + RRS Universal Leveling base + Sirui Tripod in a flimsy, oversized light-stand bag, the only camera gear bag I could find to fit it all, assembled, without being humongous. Tennis racket bags can also be used, but I’m not fond of them either for this. Both provide no padding and little protection, and are rather unsightly for this use.
I’ve used the E6 and E9 with my Nikon z7 and Nikkor 600mm F4E as well as Sigma 60-600mm Sport lens. They work well together, offering smooth panning.
However, vertical panning was quite choppy with two of three E6 copies I tested. The 3rd E6 proved quite smooth both vertically and horizontally, as did my E9. So be sure to test the E6 copy you get!
I have no reservations about the tripods (with builtin leveling bases), which have quickly become my favorites.
The E9 is not much bigger in its case than the E6 (see Images 14-17 above), but it is much heavier, 2.08Kg/4.58Lb vrs 4.2Kg/9.25Lbs. At twice the weight, it is almost too heavy. Nevertheless, I really like it with my 600mm F4E lens. It offers extremely solid and steady support with smooth panning in all directions. With fewer leg sections, it’s quicker to deploy, and it can go much higher, so shooting higher subjects does not require stooping (depending on your height).
PANORAMAS
Recall that nodal alignment is needed for shooting multi-shot-stitched images like panoramas when there are near and far subjects involved.
For our purposes here, we will define nodal alignment as the process of aligning the rotational axis of the lens’ entrance pupil so that this axis is stationary when the lens is rotated on a gimbal head. The entrance pupil of a lens is the point about which a lens is rotated where close and distant subjects focused on the sensor plane maintain their relative positions to one another. Successful multi-shot photography requires that the axis of the camera’s rotation be positioned at the entrance pupil of the lens. Otherwise, foreground and background subjects change their relative positions when the camera pans, causing misalignments and stitching errors between shots.
This alignment is important for the best quality results. However, it becomes less critical the further away your subjects are from the lens. As long as your closest subject is well away from the camera, entrance pupil misalignments cause few, if any, stitching problems – particularly when using very wide lenses. Entrance pupil misalignments increase in significance the closer your foreground subjects are to the camera. Software algorithms also play a role here. Some software can correct small nodal alignment errors better than others. Auto Pana Giga Pro is probably the current and long-time best at this although Lightroom CC Classic has gotten better lately.
Nodal alignment is a 3 step process:
1. Level the gimbal head and camera. (Easily done with the E6 /E9 leveling bases.)
2. Find closely aligned near and far objects in your desired image (or elsewhere), and move the nodal rail back and forth until parallax is resolved. Test parallax alignment at each rail position by moving the camera/gimbal left and right. Alignment is achieved when the relative positions of the near and far objects remain constant as you swing the camera. I use z7 magnified view to check this, setting the focus point all the way to the left, and then all the way to the right. This gives the widest swing possible for best results. See Images 19a-d below.
3. Aim the camera straight down at the gimbal base, and position the center of the image over the center of the gimbal by sliding the cradle in its arm-clamp. Put a bubble level on the back of the camera to make sure it is really level.
It is possible to sufficiently nodal align my Z7 + Nikon 14-30mm F4 S lens on the E6 to mostly get good stitched results, but results can be a bit inconsistent in complex panoramas like the one in Image 20 below. Step 3 alignment is off by almost an inch, certainly more than I like:

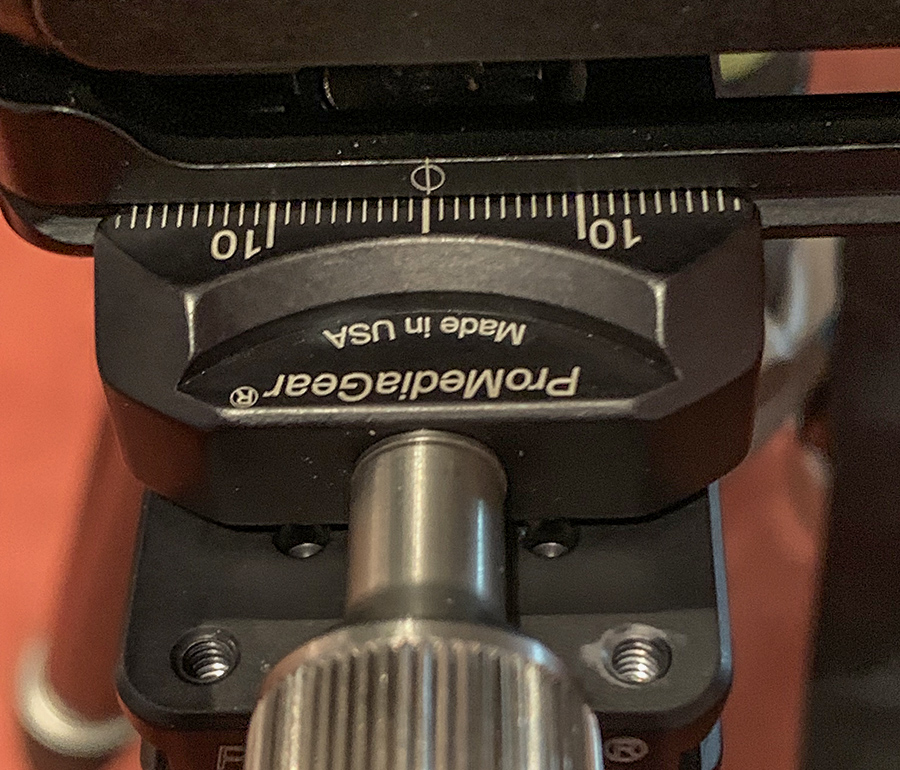
E6 Nodal Alignment Step 3 — Camera on cradle and pointing straight down at the E6 gimbal base.
The crossing point of the green lines should be over the center of the bubble level for proper nodal alignment.
Instead they are off by almost an inch!
Moving it any closer to center would shift the cradle too far, making it hit the gimbal base during rotation.
I tested multi-shot shooting with and without the cradle in various configurations. I wound up preferring use of the cradle. I mounted my camera on a 6” nodal rail using the “L” part of my L-bracket, and mounted this on the cradle, as shown in Image 1 above. I put a bubble level on the back of the camera to point it straight down and got the above alignment with the E6 cradle as low as its safety screw would allow.
If I could have moved the E6 cradle even lower (which would move it more left in the picture above), alignment would have been perfect, but that would make the bottom of the cradle hit the juncture of the gimbal arm and base, blocking it from proper vertical rotation. As you will see below, the achieved alignment was sufficient for stitching a complex 3 row ~180⁰ panorama with near (5 feet) and far objects. Results were a little inconsistent but still quite good.
Better nodal alignment would likely be required for closer near objects or greater consistency. I tried this many times. Occasionally Lightroom could properly stitch the panorama, but usually it could not. Auto Pana Giga Pro was usually, but not always, successful.
Image 19a below shows the nodal alignment point on the 6” rail on the E6. (I wish I could find a 1” longer rail!). Images 19b-c-d show the alignment achieved, which is excellent.
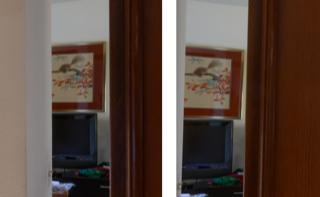
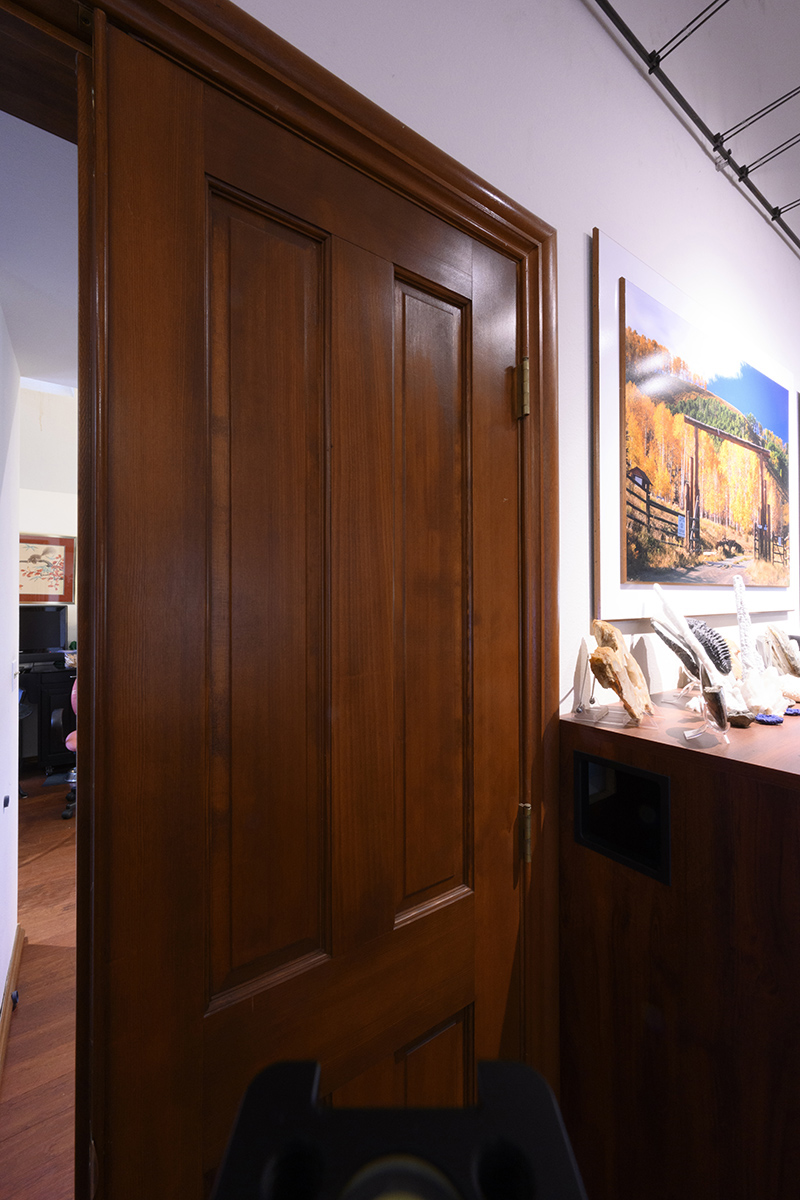
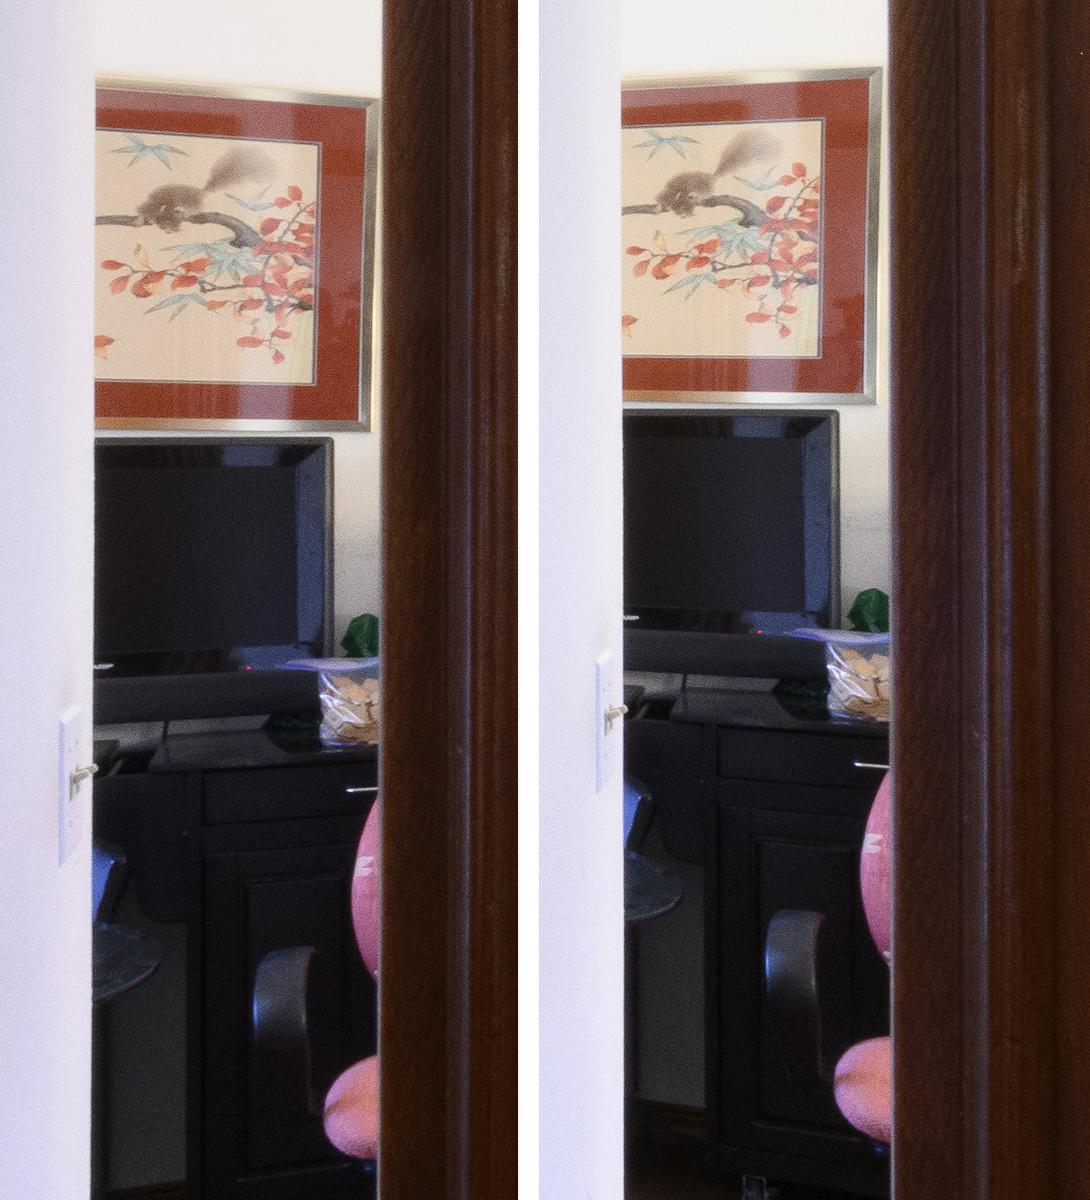
E6 Nodal Alignment Step 2 — The left picture shows the rail position used to achieve the alignment shown in the right pictures.
The left edge of the close door (~1’) is the near object, and the right edge of the gold framed squirrel painting is the far object (~15’).
The middle pictures show left facing and right facing alignment shots.
The right image is a combination of crops from the left and right facing images.
I shot at F22 here to get a clear door line in the foreground.
Using this setup, I took the following 3 row, 21 shot, 13,002 px by 7,907 px ~180⁰ panorama. This one stitched together perfectly in Lightroom:
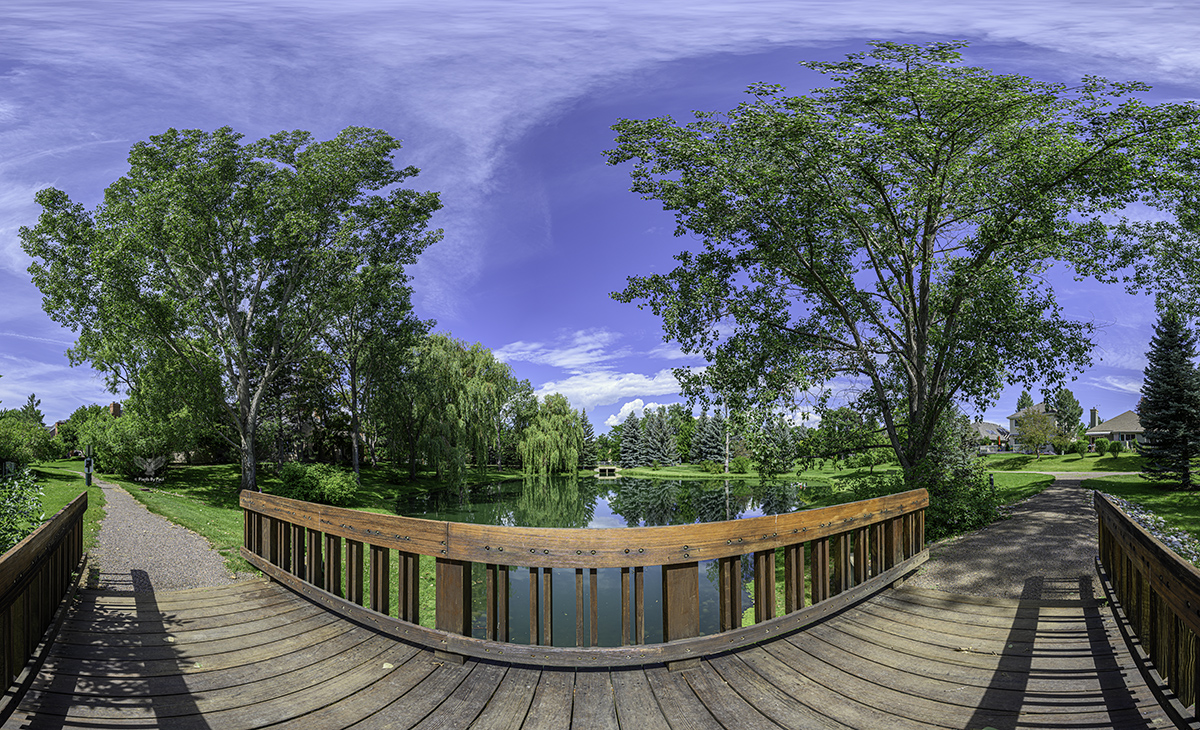
3 row, 21 shot ~180⁰ panorama
The bridge rail is 5 feet away from the lens, so reasonably good alignment was required.
I tried this multi-shot panorama with the E9 also. The E9 seemed to perfectly nodal align, but stitching results were actually much worse than with the E6, with good stitching never achieved even in Auto Pana Giga. This is a tough panorama for stitchers, being 3 row and 180⁰ with rather near objects, but with proper nodal alignment there should be no problem stitching it at least in Auto Pana Giga. With a Roundshot motorized head, I’ve used Auto Pana Giga Pro to stitch allot of 360⁰, 50 shot, 17mm lens panoramas, the results of which are on display in the Tiny Planet folders on my website.
Here are images showing the nodal alignment setup for the E9:

E9 Nodal Alignment Step 3 — Camera pointing straight down (using bubble level on back of camera) – lines and circle added in the left image (21a) to identify the center.
Gimbal arm was slid back and forth until the horizontal center line in 21a was over the “0” marks on the gimbal base.
Cradle was shifted back and forth until the horizontal center line was over the center of the bubble level.
Shown to help you visualize the movements of the cradle and gimbal arm. Their movements are perpendicular to each other.
The righthand image (21c) shows how the camera L-bracket must be aligned to the clamp.

Rail position for E9 nodal alignment

Left, right and cropped images showing the E9 nodal alignment achieved.
The near object is the closed door on the right, which was about a foot from the lens.
The far object was the right edge of the squirrel painting’s gold frame, at about 15 feet.
To be honest, I’m at a loss to understand the stitching problems I’m having here. I have not done allot of manual multi-shot shooting, as I’ve generally used the Roundshot motorized head for this. It is possible (but highly unlikely) that I occasionally bumped the tripod a little between some shots, although I tried to be very careful about this. The motorized head does not require any touching of the camera / tripod during the multi-shot shooting. I’ve asked Fotopro representatives to prepare nodal alignment guides that would hopefully sort out these problems.
E6 / E9 DIFFERENCES
Here are the major differences:
1. The E9 is not much bigger in its case than the E6 (see Images 14-17 above), but it is much heavier, 2.08Kg/4.58Lb vrs 4.2Kg/9.25Lbs. At twice the weight, it is almost too heavy for me. (But I’m small and short.)
2. The E6 folds down to ~19”, the E9 to ~25”.
3. Horizontal rotation click points every 15⁰ can be enabled by turning a small knob on the E6 gimbal. The E9 does not offer this, but does display clearly etched degrees all around its rotating base, which does help.
4. The gimbal arm can be adjusted (slid) left and right on the E9 (e.g., for obtaining perfect nodal alignment), but not on the E6:
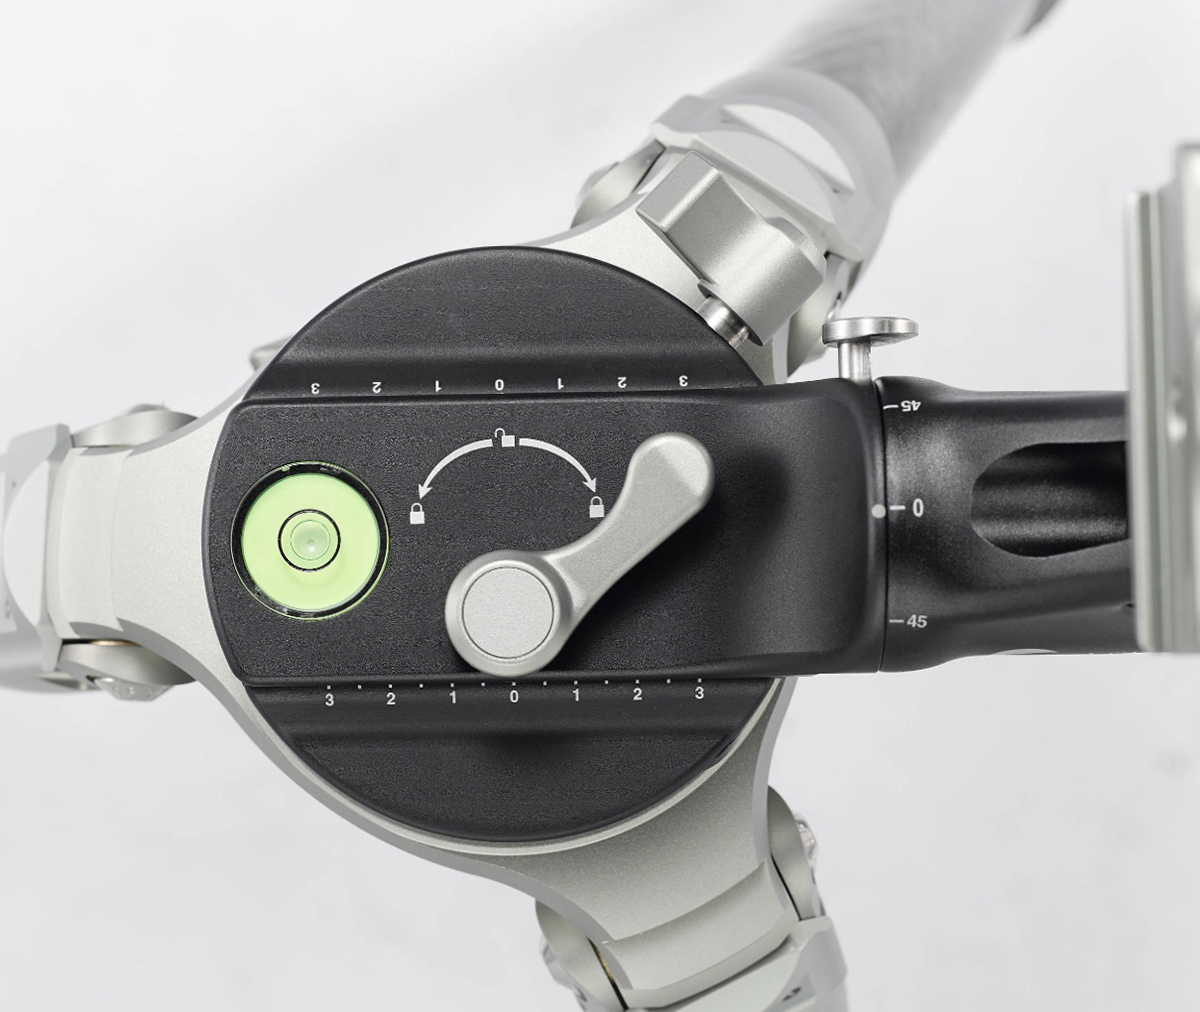
E9 gimbal base (with repositioning and locking capability)

E6 gimbal base
SUMMARY AND VERDICT
What I liked:
1. Fit and finish are superb.
2. Ease of carry and setup set a new standard.
3. Carbon fiber makes the E6 so very light.
4. The deluxe carry bags are beautifully made, with a padded compartment for the cradle, a protective cover for the gimbal, and velcro straps to hold down the tripod. A 2nd set of velcro straps were intended for the gimbal handle, which I don’t use. Instead, I store the nodal rail with those velcro straps. The bags have a well padded carry handle and chest strap. They are made so well you’d think they were by Peak Design or ThinkTank! (See Images 14 – 17 above.)
5. The E6 head folds down for storage into a ~19” package. The E9 folds down to ~25”.
6. Since there’s no center column, tripod legs do not need to be swung up for storage, as do most tripods with center columns. This saves time and effort.
7. Smooth panning (if you get a good copy of the E6!).
8. Horizontal rotation click points every 15⁰ can be enabled by turning a small knob on the gimbal (E6 only). This is quite helpful when doing panoramas. On the E9, degree-markings serve this purpose.
9. The tripods are superbly crafted. They have quickly become my favorites.
10. The included leveling bases are integrated so well that they take up almost no extra space, helping to minimize folded length.
11. A well-made gimbal video-like handle is included, along with a set of extra feet and some extra hardware, as well as full manuals.


What could be improved:
1. I wish better nodal alignment could be achieved with the E6 and my z7. Better alignment would certainly give me more confidence when using this setup for multi-shot-stitched photography. I would worry less about taking the shots and then getting home to find that they won’t stitch. If the cradle were taller and its bottom thinned to allow a lower positioning without blocking vertical rotation, far better alignment could be achieved. Or perhaps the developers can find another way?
2. A professional nodal alignment guide for the E6 and especially the E9 is needed. While my attempts at E9 nodal alignment seemed to work, they did not yield stitchable results for the panorama in Image 20 above, even though many attempts were made.
3. The E9 package is almost too heavy for me. I’d love a significantly lighter but similar version, even if it were a bit smaller.
The E6 price of $1099 seems fair to me, given all that you get:
1. A superb gimbal head with many innovative firsts.
2. A superb carbon fiber tripod.
3. A superb integrated leveling base.
4. A superbly crafted carry case.
5. A removable video-like handle for the gimbal head.
6. An extra set of tripod feet.
7. A lens plate.
8. A cover for the gimbal head while it’s stored in its case, to prevent accidental scratching from the other gear in the case.
I also feel this way about the E9 price of $1399.
As a bonafide gear-head, I highly recommend both the E6 and, if you use large, heavy lenses, the E9! I give them both 4.9 stars (out of 5). The E6 would get 5 stars if it allowed better nodal alignment with my z7. The E9 would get 5 stars if it could be made a couple pounds lighter, perhaps by making a slightly smaller version.

ABOUT THE AUTHOR
The author carrying E9 with Nikon z7 + Nikkor 600mm F4E + TC-17
BACKGROUND: BS and MS in Mathematics and Biometrics from the University of Cincinnati, and MS and PhD in Computer Science from Stanford University. Graduated in their 2nd Computer Science PhD graduating class way back in 1968. Worked at Bell Labs first in Murray Hill NJ (publishing further results from my PhD thesis for 3 years) and then for another 30 years at the Denver Branch Labs, in advanced development. Retired in 2001 (with 23 patents) to focus on photography.
PHOTOGRAPHY: I’ve enjoyed photography since my early teen years. I’ve had a B&W dark room and much later, a color darkroom. Being a computer nerd, I’ve never been comfortable with chemicals. So the digital age of photography was tailor made for me. I’ve sold many many fine art prints at my gallery in the Millennium Hotel in Boulder Colorado. I closed that gallery several years ago. Now, at 76, I’m fully retired from business related activities, and doing photography just for fun, just for me. (Of course, if others like some of my photographs that is a terrific bonus!)
As you can see from my website here, I enjoy a variety of photography venues: nature, landscape, wildlife, birds (I love birds!), travel, architecture, “tiny planets”, fisheye, abstract, macro, etc.
I’ve come to enjoy the social aspects of photography as well. Having friends who are passionate about photography is great fun. We share in photographic outings and/or in enjoying each others photographic works. We grow each other’s skills and find new subject matter for each other.
I only write equipment reviews when I get excited about a new product that has not received sufficient attention. That is the case here.
PHOTOGRAPHY RELATED PUBLICATIONS:
“ARCA-SWISS C1 Cube a.k.a The Magic Box”, September 24, 2010 by Paul L. Richman, Ph. D.
“Hidden in Plain Site”, October 5, 2011 by Paul L. Richman, Ph. D.
I’ve also published photographs in the National Geographic (a full page spread) and a London newspaper (photographs of an unusual brown pelican).
EQUIPMENT: In the past, I’ve used Nikon (F, D100, D3, D3x, D800e, D810 and now z7), Canon, Leica (M9), Pentax, Olympus (E-M1ii, Pen-F), Panasonic (GH-5, G9) and Sony (ar Mark 1 and 2) cameras. My current camera is the Nikon z7. I’m as much a technologist (gear-head) as photographer, and so greatly enjoy using the latest and greatest gear. I shoot only RAW and use Adobe Lightroom CC Classic and Photoshop CC for post processing, along with many plugins (Topaz, NIK, Imagenomic, ….)
I no longer make large prints. I mostly want to see my new images in large print size, but printing/mounting large is costly, especially if one keeps swapping out pictures. So now I view my images on my iPhone XS Max, iPad Pro and especially my huge (for a Mac monitor) 55” NEC monitor. I WOW myself and friends when I zoom in on high Rez files. And I love the crop-ability of my z7 46MP sensor.
The S lenses now coming out for the Nikon Z mount are compact and excellent, although the selection will be scant for quite awhile. Thankfully, all the latest Nikon F mount lenses, even those from 3rd parties, work extremely well with the Nikon z cameras with the Nikon FTZ adapter. The Nikkor 300mm PF F4 lens offers incredible image quality, lightness and compactness, and works extremely well with all the latest Nikon teleconverters. The Nikkor 500mm PF F5.6 lens is so very light, compact and sharp (for its focal length and aperture). The Nikkor 8-15mm Fisheye lens is superb, really two lenses in one for me (circular full-180⁰ fisheye, and also a full-frame fisheye). With it one can take fun images almost anywhere. The Nikkor 600mm F4E is a superb long telephoto lens. I use it mostly with the TC-17e II for 1030mm of reach. The Sigma 14mm F1.8 is a big and heavy but superb ultra-wide lens. If you get a good copy, the Nikkor 14-30mm S F4 lens is superb and sharp corner to corner at all settings, setting a new standard in compact ultra wide angle zooms. This Nikkor 24-70mm S F2.8 and F4 lenses are superb. And the Sigma 60-600mm Sport lens is excellent.
For support, I now prefer the Fotopro E6 and E9 tripod, gimbal, leveling-base setups, as discussed in this review. I also like the KakaFoto G4 geared head, which I now use on a Fotopro E6 tripod, and carry this assembled in an E6 case. I use the Kirk window In the past, I have used heads and tripods from Sirui, 3-Legged Thing, RRS, Arca Swiss, Acratech, Markins, PhotoClam and others.
If you have an interesting idea for a guest post, you can contact me here.