Shooting wide while traveling light
Very often we carry only a camera or two with just a couple of lenses in our pack while we are shooting. It is especially true nowadays for photographers who travel by air with the size and weight restrictions by most airlines as well as airports. Just today I read the news that the US is going to pass a bill to restrict electronic equipment larger than a smartphone for carry on luggage. At this moment we are already paying for the extra weight and baggage outside of the allowable limits. So one can imagine how this will affect all photographers like us.
As a traveling photographer, I always encountered the question of what to bring for a particular shoot based on what I can carry all the time and not left in the car, coach or hotel. It is pointless to carry equipment that is not with us all the time or don’t have time to change over due to the circumstances. Worst still if we are tired out every-so-often that we have to take a break every 45 minutes or so to rest our body and feet, while others are moving ahead.
I wouldn’t dispute that prime lenses or professional zoom lenses are better due to their specific design or larger aperture opening. But most of the time we will have to carry more lenses or weight, especially the latest range of zoom lenses which uses filter size that is larger than 77mm. This also affects the number of accessories like filters that we have to carry.
Take for example we can carry lenses like the Nikkor 14-24mm f/2.8G, the 24-70mm f/2.8G and the 70-200mm f/2.8G to give us the coverage of 14 to 200mm or 114 º to 12 º 20’ angle of view. Or we can also travel light and small by carrying the Nikkor 24-120mm f/4G VR and the 70-300mm f/4.5-5.6G VR and still give us as much coverage or even more. I am very sure many will say: What the heck are you talking about? How can a 24mm lens give you as much coverage as a 14mm? Just hold on to your attack and I will show you how. Next is how can a f/4 or a f/4.5-5.6 lens shoot as well as a f/2.8 lens in the dark. This I will have to show you in another article if I have the time to do it. It is basically due to the capabilities of most Nikon cameras coming out since the D800 and D7000. Yes, I know that people said that it can’t use above ISO 800 let alone ISO 12800. The main point here is that one is trying to capture an image that is still useful rather than not being able to capture the image or being destroyed by using flash. The other thing is the printing is no larger than A4 size most of the time. If we don’t notice it at A4 than it should be considered acceptable.
Okay! Let me start with the main topic of discussion for today, and that is shooting wide while traveling light.
Many a time while we are traveling, we will see something that we will like to shoot and found that we do not have the right lens to get the job done. For example, shooting a scene much wider than a 24mm lens can capture or shooting a scene that requires a longer lens. For the later, it will be easier with a higher MP camera that one can crop.
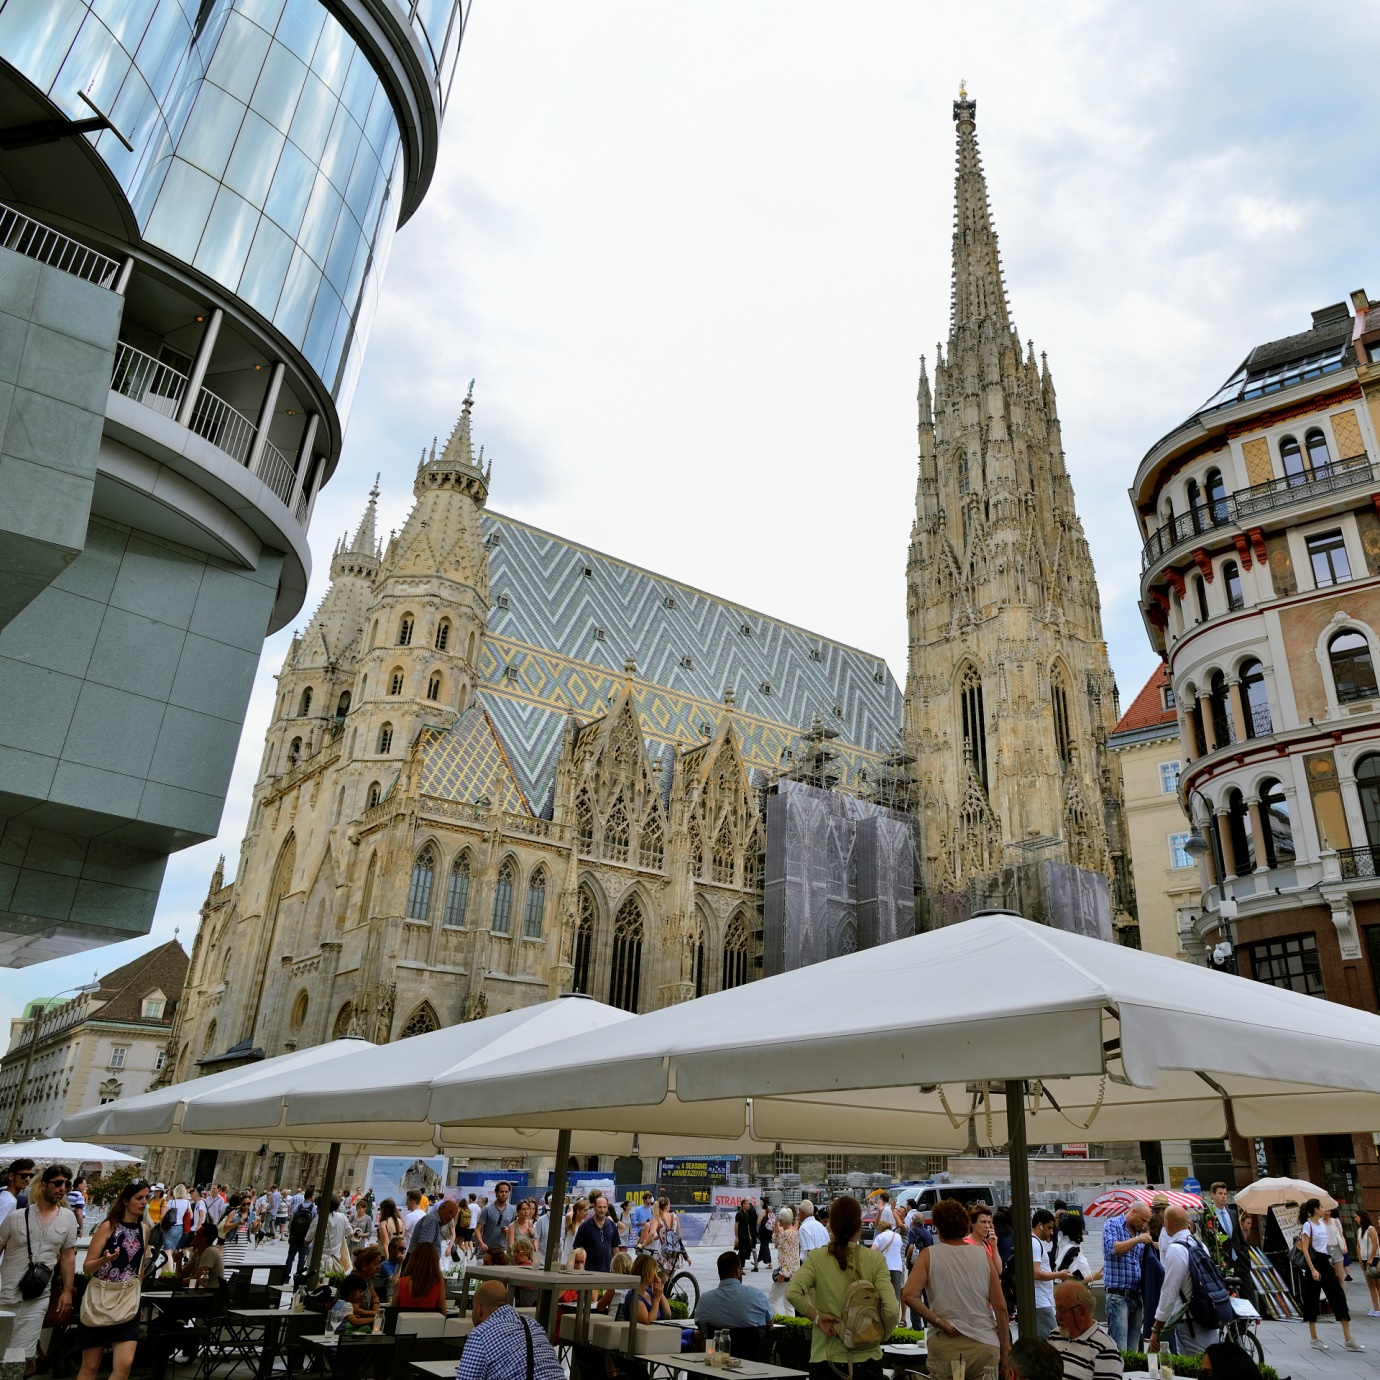
For example the following scene in Vienna at around 7:45 pm in the evening with many people moving around and have a 24-120mm f/4G mounted on the camera with another 20mm f/1.8G prime in the backpack with no mono or tripod.
One can only capture a scene like this with the top of the St. Steven’s Cathedral missing,
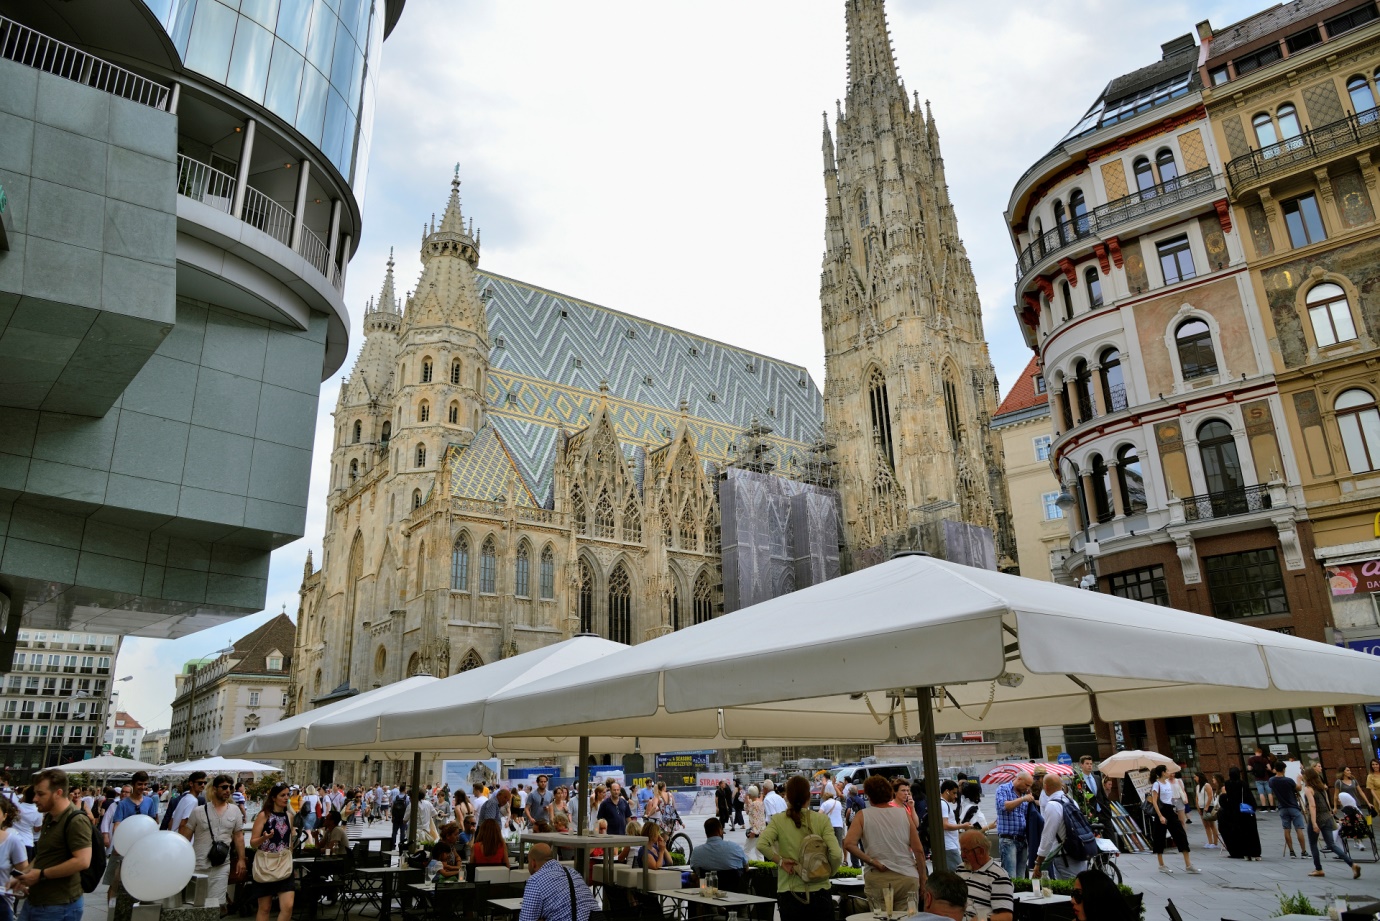
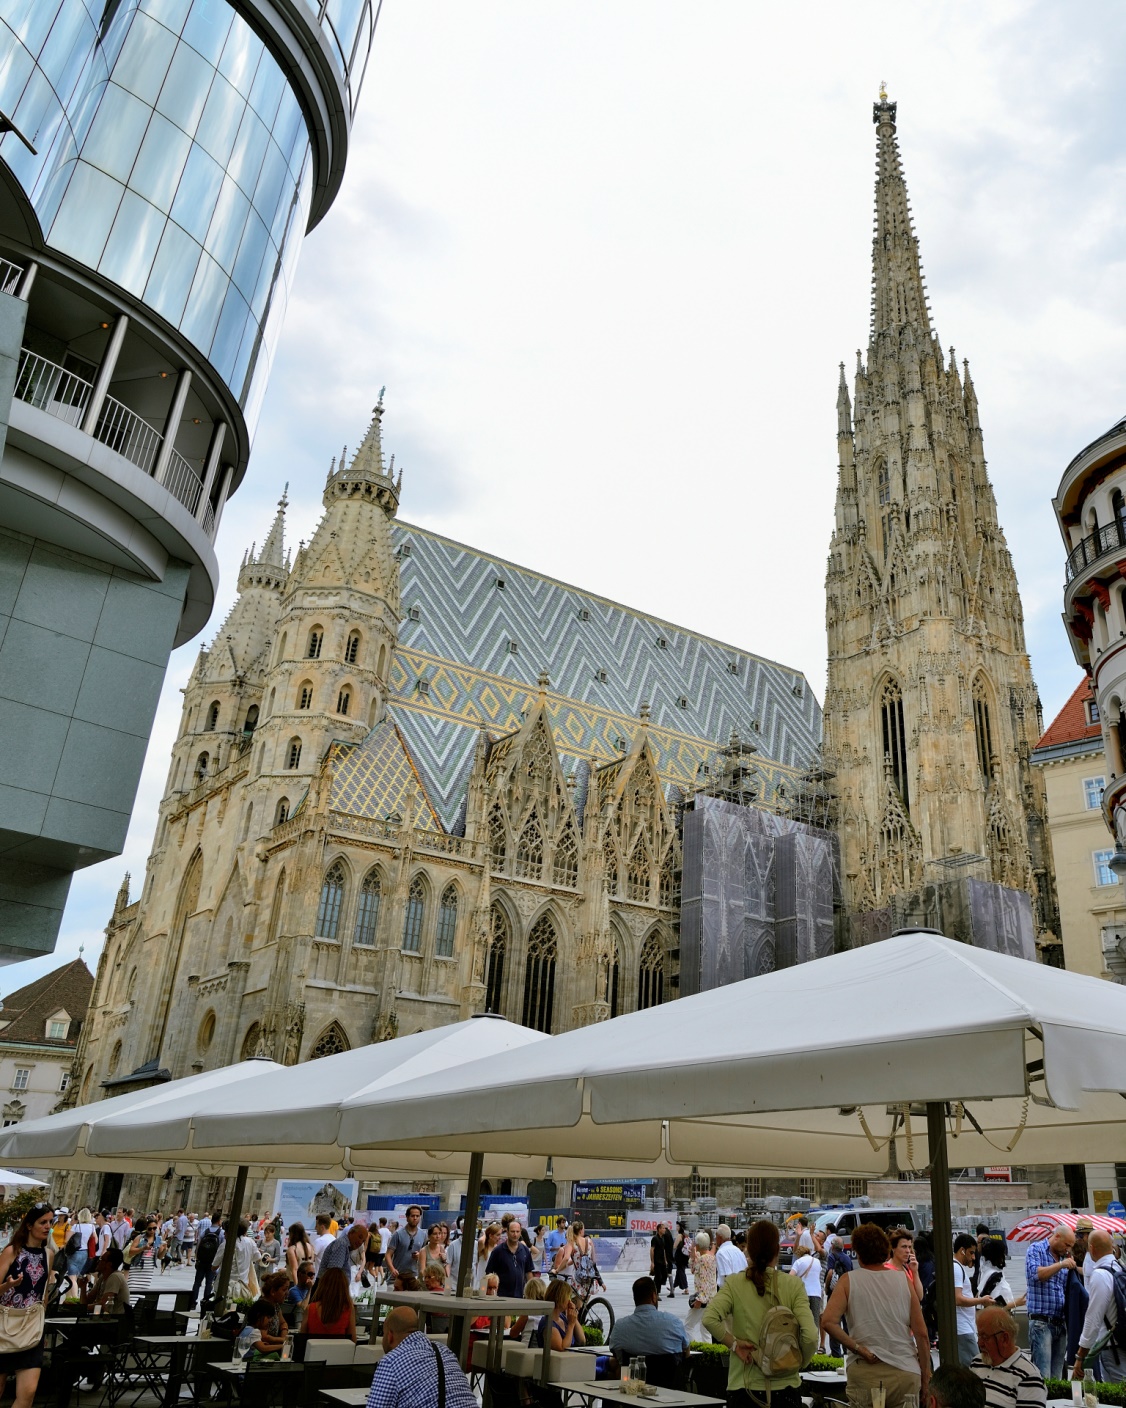
or with the top but missing the activities on the street like below:
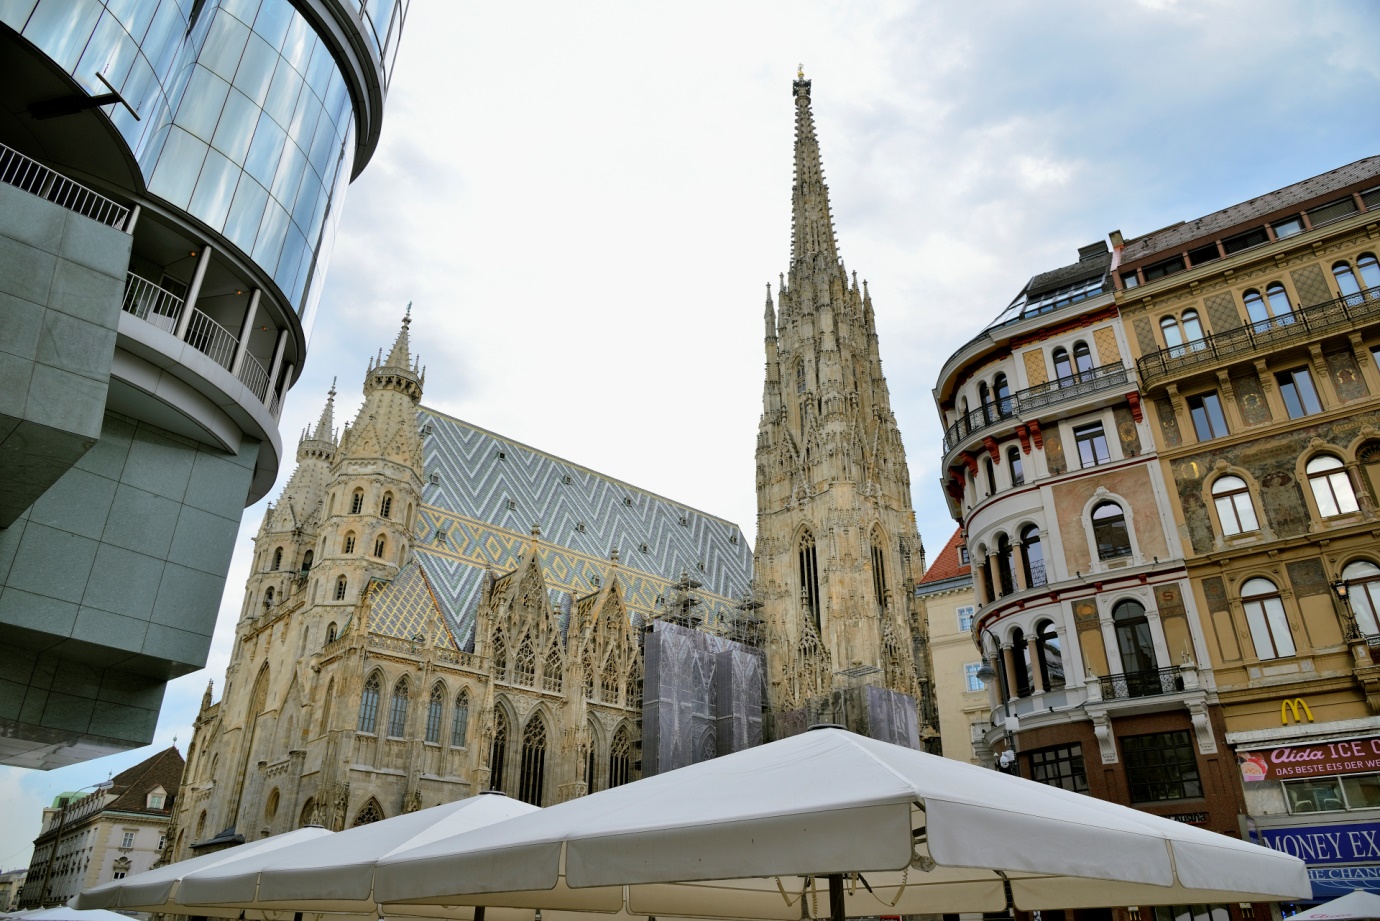
As already mentioned I do have a 20mm f/1.8G in my backpack but would it be enough to have the intended coverage? Not sure, and the next thing is the sky is darkening fast due to some dark clouds moving in. So I did what I used to do many times while traveling and that is to take both shots and do the processing later.
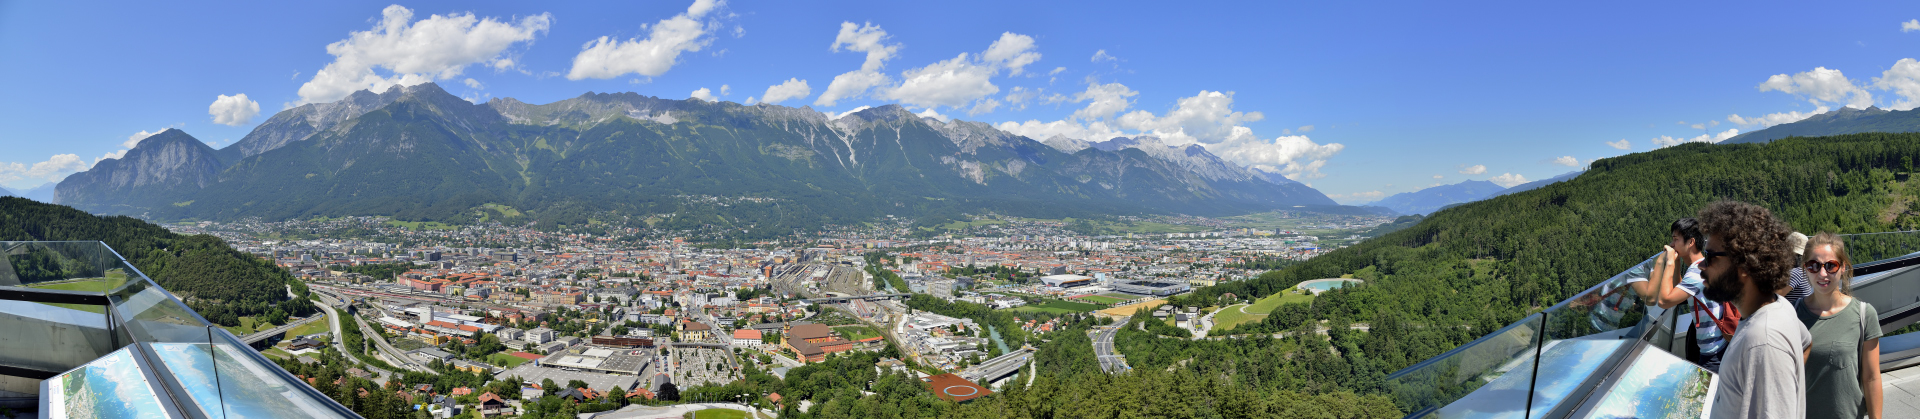
The most important thing here is to make sure that the exposures for the shots are close to each other. If one has to take more than 3 shots, one has to meter it and take the average for the 3 or more shots. For example, I did post some time ago here the following shot:

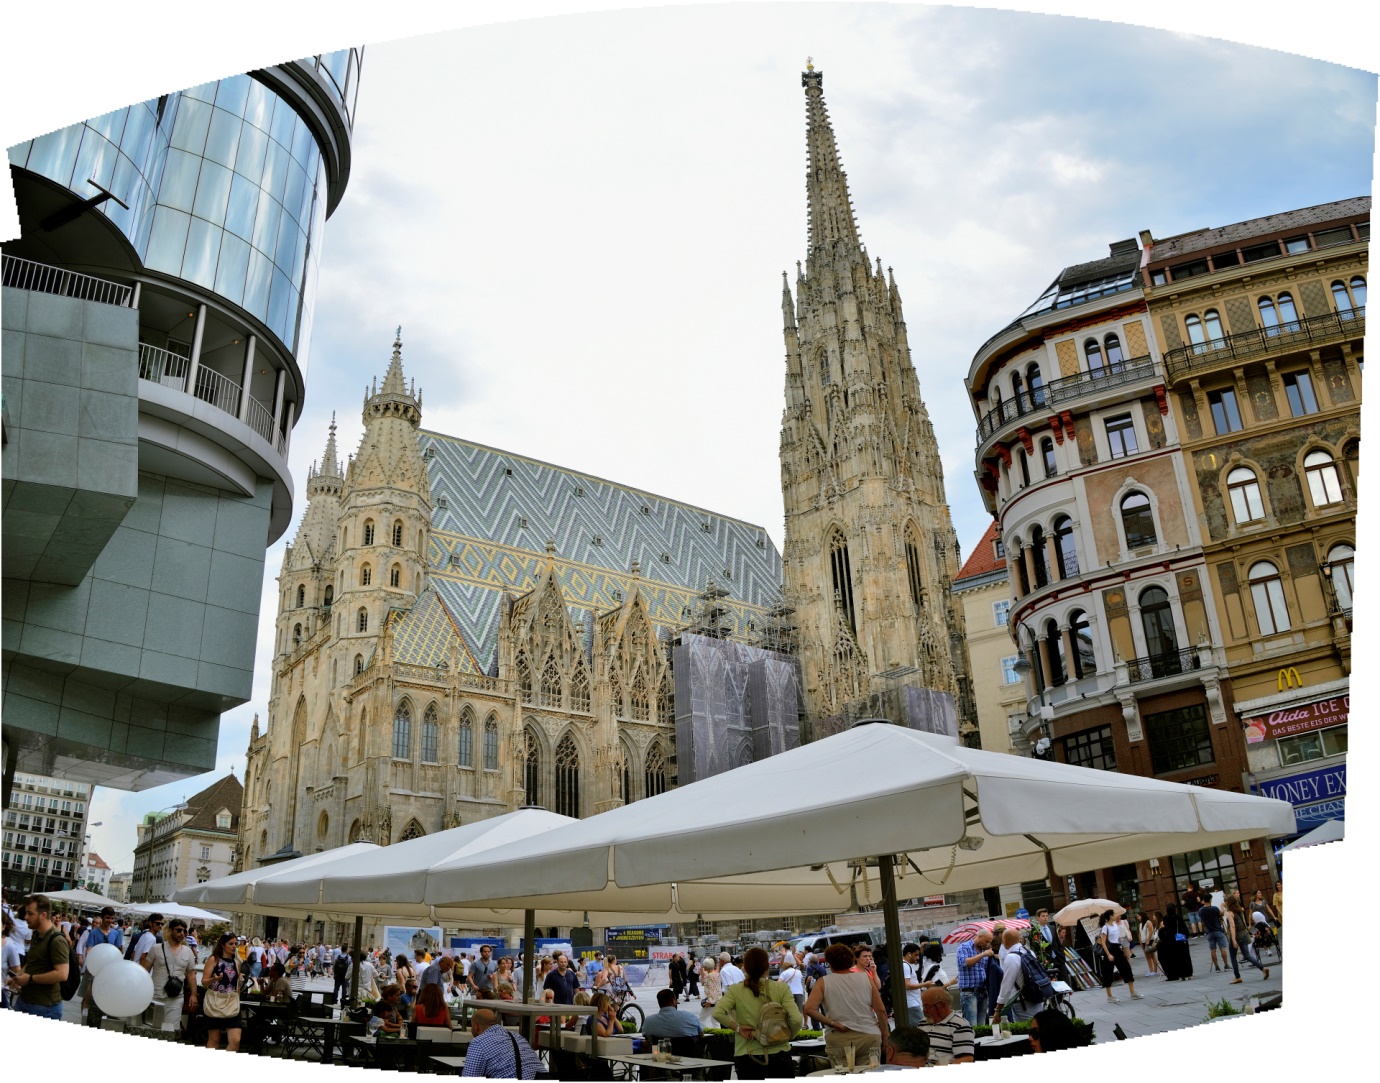
These 4 shots have a coverage of about 220 º angle of view, so the exposure changes will be drastic, not only that, different subjects will require different exposure, so one can only use an average and take care of getting it perfect in post-processing. But if one gets the exposure correct for each shot, one might not be able to merge or stitch during post-processing, due to the drastic change in color, contrast and whatever…even if it gets to merge and stitch together, one will notice that there are errors like merging or stitching at the wrong location or having duplicates.
Here is the look of the final version – with this crop it will remove most of the misalignment of the glass at the bottom, which I already mentioned were taken handheld without any support. So there is bound to be in-perfection but still give one the overall look as if they were standing there at the moment:
As seen for the St. Steven’s Cathedral shot, it does not conform to normal rectangular format and it also has a very high distortion making it difficult to crop. Here I would like to bring out another point about lenses with low distortion compared to lenses with high distortion. It is always better to use lenses with less distortion compare to using lenses with high distortion, even though one can use on-camera distortion correction. It is not the same because one cannot interpolate information that is incorrect or not there at all. Another thing is that there are times that photos taken with high distortion lenses cannot be merger or stitch together, especially multiple overlapping shots.
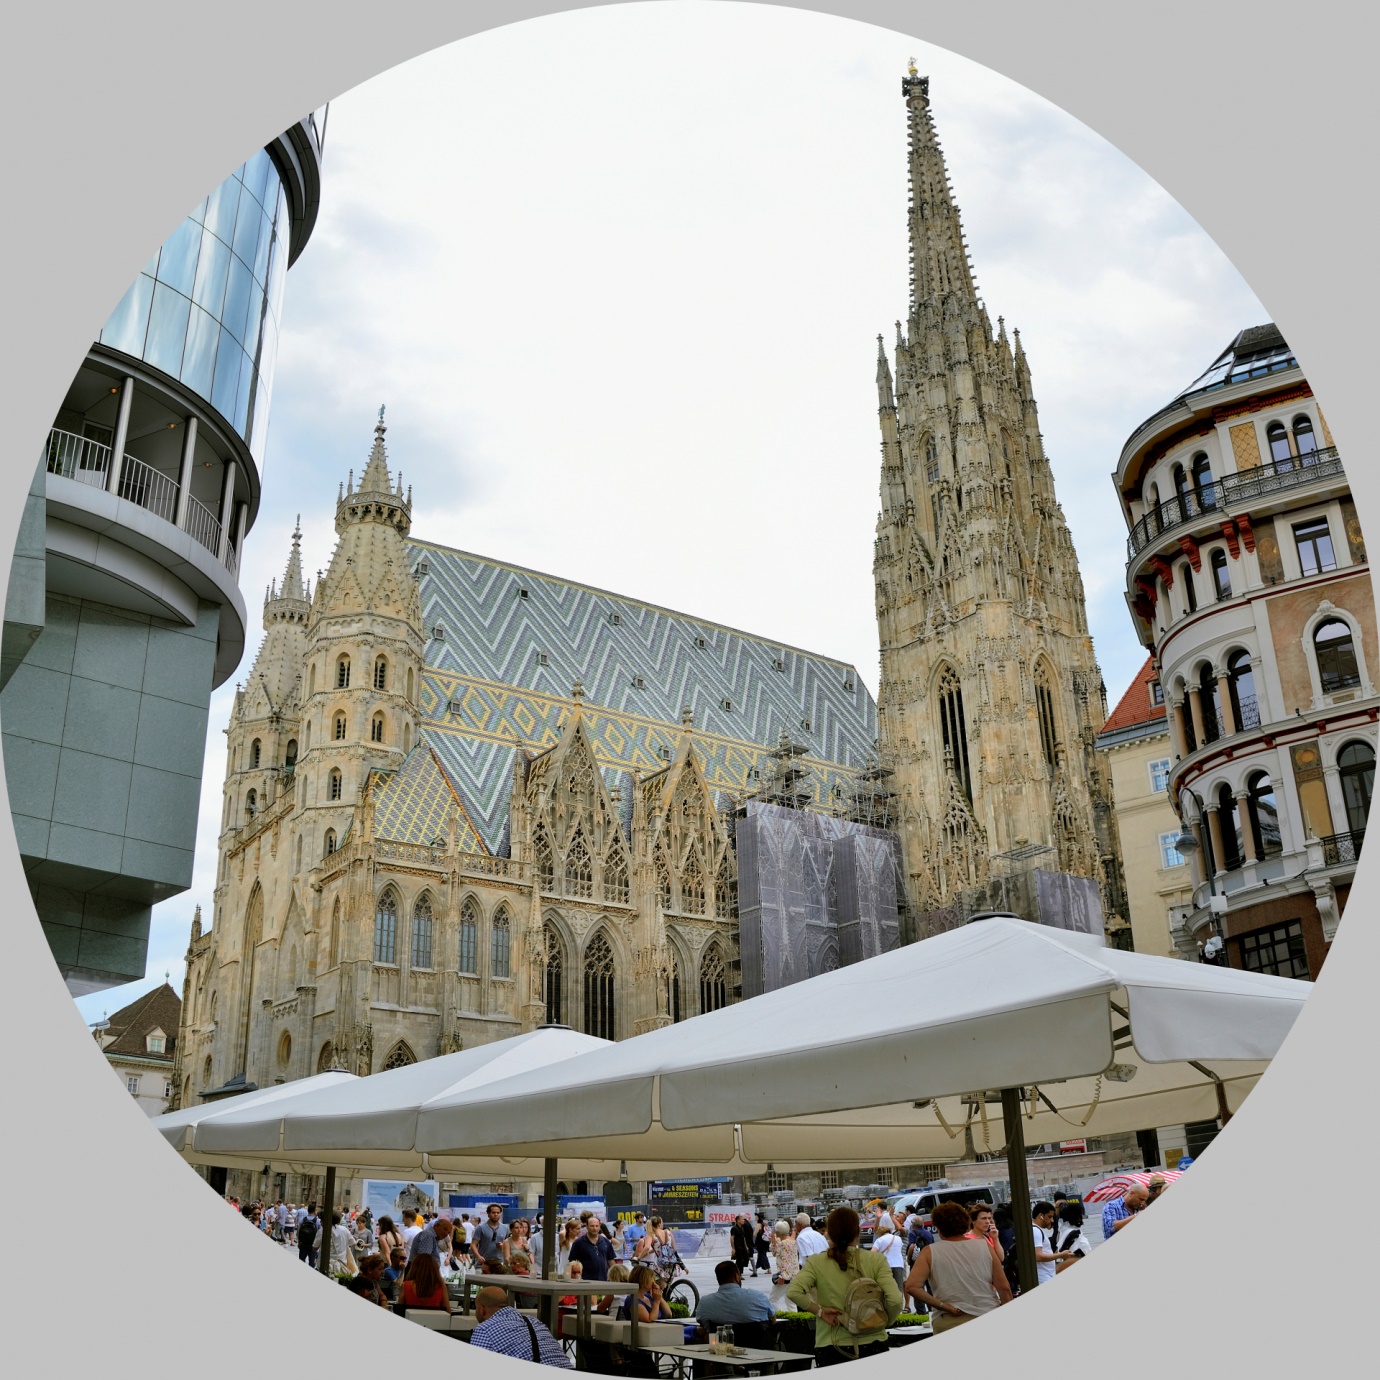
So, how about making use of its non-rectangular and high distortion to form a fisheye shot?
Or one can also do Photomerge with Perspective Correction in Photoshop to get this:
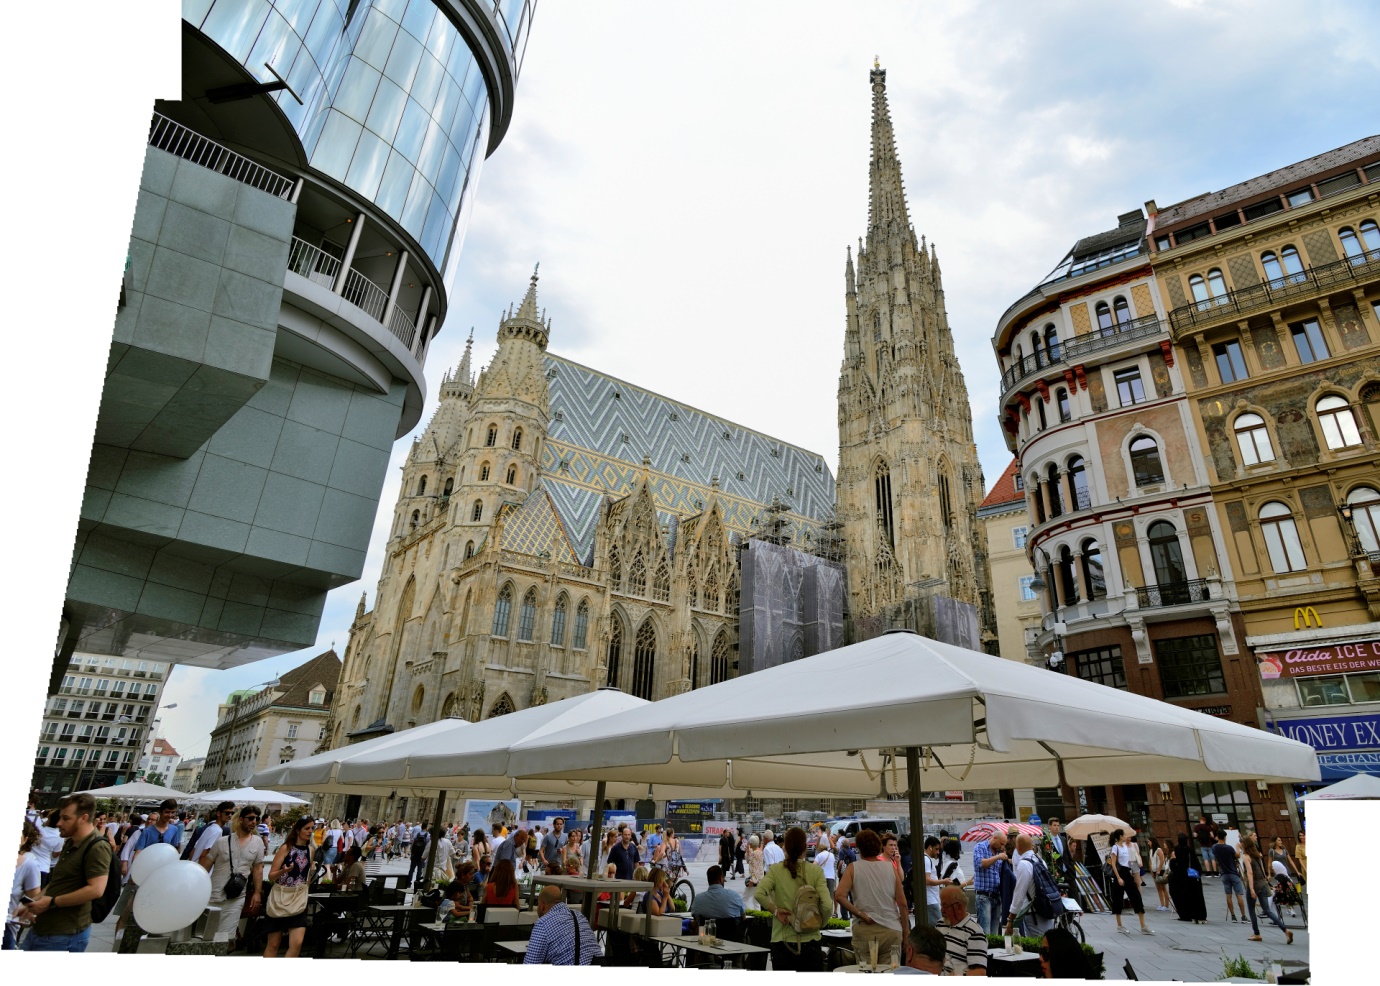
As can be seen, the canvas and format are straighter making it easier to do a Medium Format crop like this:
Or even a normal Portrait 4:5 shot like this:
Now! All the final cropped results will have the Vienna street scene with the St. Steven’s Cathedral in the background. Another important note is not to have movement in overlapping shots, as in this sequence with people moving on one shot but not on the other. This will avoid multiples or blur sections on the final results.
I am sure some might think that the contrast and saturation are not good enough. Like I said before, one can always adjust them once they have been merged or stitched. But I do like to keep them the way I saw it not too contrasty or saturated.
Anyway, I will still post a few shots with a little adjustment on the saturation to make those folks happy.
Thanks for viewing!
Regards,
Hans DerSniper
If you have an interesting idea for a guest post, you can contact me here
Like: Nikkor Facebook page | Join: Nikkor Facebook group