Sports photography with slow shutter speeds is by Omari Stephens (website | Google+ | Patreon):
Conventional wisdom suggests that sports photography is a field where fast shutter speeds, wide apertures, and expensive cameras and lenses are the only game in town. Where the purpose of a great photo is to “freeze” the action. I loved (and still love) sports, but the conventional path wasn’t an option for me.
My own photographic coming-of-age happened with a D70 and its 18-70/3.5-4.5 kit lens. When many sports photographers might have leaned on shutter speed to keep things sharp, I focused on technique and the ability to predict motion and stillness. Where many photographers try to eliminate blur, I strive to incorporate that blur in a controlled, intentional manner. And when well-executed, those photos have the potential to feel even more compelling than completely frozen shots, because sports typically feature their own balance of motion and stillness.
The result has been that I’ve learned to take photos of indoor sports and other fast-moving subjects in a way that is completely accessible for people with everyday cameras. No need for D3s levels of low-light performance. No need for some 10fps monster. If you’ve got a DSLR made in the last decade, you’ve got everything you need.
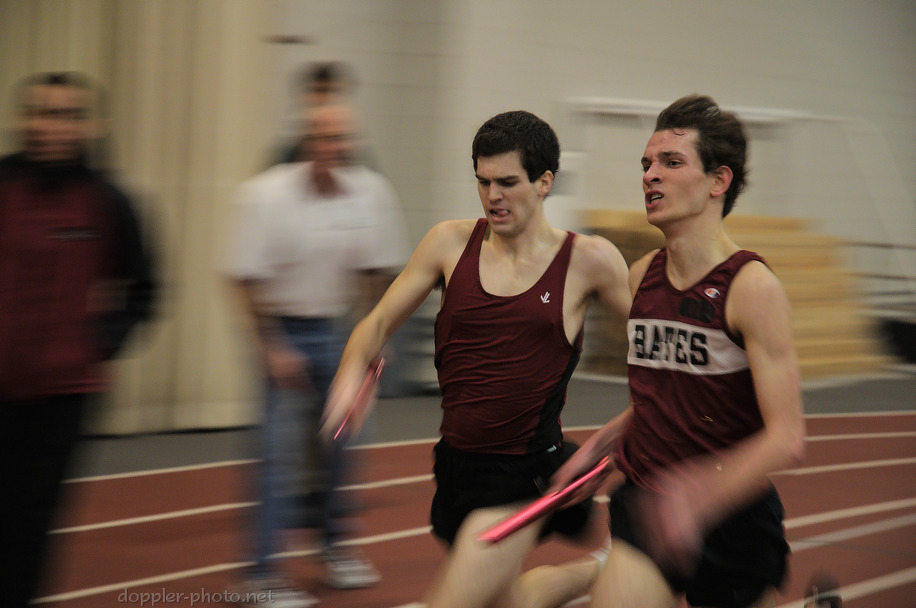
This technique is basically an extension of panning: you use camera-holding technique to choose what should appear sharp in the image. Then you add prediction and timing to show the contrasting motion of the scene. So, for instance, if you’re shooting fencing at 1/60s, maybe you wait for the tension as one fencer begins to strike:

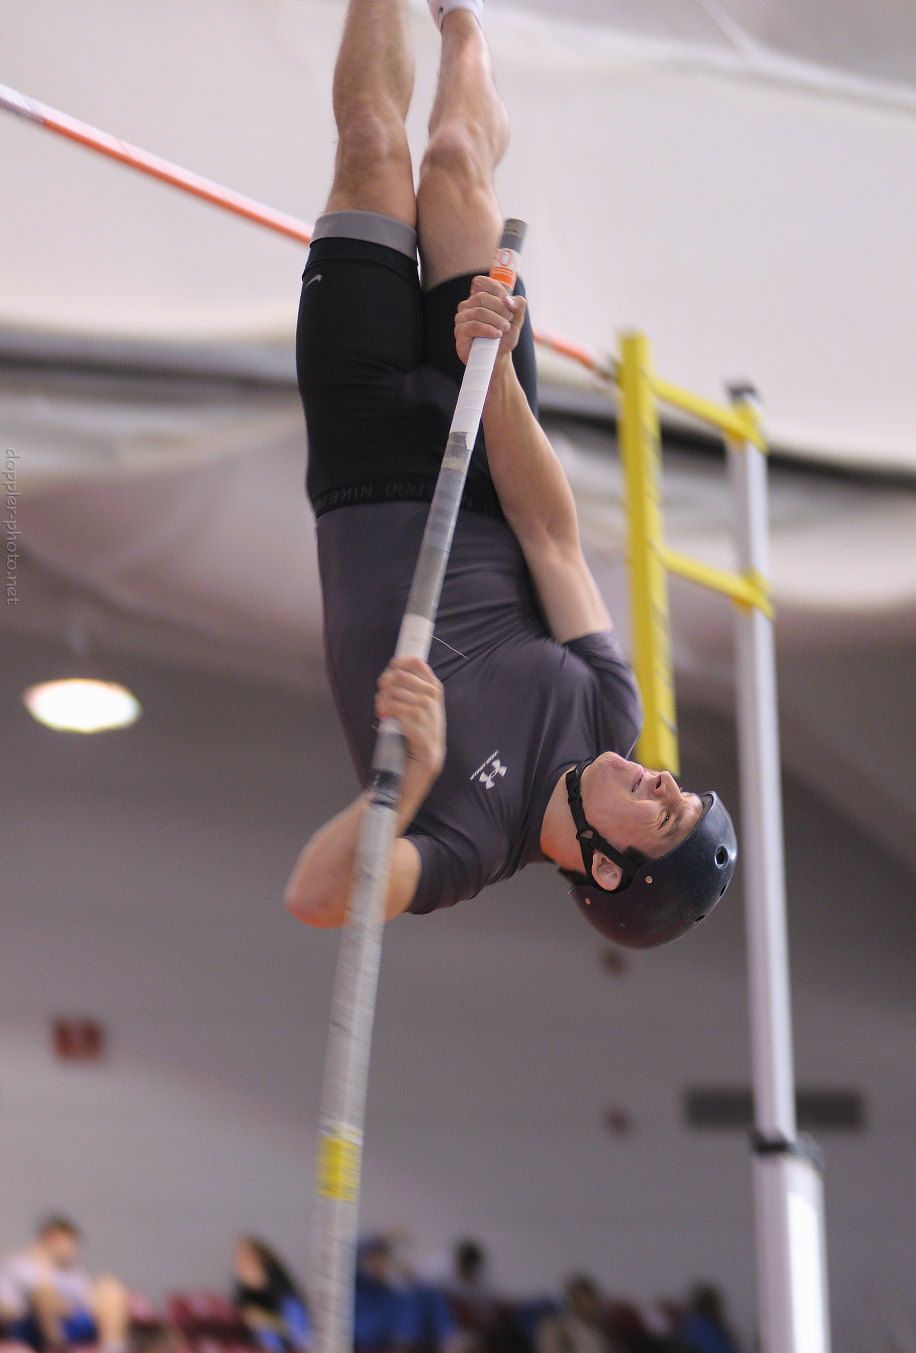
Or maybe you illustrate the motion of a pole vaulter’s pole as it recoils in 1/125th of a second:
Step One: Believe In Yourself
The first part of this technique deals with the photographer. You must be confident. You must be audacious. You can do this. You can do this, but only if you commit to it. As with many technical changes, you’re going to take a step backward before you can take two steps forward, and you have to embrace that fact.
Think about toddlers: they become experts at crawling on all fours, but then they endure an unsteady learning process with the hope of walking upright. As a photographer, you have to understand that there will be an unsteady learning process before you start getting those sharp images.
So the next time you see a rapidly moving scene in low light, avoid the impulse to crank up the ISO and the shutter speed. Forgo that continuous shutter release. There’s another way.
Step Two: Learn to Decompose Motion
Okay; we need to talk about motion. First and foremost, motion is always relative, by its very nature. A moving object is always moving relative to something — a car relative to the road, a baseball relative to the batter, or maybe someone’s fork relative to their mouth.
Likewise, stillness (being the absence of relative motion) is also always relative. If I set my camera on a tripod, and the tripod on a road, then the camera is still, relative to the road. Even if a car drives by at the same time. Stillness isn’t the absence of all motion; it is the absence of certain kinds of relative motion.
So the motion or stillness of the camera determines what appears sharp in the final image. Now, all motion can be decomposed into some combination of linear motion (often called “translation”) and rotation. In a rigid object (like an intact brick), the entire object translates and rotates together — if you imagine a tiny camera mounted on part of the brick, and looking at any other part of the brick, the view of the brick itself never changes. The brick never appears to move, from the perspective of that tiny camera.
A non-rigid object (like a car) has parts that can translate and/or rotate relative to each other. On a car, the wheels are obvious parts which frequently move relative to the body of the car — a camera mounted to the body of the car will see the wheels appear to move.
To reiterate, the motion or stillness of the camera determines what appears sharp in the final image. If you match the translation and rotation of the camera to the translation and rotation of a subject, then that subject will appear still in the final image. So for example, if I take a picture as my camera is still, relative to the road, then the road appears sharp and a passing car appears blurry. If I move the camera in a certain way (such as by panning), suddenly the car body appears sharp, and the wheels and the road are motion-blurred.
Now imagine that you have two identical cars traveling side-by-side at the exact same speed. If you mount a camera to the rotating wheel of one car and take a picture of the other car, then suddenly the matching wheel of the other car looks sharp, and everything else is motion-blurred. This is really important to understand. Even as the parts of a non-rigid object move relative to each other, the camera can still differentiate between those different motions.
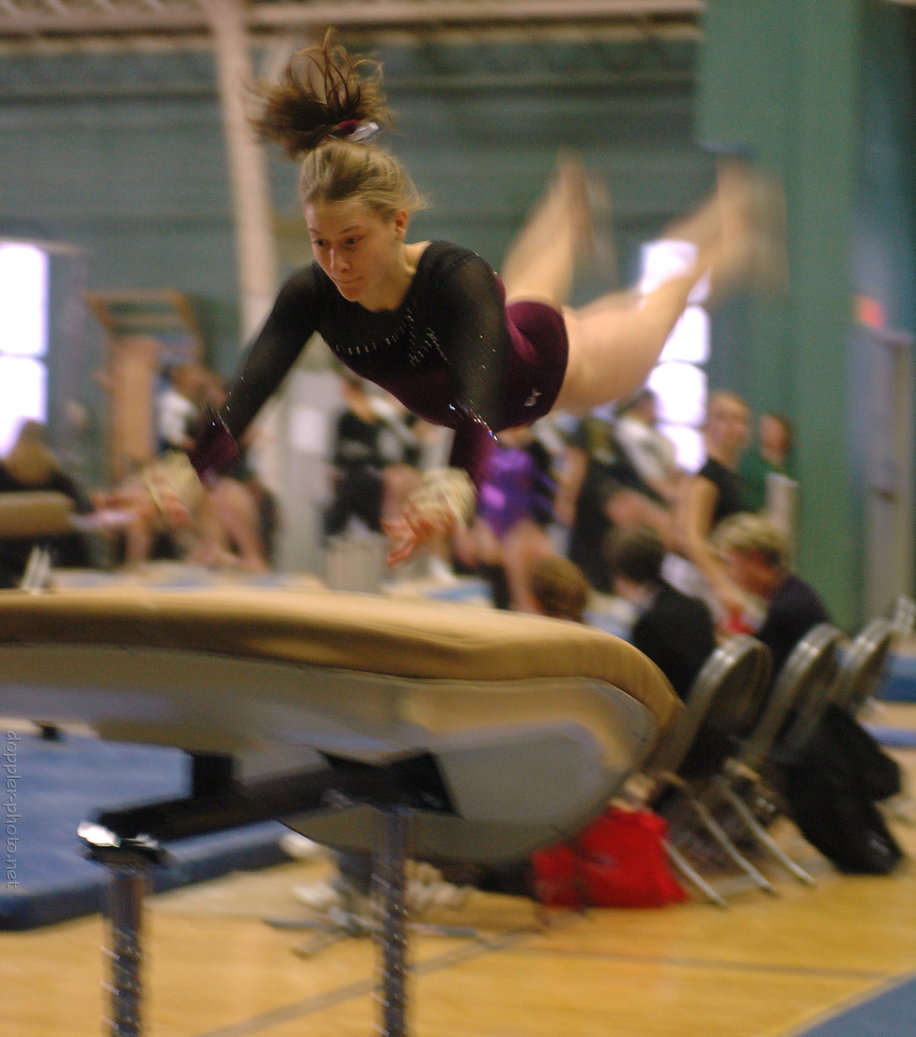
Now, let’s talk about people. People are non-rigid — they have arms, legs, a torso, and a head that can all move relative to each other. But there’s a method to the madness. First off, a human who is visually tracking a moving target (that is, a target moving relative to that person) will tend to keep their head very steady, relative to their torso and/or relative to the target.
In this photo, you can see that the gymnast’s arms and legs are all in motion, relative to her torso, but her head is steady. So by following her torso with the lens, and hitting the shutter release at the right time, I ended up with a photo where her face was sharp.
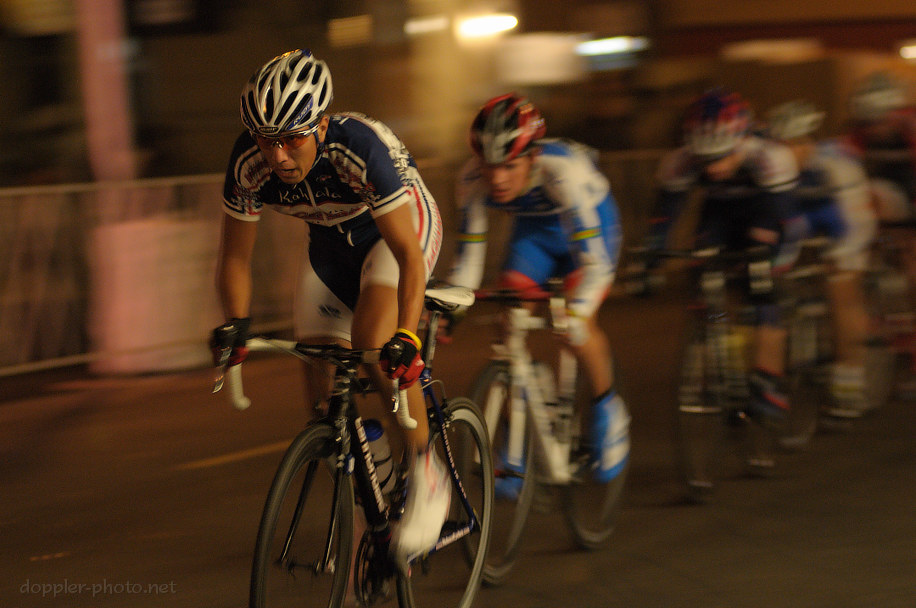
You can see the same effect throughout the photos in this post. In some cases, the head moves with the torso, and in others, the head remains steady even as the person’s torso moves.
Step Three: Set Your Camera
As with any panning, the appropriate camera settings will vary by situation. But generally I would suggest a shutter speed around 1/100s. 1/200s at the fastest. Aperture and ISO don’t matter too much. I very strongly suggest keeping the camera in single-shot mode, rather than any kind of continuous shot mode. This technique depends pretty heavily on timing, and there’s no better way to focus on timing than to force yourself to make that first shot count.
Be careful with vibration reduction/image stabilization. If the camera moves in a way the system doesn’t expect, it can produce unexpected results.
Beyond that, have a plan for how you’re going to deal with focus. This will depend on how the subject is moving relative to you. In some cases, zone focusing (that is, focusing at a preset distance) works really well; especially if your shot timing is precise. Other times, you’ll need to plan on tracking the subject for enough time so that AF can lock on. I particularly like back-button focusing for the ability to switch focusing techniques as the situation dictates.
Finally, I find it very helpful to have a visual reference point that is stationary in the viewfinder. I pretty much always use the AF point squares that are in the viewfinder, but you can use anything; it just needs to be visible, and it needs to stay in place, regardless of where you point the camera.

Step Four: Practice Your Technique
Okay. First, recall that all motion can be thought of as some combination of translation and rotation, and you can choose what should be still in the final image by matching the translation and rotation of the camera to the movement of the object that you want to appear sharp.
How do you move the camera like that?
That’s actually a long and drawn-out topic, but I’ll go through some tips that I’ve found really helpful. Additionally, any of the various primers on doing panning in photography will also be relevant. Note that there will definitely be situations where some of these tips will lead you in the wrong direction, so use discretion.
- Do whatever you can to move your entire torso as a unit. If you’ve got a viewfinder, use it. Keep your arms pulled against your sides, and your brow against the camera. Ideally, you want to use the large muscles in your core to move your torso and camera as a unit, rather than maneuvering the camera with just your arms and hands.
- Use a stationary viewfinder reference (such as an AF point marker) for feedback on how well you’re tracking the subject. If the subject is a person, I match a square to their head and do what I can to keep it there. If your marker starts off over the subject and is still over the subject once the exposure is done, there’s a decent chance that you kept them sharp in the actual image.
- Relax, hold your breath, and then squeeze the shutter-release. It’s really easy to get excited and jostle the camera while you’re trying to take a picture. Imagine that you’re trying to open a heavy door that has a really delicate doorknob. You use a light touch for the doorknob, and then you throw your weight against the door, right? Same here. Keep your torso tensed and stay focused, but you still need to use a light touch for the shutter release. You still need to maintain your composure as you wait for the perfect moment to take that one photo.
- Learn to shoot with either eye. I typically shoot with my right eye to the camera, but sometimes I switch. If I’m trying to track a subject moving quickly from right to left across my field of view, then having my left eye to the camera allows me to watch for the subject with my right eye, and more accurately predict how fast it’s traveling, and when it will enter the field of view. Knowing those factors helps me start tracking the subject faster.
I also shoot with my left eye when using Joe McNally’s “Da Grip” camera-holding technique (which is useful, even for DX DSLRs). - Learn to aim the camera by feel (aka shoot from the waist). This is helpful to track a subject from really-low or really-high perspectives. It can also help you react quickly if you notice an interesting, moving subject while the camera is down — you can start tracking the subject even as the camera is still coming up to your eye.

Put It All Together
This is basically the practical application of things we’ve already discussed. Here’s an example of how one might approach a real-world photographic situation using this technique.
Step One: So, you walk into a poorly-lit indoor arena where you’re going to be photographing people sprinting and flying through the air. Relax. No big deal. You’ve got this. The first step is to come up with a plan.
Step Two: Okay, deconstruct the motion. What are the different movements involved in the pole vault? It helps tremendously if it’s a sport you’re familiar with, but if not, do some research. Maybe search for videos on YouTube. Maybe spend a couple minutes watching as people are warming up.
So, they’re sprinting down the runway. That’s mostly linear motion. Arms and legs moving, but torso will be steady while the person is in midair, between footfalls. Then the takeoff. The athlete moves in a curved path, and their body rotates as they move. That said, there’s a short period right after the takeoff where the torso doesn’t rotate. And then, once the vaulter is completely upside down, they stop rotating as well. So those are two clear opportunities for sharp photos.
Then the person passes (or maybe hits) the crossbar and relaxes as they fall back to the pit. They’re traveling pretty slowly coming over the bar — another shot opportunity — and because they’re no longer touching anything, their motion will be easier to predict. Sometimes people show reactions while in midair, so that’s another good shot to look for.
Step Three: It’s indoors with constant lighting. That’s an obvious manual-exposure situation, for me, so I don’t have to worry about the camera trying to meter on the background or anything. I pick a shutter speed around 1/100s, wide open aperture, and then pick an ISO to get a decent exposure. For indoor events, I typically pick an exposure that’s about a stop below “ideal” — I want a person looking at the photo to get a sense of the atmosphere of the place.
Other than that, back-button focusing (as always), AF-C (as always), single-shot mode (as always). For tracking pole vaulters, I generally disable VR, because I’ve found that it doesn’t deal well with me following the athlete’s curved trajectory. If I can set up where I’ll catch the vaulter as they pass directly in front of me, then I’ll zone-focus (so AF on the runway, and then avoid touching the AF-ON button). If not, then I try to track them. If tracking doesn’t work well, then I switch back to zone focus — maybe on the middle of the crossbar, maybe on some part of the pit.
I’ll also look for perspectives that I haven’t shot before. Each one may require slightly different settings. If the athlete is moving particularly quickly or slowly at that point, I’ll adjust the shutter speed. If the background is distracting, I’ll go for a tighter shot with a longer focal length, or I’ll just move slightly.
Step Four: As the saying goes, there’s nothin’ to it but to do it. Get out there and take some pictures :o)