
In this guest posts Gary Yost (www.garyyost.com) will share his experience shooting infrared time-lapse of the Hawaiian Mamane trees with a 650nm Lifepixel IR-converted Nikon D5200 camera:
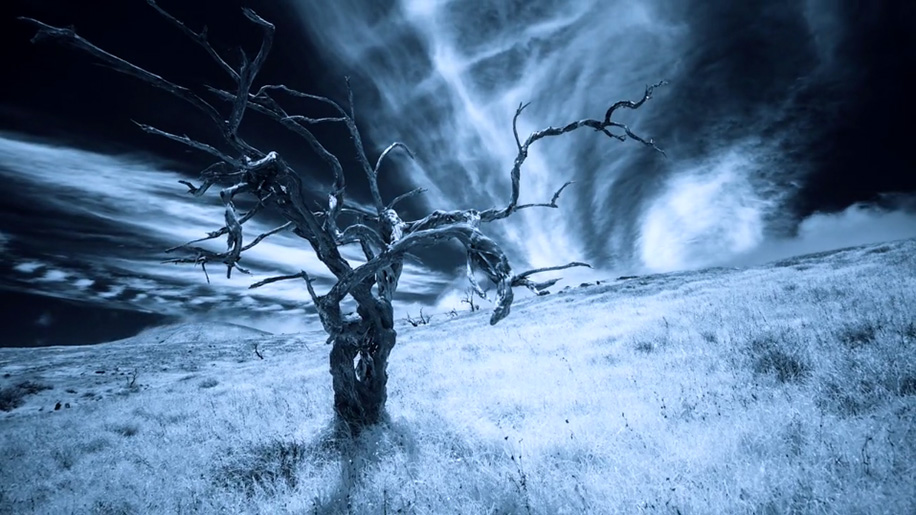
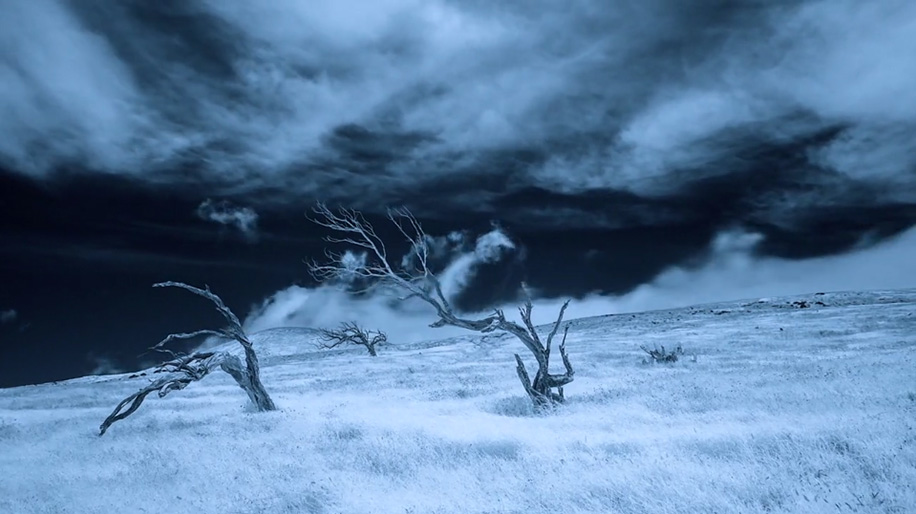
What really turns me on in photography and filmmaking is finding ways to visualize the mysteries of the natural world. In the summer of 2013 I came across a stand of beautifully gnarled dead trees on the Big Island of Hawaii and they evoked in me feelings of similarity to the beautiful ancient Bristlecone Pines in the White Mountains. Kohala mountain, which is the site of the these amazingly-shaped Hawaiian tree bones, also has some of the craziest cloud patterns in the world because of the way this dormant volcano pushes the tropical moisture around the northern part of the Big Island.
The mystery of why they died captivated me and I felt compelled to capture their cloud-shrouded flowing windswept beauty using time-lapse cinematography. Unfortunately however, these trees were on private grazing land belonging to the Parker Ranch, which controls 10% of the Big Island, approximately 250,000 acres. After returning to my home in California I kept thinking of these amazing trees. I did some research and learned that they were Māmane trees, considered sacred by the Hawaiians and used as building material for important houses, for making tools, and even for crafting dry-land sled runners (sledding is a sport on Hawaii… who knew?). The Māmane were threatened in the early 1900s by overgrazing from goats, sheep and cattle and they successfully brought a lawsuit against the state of Hawaii, along with co-plaintiff the Palila bird (a threatened songbird who depends on their branches to nest in). It was amazing to learn that a tree and a bird actually won a court case to protect their environment, and I become charged up about honoring these trees with a video homage.
This snapshot provides a sense of what they look like, in color, when you’re standing among them.

I contacted the manager of the Parker Ranch and submitted a proposal about how I wanted to capture the images of these trees for a short respectful film, and after a few months of discussion and patient waiting I was given a week-long filmmaking permit! I’d been thinking about how to best capture their shapes and had already decided that I wanted to create this piece monochromatically so that the color of the grass and sky wouldn’t detract from their beauty. I’d been experimenting with infra-red photography for the last couple of years, having sent an old D200 to Lifepixel for a 650nm SuperColor conversion. After some tests here in California I decided that infra-red would provide the contrast between the sky, clouds and trees that I was looking for. But the D200 is not a Live-View camera, so the only lens that I was able to use with it was the Nikkor 17-55/f2.8 that had been calibrated by Lifepixel at the time of conversion. My vision for these trees required much wider fields of view than the 17mm would offer (effectively a 26mm crop on the D5200’s APS sensor). I realized that I’d need a Live-View camera to be able to focus arbitrary lenses with an infra-red sensor, so I purchased an inexpensive red-bodied Nikon 5200 and sent it up to Seattle for conversion in early June. The red body for an infra-red camera was a fun bonus and a good way for me to not get confused!
Once I got the camera back from Lifepixel, I made some tests with the Tokina 11-16/f2.8 lens (effective 16-24mm) and got exactly the look I was hoping for. I brought that lens along with my Nikkor 24-120/f4 to Hawaii, plus some neutral density filters and a great little portable Mefoto travel tripod, the A1350. This tripod has interchangeable feet, including a great set of spikes that I knew would be useful on that rough landscape. It also has a center-column hook for hanging weight during periods of high wind for extra stabilization.
Here’s a snapshot of what my rig looked like. Super compact and portable:

Soon after I arrived on the island I visited the Parker Ranch headquarters and the very generous people there handed me a permit allowing me to shoot for 5 days to my heart’s content. It’s frequently foggy, misty and rainy up there at 3,000 feet and I watched the weather carefully – it needed to be clear enough to see the trees but with still enough clouds to capture that feeling of time passing. One of the most powerful shots in the film for me was made with the 24-120 at 120mm, at 1:16 into the film. It’s a shot of one tree in the foreground with a storm moving over the plain that lies between the Kohala and Mauna Kea volcanos. As the storm is passing over the land, it looks like the ocean roiling and bubbling. Compressing 25 miles of space so tightly (that’s Waikaloa Village in the midground, frame right) creates a beautiful optical illusion, and is a great reason to always bring multiple lenses with different focal lengths so you can explore visual compression and expansion. That 24-120 was useful in 2 other shots. Can you tell which?
Of course I shot RAW files which allowed me to white-balance the infra-red images in Adobe Lightroom on my laptop back at my rental house. But there are challenges you must overcome in Lightroom when processing infra-red images because no matter how cool you make the image using the WB Temp slider, there will still be a red cast. So after googling around, I found a few people who had figured this out using the Adobe DNG Profile Editor. It’s simple to make a new camera profile just for infra-red images and load that into Lightroom! Here’s a good description of the process:
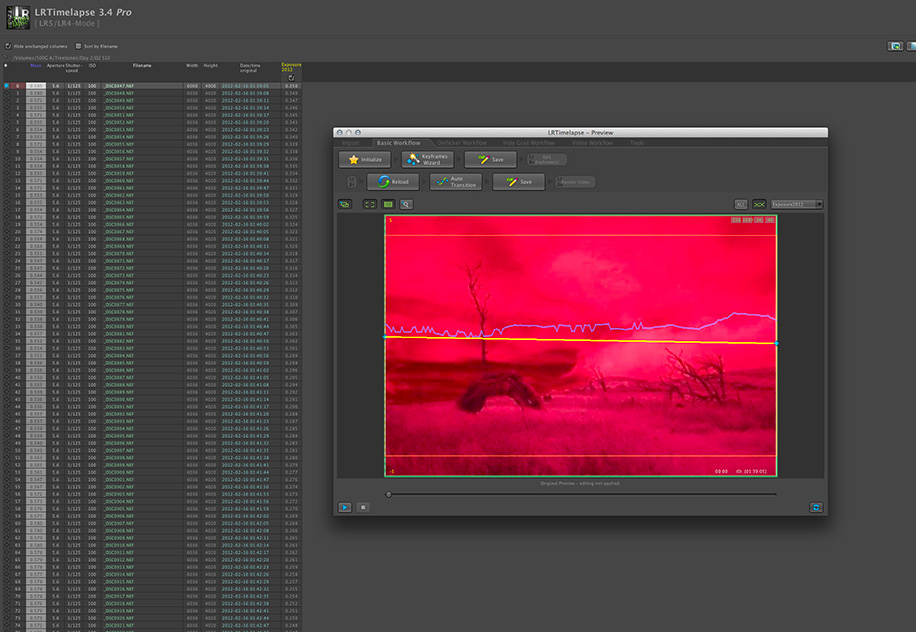
Once I had the white balance adjusted correctly, I used LR Timelapse to create time-lapse sequences with all of the other raw parameters I chose for contrast, clarity, exposure, etc. After each day of shooting I’d render a set of proxy animations to make sure I had what I needed, and if shots didn’t work out I’d schedule reshoots for the next day. Here’s what the raw files look like in the preview window of LR Timelapse before white balance adjustment and processing.
After four days of shooting, my wife Sondra saw the footage and suggested that the film needed an actual spirit to emphasize the haunting feeling of the place. The question was… How to film a spirit? Because the 650 nanometer IR filter is directly on the sensor, the D5200 can shoot IR video and I filmed my wife dressed in a shroud, walking near one of the trees. Without moving the camera I then made a time-lapse shot from the same perspective. I sent both off to my friend Jamie Clay on the mainland and he composited them together in After Effects using three layers; the top layer was applied using the Overlay mode, the next layer was applied using Linear Light, and the bottom layer was the timelapse sequence. A simple feathered oval mask was tracked on both ghost layers to isolate them and give them a small halo. I slowed the real-time sequence down in FCPX using Optical Flow, which added to the ghostly effect, and contrasted the slowed-down spirit with the sped-up clouds. As I’ve written before about Time-lapse filmmaking, it’s important to incorporate narrative elements to amp up the emotional impact of a piece.
When I got home to California I re-rendered each scene in ProRes 4:2:2 format using LR Timelapse, and then added motion blur with Re:Vision Effect’s RealSmart Motion Blur in After Effects. Finally I added a deflicker pass using Digital Anarchy’s Flicker Free AE plugin.
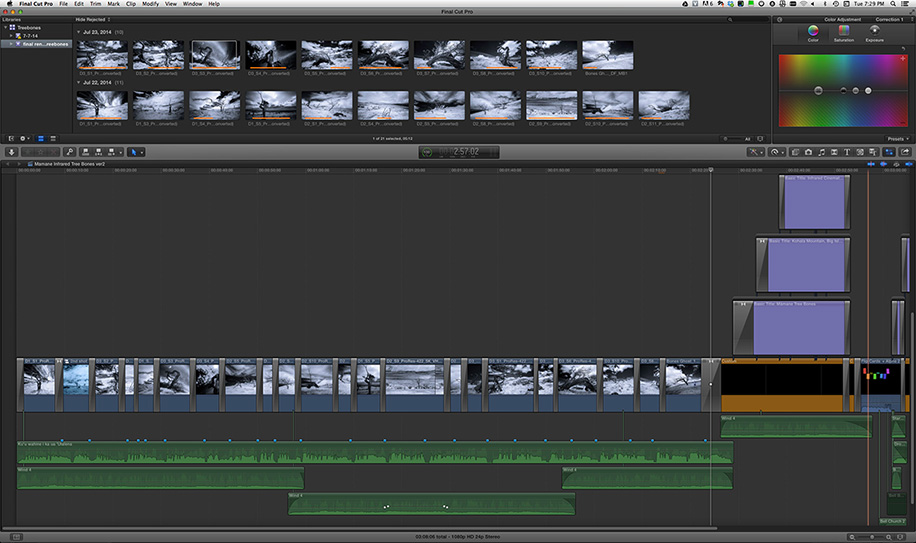
Putting everything together in Final Cut Pro X, the first thing I did was explore different looks for the piece. I didn’t want to go with something that obviously shouted “infra-red” but still it was crucial to create a dreamlike feel. Using a deep periwinkle blue palette created a beautiful otherworldy grade and the FCPX color board made this very easy. Here’s how the final piece looks inside the editor:
Once the look of the film had been established, I researched finding the most appropriate soundtrack that would compliment the haunting feel of the piece. After doing a half-day of research I found a Hawaiian pre-European love chant by Charles Albert Manu’alkohanaiki’illili Boyd. His chant brought the piece into clear focus and gave me the inspiration I needed for the edit — his pauses and breaths were a perfect counterpoint to the movement of the clouds. I added a very limited number of camera moves in post (panning, tilting and some subtle pushes) and then finally put a windy soundtrack behind the chant, giving Boyd’s voice some ambience.
My intention when creating any short film or photograph is for the viewer to feel something. I hope that, when you watch this 2-1/2 minute piece, the hair stands up on the back of your neck the way it does on mine. (As they say in Hawaii, “it’ll give you chicken skin.”)
Thank you for watching.
Bio: Gary Yost is a filmmaker and photographer living in the San Francisco Bay Area who focuses on telling stories about the interesting people and places where he lives. Yost has been using technology to tell complex stories for a long time.
As the leader of the team that created Autodesk 3DS Max he gave millions of people 3D modeling and animation tools, enabling them to use computers to visualize anything they could think of… and a lot of those things were too large, too small, too fast or too slow to show with conventional video. These days, Yost refers to nature as “his grand animation stand” and spends much of his time on Mt. Tamalpais in Marin County.
You can view his work at: garyyost.com.
If you have an interesting idea for a guest post, you can contact me here.