
This article on how to use Nikon’s AF-ON button for AF is written by Steve Perry (website | YouTube | Facebook):
Still autofocusing by pressing halfway down on your shutter release? Well, suppose I told you there’s another way that you might even like better? Sound interesting? Read on.
The technique is called Back Button Autofocus and it can really change the way you use your camera. Rather than autofocusing with your shutter release, you move the autofocus function exclusively to a button on the back of the camera. When you first hear about this technique, it’s natural to greet the idea with a bit of uncertainty, but once you get used to focusing with this method, you may never go back.
See, Back Button AF turns focusing into an almost instinctive act for many photographers. It’s a fantastic alternative to switching between single shot AF for static subjects or continuous AF for action. With back button AF, you can do whatever you want – instantly. I’ve been using it for years, and I’m confident in saying that this technique has helped me land some of my best shots.
Naturally, this is a case of personal preference, however, wouldn’t you like to see if you should add this tool to your arsenal? Check out the video below for details. Oh, and don’t worry – nearly every Nikon DSLR supports the feature and the video shows you exactly how to set it up. Why not give it a try for a couple weeks and see what you think?
VIDEO
SAMPLE PHOTOS
Below are a few sample shots. As a wildlife and landscape photographer, Back Button AF really comes in handy, but keep in mind it’s just as effective on portraits, sports, street, architecture, or whatever style of photography you enjoy. By the way, all were resized using my web sharpening technique you can find on my YouTube channel.
Shooting Action Photos:
One of the best uses for Back Button AF is when a static subject suddenly decides it’s time to run, leap, jump, or sprint. You’ll find that going from static shots to action shots isn’t just instantaneous, it will also become instinctive in a very short amount of time. Beats trying to switch back and forth from single shot AF to continuous AF, that’s for sure.
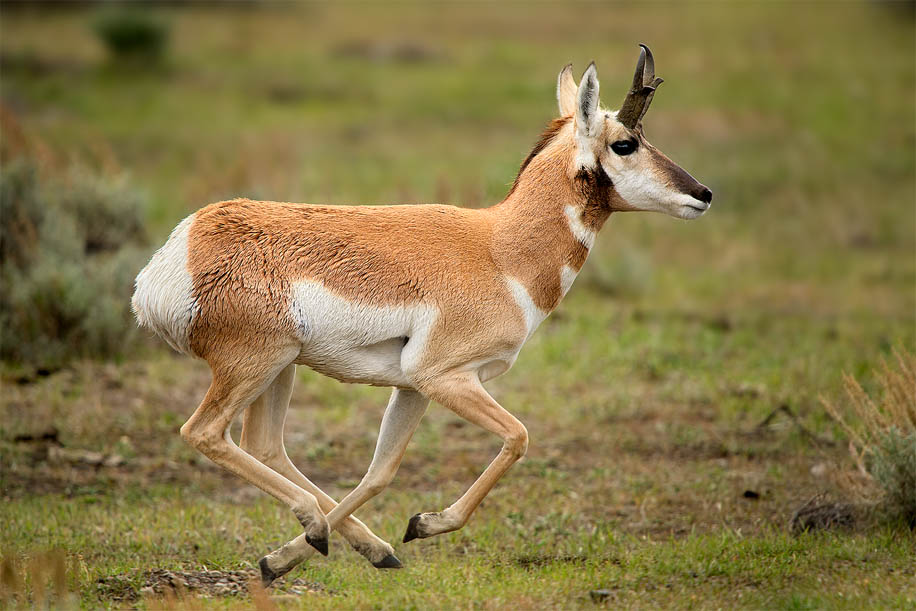
Sprinting Pronghorn – Shot with a Nikon D4 and Nikon 600mm F4. This started off with him simply posing for a few portraits, and then he took off running after a female. Back Button AF allowed me to instantly track him as he sprinted in front of me.
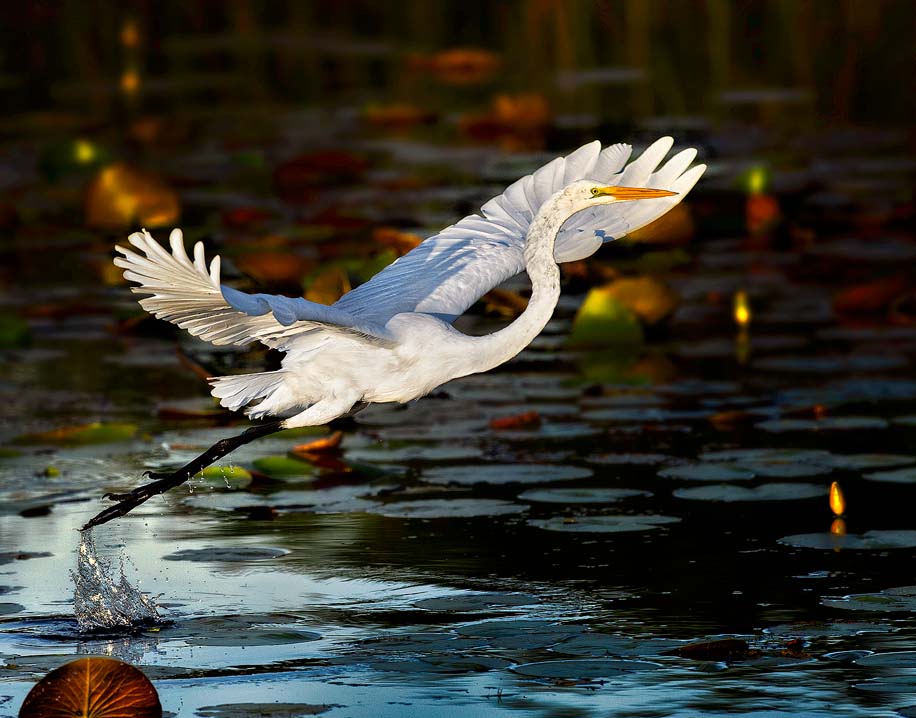
Egret Takeoff – Shot with a Nikon D4 and 500mm F4. This egret was busy flying from spot to spot on this little pond, so when he came close I knew what would happen. Back Button AF allowed me to shoot portraits by focusing and recomposing until I could see he was ready to take off. In a split second my finger was holding down the AF-On button and I was tracking the takeoff. Never took my eye from the viewfinder, never really even thought about focus.
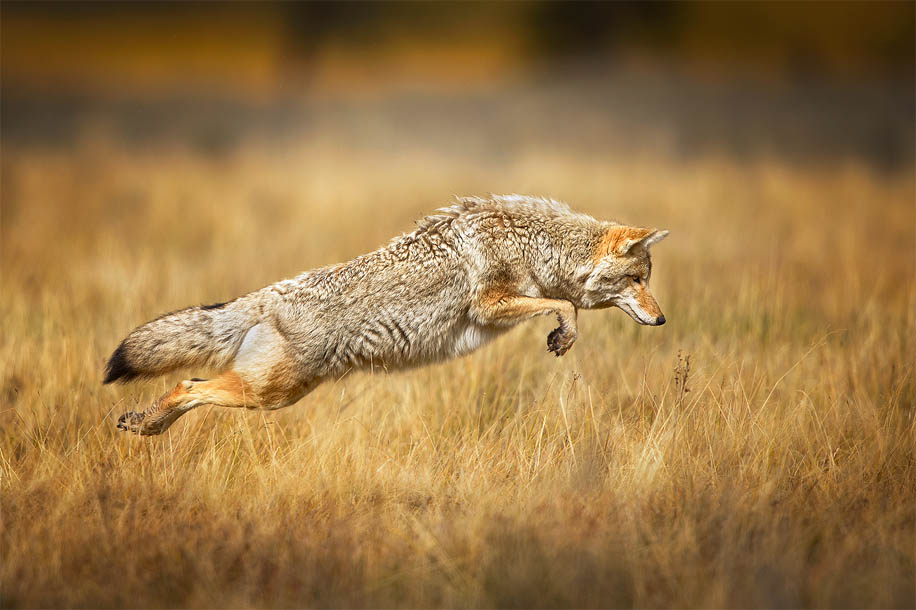
Perfect Pounce – Shot with a Nikon D4, 600mm F4, and 1.4TC. This coyote was busy hunting and Back Button AF made it simple to grab focus and recompose for portrait shots, and then instantly switch to continuous AF when he pounced.
Shooting Static Photos:
What about when the action stops and you want a static posed shot? No worries, just focus on the point you want, release the AF button, recompose and shoot all you like. The focus will stay at that point no matter how many times your finger comes off of the shutter release. No more refocusing and recomposing between each and every shot.
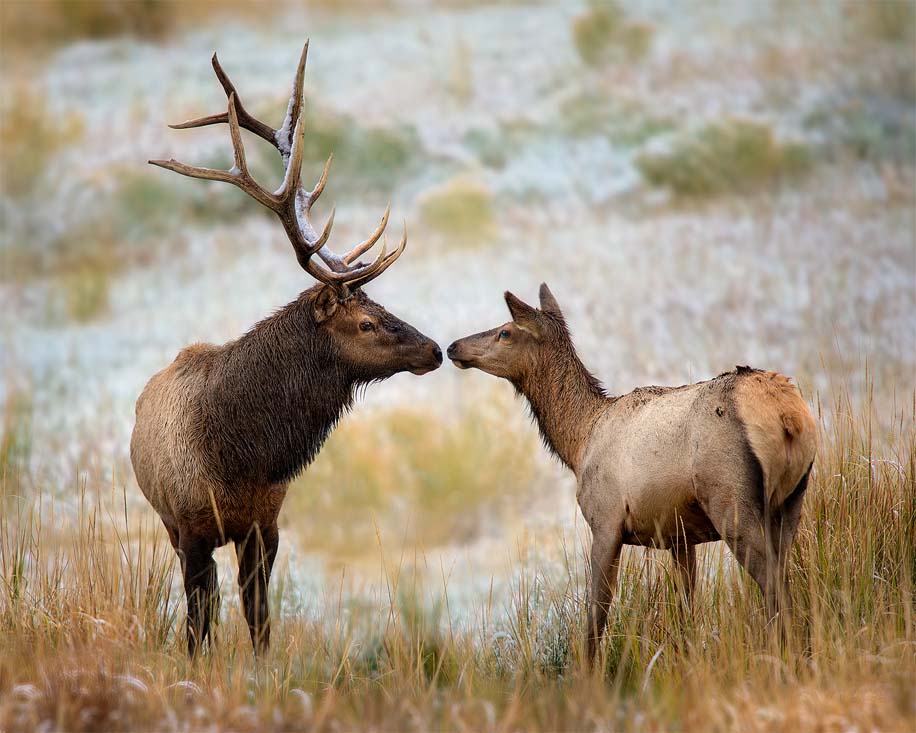
Nose To Nose – Shot with a Nikon D4 and 600mm F4 + 1.4TC. Back Button AF saved the day here. I was easily able to switch from tracking the bull as he moved to focusing and recomposing when he stopped. This moment only lasted a second – no time to fiddle around with AF settings. Back Button AF allowed me to instantly lock focus on his eye and make the shot.

Polar Bear Taking A Break – Shot with a Nikon D4 and 500mm F4. This girl was walking along the ice and then decided it was break time. I went from tracking her to making this portrait without worrying about whether I was in AF single or AF continuous focus. I just locked focus on the eye, took my finger off the AF-On button, recomposed, and took the shot anytime she looked my way. Had she decided to start walking again, I could have instantly started tracking her.
Fawns – This was shot with a Nikon D4 and 500mm F4. Just seconds before this shot I had been using an AF point just above center to photograph one of the fawns as she moved towards me. When the next one walked up, my AF point was in the wrong spot, but no worries, I quickly focused on an eye, let go of the AF-On button, recomposed, and shot the photo. Had I been on continuous AF, I would have had to either move my AF point to one of their eyes or switch to single shot AF. However, this moment didn’t last long, and the truth is I would have missed the shot because I was messing around with camera settings instead of shooting.
Shooting Landscape Photos:
Landscape photos really aren’t the type of subject that strike people as benefiting from this technique – after all, how tough can it be to focus on a landscape, right? Well, turns out Back Button AF really does come in handy. It allows you to focus on one spot in the photo, recompose, and shoot – all without the need to repeat the process each time you take your finger off the shutter release. This is especially handy if the spot you want to focus on isn’t under one of your AF sensors. Plus, it makes shooting with a tripod better, since you only need to focus and lock down once, not reset every time you take your finger off the shutter release.

Keeweenaw Sunset Breakers – This was shot with a Nikon D800 and 14-24. For this shot, my AF point was slightly below the last row of AF sensors. With Back Button AF, I was able to focus, compose, and lock everything down. I didn’t have to refocus and recompose each time my finger left the shutter release.

Split Rock Moonrise – This was shot with a Nikon D3x and 24-70. In this situation, I needed to find a focus point that would keep both the rock in foreground sharp as well as the lighthouse (at my selected aperture). So, I found a spot on land that was just the right distance, focused, and released the AF-On button. From there, I composed the photo and shot away, never worrying about refocusing or recomposing.

Hocking Hills Lower Falls – This was shot with a Nikon D3x and 24-70. For this shot, I wanted to focus on the rock just in front of where the waterfall breaks over the edge of the cliff. Of course, no AF point there, so I simply focused, recomposed and shot away. With AF-On I didn’t need to worry about the need to refocus and recompose each time my finger left the shutter release.
If you have an interesting idea for a guest post, you can contact me here.