Today’s guest post on shift panos is by Brian Valente:
Panoramic photos have become quite popular in recent years. The software to process multiple shots into a single wide (or tall) image has dramatically improved, and there are many hardware options available to shoot great panos. I originally wrote about panoramas in Outdoor Photographer in 20XX and since then pano photography has just exploded. And who doesn’t love a great pano?
Panoramas don’t have any formula on how many shots you should take. It’s often an artistic choice.
Challenges with Traditional Approach to Panos
Not every panoramic photo (‘pano’) has to be that opportunity to create an epic super wide angle vista you know will someday hang in that museum. A lot of times panos can be simple enhancements to the composition and framing that help include additional elements without having to resort to a wider lens. Sometimes I think of it as the “foreground enhancer” because I often use it to include foreground elements I would otherwise not be able to frame into the shot. It also allows you to change your aspect ratio – instead of the built-in 4:3 you can shoot something taller or wider.
However, panos are not as easy as maybe we’d like, and there can be a lot of gear and added complexity involved **. Usually you have a pano head that allows you to precisely adjust the lens and camera positions, and to minimize parallax when the images are stitched together, thus avoiding a lot of artifacts.
Challenges with ‘traditional approach’ to shooting panos include:
- Pano heads add expense and weight (which may also require a better tripod)
- You can’t easily switch in and out of “pano mode” when you have all this extra gear on your tripod
- You have to adjust the pano equipment just right to set the entrance pupil (also erroneously called the “nodal point”). This feels at times like an artful guessing game.
- Zoom lenses may result in focal length shifts, which can ruin the image
- Requires additional setup time
- (**Just to be clear we’re talking about creating high quality panos. Yes, you can handhold your images and they will stitch together into a pano (there are even PnS cameras that automatically create a pano for you as you just sweep the camera from left to right). But these often create stitching issues and may not be the sharpest images)
Shift lenses as an alternative to pano hardware
Turns out, using perspective control (PC) lenses is a great way to create panos and avoid a lot of the headaches mentioned above. PC lenses (also called shift/tilt lenses, or just shift lenses) are a great and easy way to create panos that are limited in range, but still go beyond traditional framing.
Shift lenses have a built in feature of the lens that allows you to move the lens up/down or left/right relative to the sensor, and as a result you can change the framing without moving the camera. In addition to using it to recompose your frame, we can also take a series of images at different shift points, and combine them to create a pano.
Here’s a great example of a shift pano:
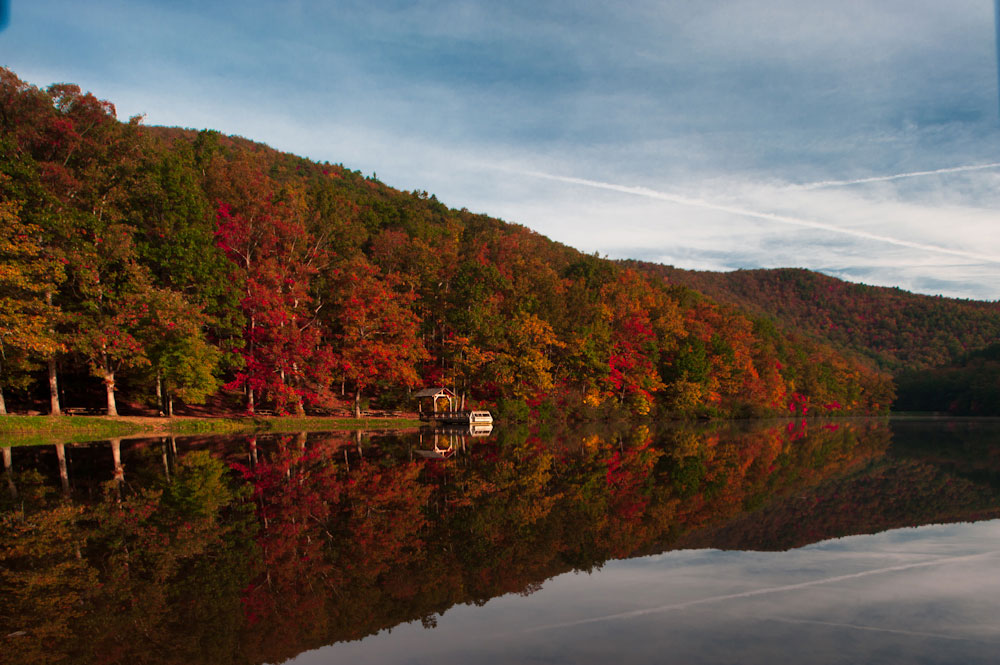
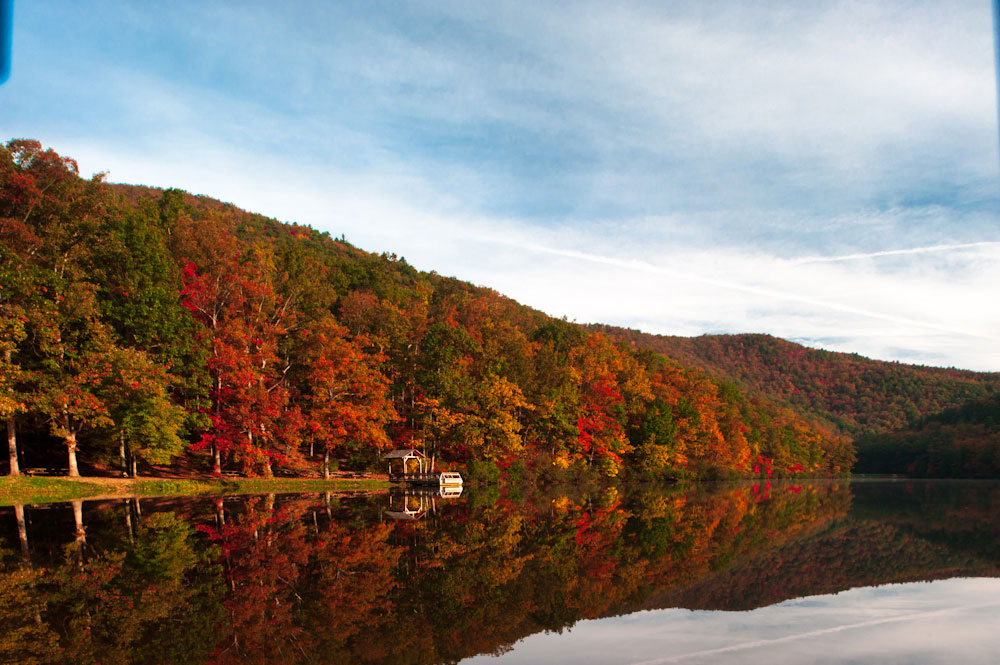
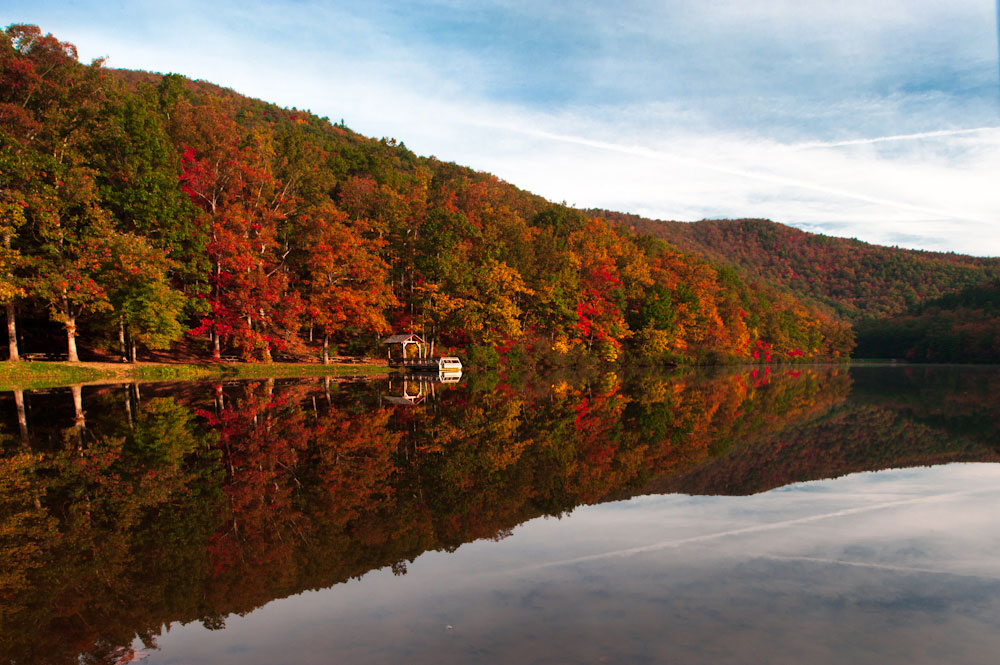
I traveled with a group to Shenandoah area to photograph the fall colors. We came upon a lake at sunset and everyone started shooting this wonderful boathouse nestled in the trees:
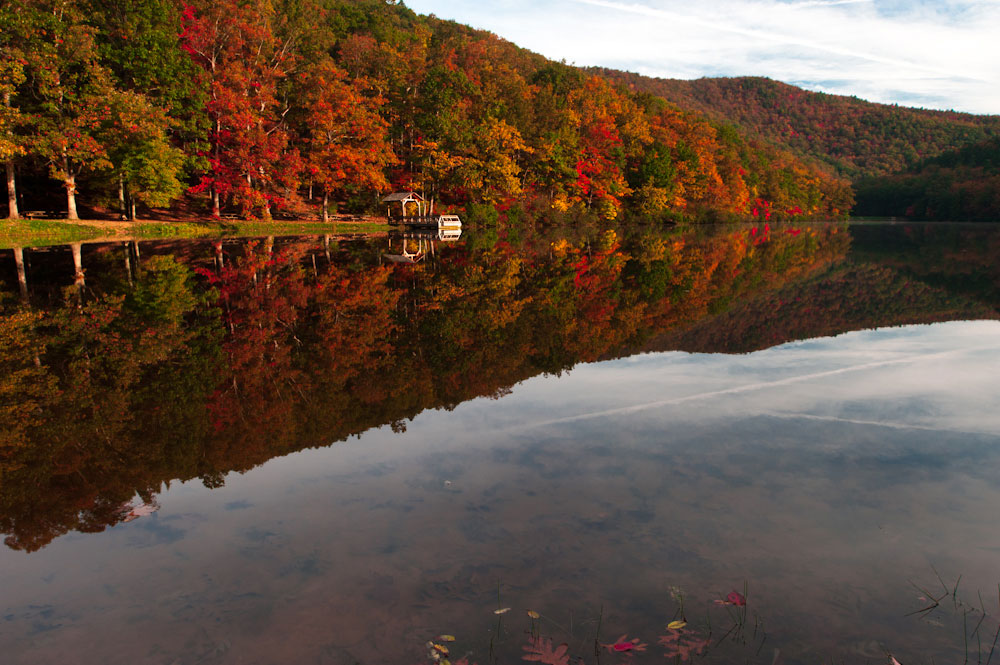
The problem was, everyone was taking pretty much exactly the same shot! Definitely not what I was after. Looking down I noticed some really amazing leaves in the lake, and decided to shoot a 5 frame shift pano to get something a little different: in this case a potentially interesting foreground. This shows the 5 frames I shot, along with the final stitched image:
This worked out really well for a number of reasons:
- Time was short, as the morning light was moving quickly. I already had my shift lens on, so I could instantly switch to pano mode and get the shots I needed.
- Assembling the image was simple, and I didn’t need any specialized tools to fine tune the pano.
- I had a unique image from exactly the same vantage point as the other photographers
Advantages of shift panos:
- Doesn’t require special hardware
- You can switch out of pano mode quickly
- Zero parallax issues when stitching (entrance pupil doesn’t move)
- You can use a polarizer
- Simple to operate
- Easily shoot horizontal or vertical panos
How to shoot Shift Panos
Fortunately shooting shift panos is quite easy.
First you need a shift lens (see below for more details and recommendations). When framing your subject, you should use the shift function to determine your desired begin and end points of the pano, and then position the camera at shift of 0 in the middle of that range.
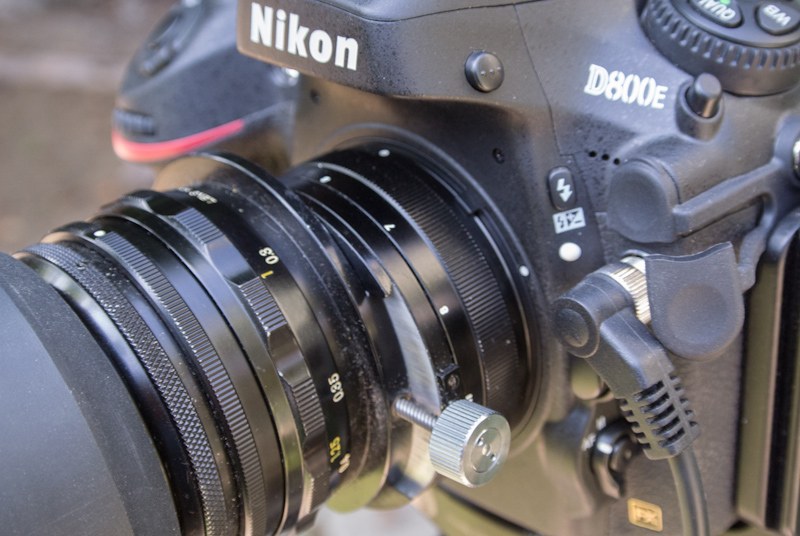
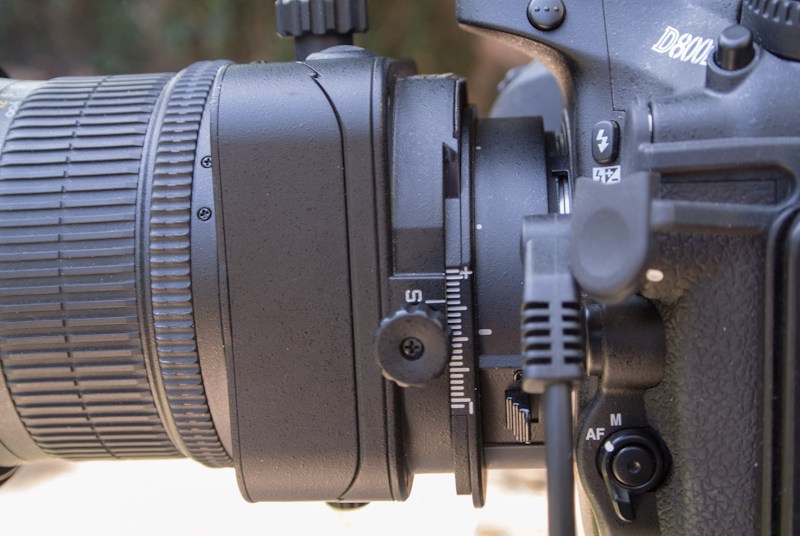
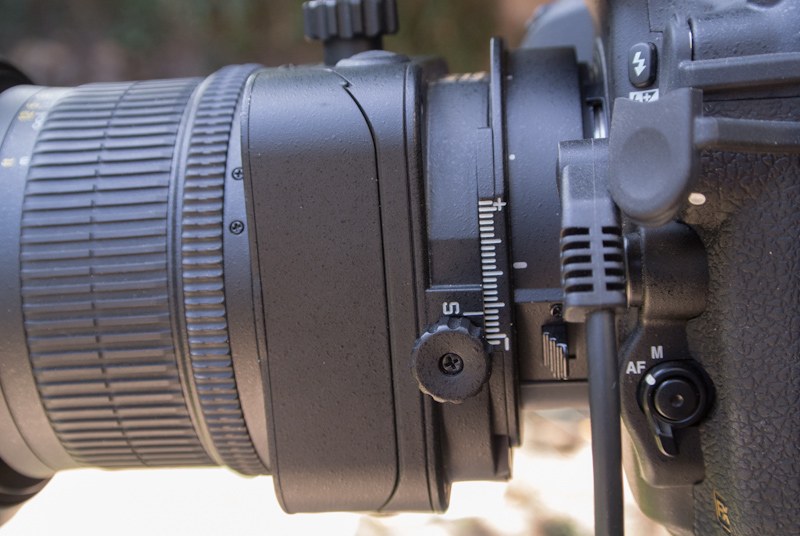
A Nikon Nikkor 35mm f/2.8 shift lens (old school) shifted nearly all the way. Note that the older Nikon shift lenses shift in only one direction, though it can be rotated to shift up-down or left-right
Choosing a lens for shift panos
Nikon Shift/Tilt Lenses
Latest Nikon shift/tilt PC lenses are fantastic, and priced accordingly. The “E” part of the PC-E lenses means electronic diaphragm. This basically means does a pretty good job of determining proper exposure even when the lens is shifted or tilted, and is a LOT more convenient than the older non-E shift lenses. They are also nano-coated for reducing flares, and wonderfully sharp. Like other PC lenses, they will definitely introduce CA when shifted or tilted. Contrary to my standard practice of using a flat field lens for panos (typically a 50mm) I often use the 24mm when doing shift panos because it does not introduce that bending effect I really dislike when you are shifting.
Nikon’s older shift lenses
These are a great bargain and can be a really inexpensive way to get into high quality panos. You only need shift, so you aren’t spending the extra $$ on features you don’t need like tilt. Nikon made a series of them through the years, these are the most frequent ones you will see on eBay and other places that carry used Nikon lenses:
- Nikon PC Nikkor Perspective Control 28mm F/3.5 Lens
- Nikon PC Nikkor 35mm F/2.8 Lens
- Nikon PC Micro-Nikkor D 85mm F/2.8 Lens
Third party shift/tilt adapters and lenses
Don’t have a lot of experience here, but in general you would be looking for a medium format lens and the adapter. You need an image circle large enough. Unless you already own a high quality medium format lens, by the time you go through all the expense, you are probably better off looking at a classic Nikon shift lens.
Some Russian shift/tilts adapted for various lens mounts. No experience here but the reviews seem to be mixed. Hartblei is one of the companies you will see here.
Adapting bellows/large format lenses
Adapting bellows or a large format camera system is also possible, and in fact I have a Cambo X2 (thanks to a recent guest posting) and love it. While it would get the job done, it’s a bit overkill and I would not recommend it because:
- It’s large and cumbersome
- You have the added expense of a view camera and some good large format lenses
- You can’t easily switch between pano and non-pano setups
- It requires support that can handle heavier load
- Opposite of the idea of a simple, fast setup for panos
Additional thoughts and tips for shift panos
- It’s tempting to think of panos as horizontal, but I often find shooting vertical panos to eek out a little more foreground than I would otherwise have.
- Using PC lenses can introduce a lot of chromatic aberrations – just the nature of the lens. The more you shift the more it shows. Lightroom 4 has excellent CA removal, and there are other tools as well.
- Avoid shifts to the absolute maximum of the lens. If you do, be prepared that the end shots may have heavy vignetting or distortion, and may not entirely usable. Better lenses minimize this, but it’s still there. (You may have noticed some obstruction in the Shenandoah sunrise image above at the top of the sky frame in the corners – that’s actually a mattebox and filter that’s getting in the way due to the high degree of shift)
- For older shift lenses that shift in only one direction, you can shift in one direction to capture half the pano, then rotate the lens 180 degrees and shoot the second half of the pano. Or you can just shoot with the range of the shift in one direction.
- I tend to use between 3-5 shots per shift pano, following the general rule that shots should overlap about 30-40%
- Follow general pano recommendations: manual exposure, manual white balance, manual ISO, manual focus. Avoid setting auto anything!
- Works better on DX cameras, since most (all?) shift lenses are full frame. Larger image circle so you can shift more without running into limitations of lenses. The downside is they are not as wide.
Additional Examples
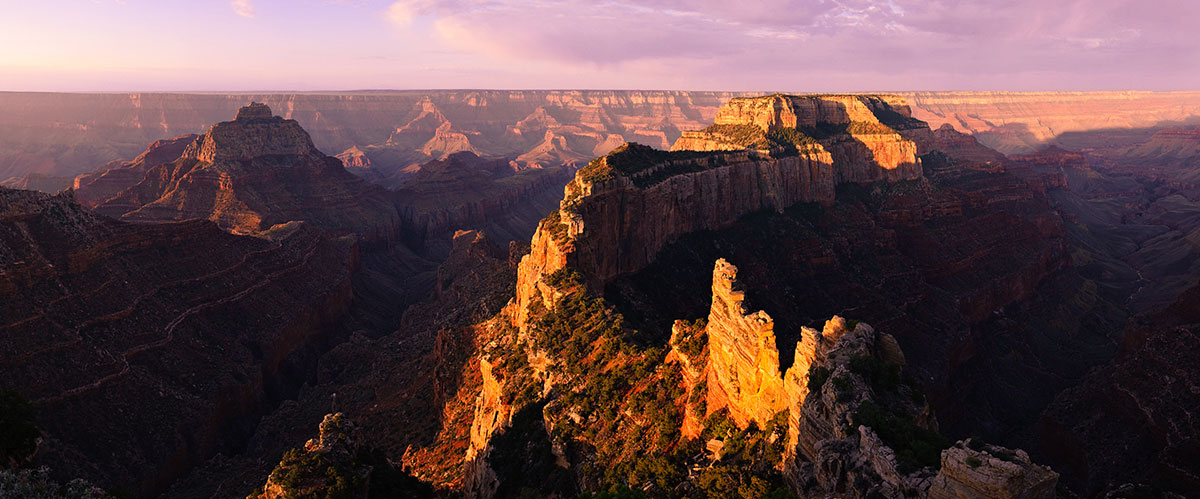
These additional examples show standard framing and a shift pano framing images for comparison:
