My name is David Balcells and I work as a Chemistry Researcher at the University of Oslo (Norway). Besides science, photography is my big passion. After reading a few inspirational books, like Chris Weston’s Nature Photography, I found the perfect school in my hometown’s backyard: the mountain of Montserrat (Catalunya, Spain). In this post I want to share with you 7 useful tips that I learned in this unique location.
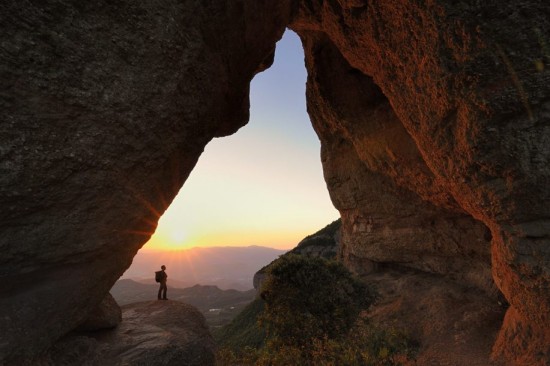
Use perspective and scale. They introduce a strong 3D-character. For this picture, I carefully placed the tripod in the SW corner of La Roca Foradada (meaning “The Pierced Rock”, a popular rock feature of Montserrat) to get the best perspective. I introduced scale and extra depth by placing myself on the opposite corner and waited for the sunrise to finally shoot at f/16 with my favorite Tokina f/2.8 wide-angle set at 16mm.
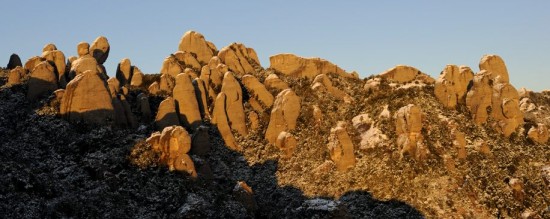
Exploit time and location. Shot in the region of Agulles (“Needles”), this picture captures the fantasy orography of Montserrat, which gathers hundreds of rock monoliths on a small-sized mountain range (ca. 4 x 12 Km). After several attempts, this is the best image I got for 3 good reasons: magic hour (sunset; don’t forget that little headlamp!), season (winter snow, rare in the Mediterranean regions) and unique viewpoint (shot from a hidden lonely ridge).
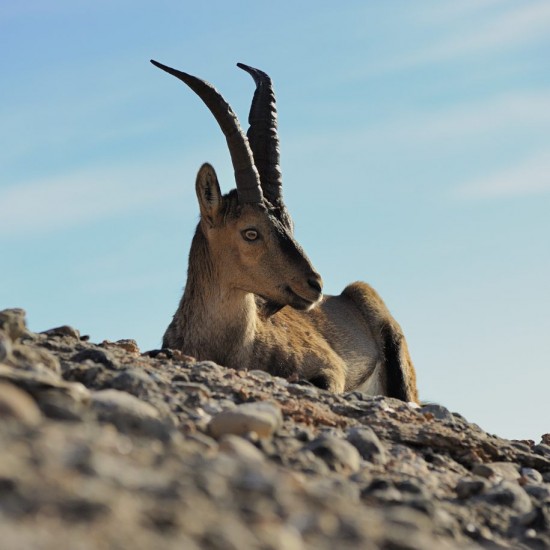
Watch out for wildlife. Besides landscapes, mountains also provide wildlife with proper habitats. Seemingly impossible in Montserrat, due to the big cities around (Barcelona is only 30 Km away), but mountain goats (capra pyrenaica) were successfully reintroduced in the 90s. I met this old male in a seldom visited area and shot it with the Nikkor 80-200 f/2.8. The eye-level perspective engages the observer through the connection with the animal’s glance.
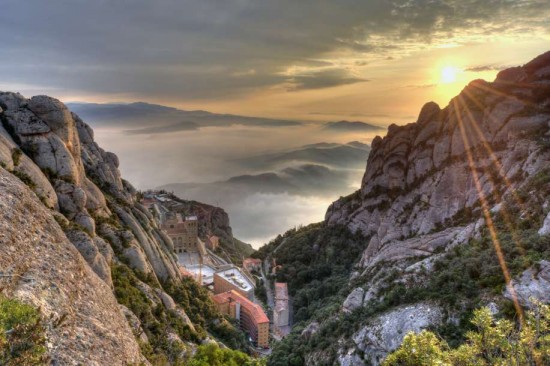
Don’t be afraid of HDR. This sunrise over the Benedictine abbey of Montserrat broke the dynamic range of the Nikon D700. I solved this by blending 3 bracketed images in Photomatix. The final HDR image was a success: it became a friends’ favorite and was awarded in a local contest. Yet some argue that, being HDR, it looked “unnatural”. Fine, BUT, if I’m asked which of the 4 images is closest to what I saw, no-brainer: the HDR. I believe that “unnatural-looking” often means “never saw this” because, hey, how many people wakes up at 5AM for a 2-hour drive and hike in the dark to see, only if lucky, these awesome scenes?
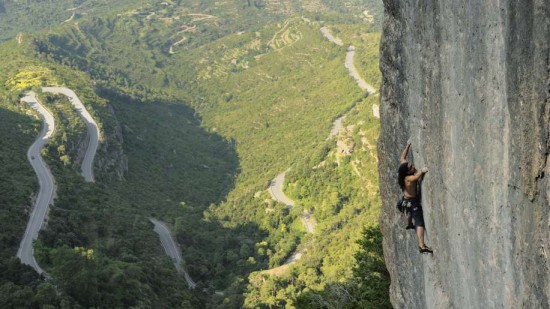
A landscape can be better than a portrait. Mountains are excellent venues for the practice of extreme sports. Climbing is the most popular one in Montserrat. In this photo, instead of zooming into the climber for a portrait, I used his vertiginous position in the rock wall for adding drama to the landscape in the background. Another key feature in the how-to of this image is the viewpoint – a rappel station giving a side view from above the climber.
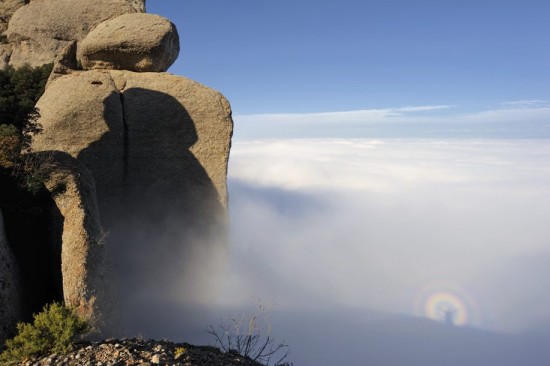
Be there. All photos obviously require us to be there. But this one even more, since it is the photographer who creates the highlight on it, due the Brocken specter. This optical illusion arises when the light hits the viewer from a low angle through the fog. The viewer’s shadow, in this case mine as I took the picture, is projected with a circular rainbow frame. This is a rare event which, in 5 years and despite frequent fogs, I have only seen a couple of times.
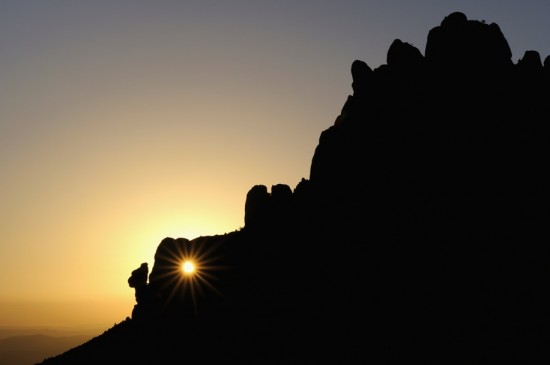
Silhouettes and sunstars can work great. They add a symbolic value to pictures. In this one, I combined both by using the Micro-Nikkor 60 at f/22, which generates the 18-pointed sunstar and still delivers good image quality. There is a little adventure story behind this image – After getting up at 4AM for the early summer sunrise, I had to run over the mountain to find the exact spot where the sunlight was projected on. And once there, I had to act very fast!
Thanks for reading. I hope these tips are useful. I am looking forward to your comments!
David Balcells
If you have an interesting idea for a guest post, you can contact me here.


