How to build an awesome studio on a budget by Cary Jordan
Have you ever wanted a great studio, but always felt it was beyond your budget? Or that a studio that could unleash your creativity, while producing professional images was only available to the select few that could afford the high cost? The truth is, you don’t have to break the bank to build a great studio; a good studio can be built for less than the price of a current Nikon pro-sumer full-frame DSLR. It’s especially wonderful when you can utilize some of the gear you likely already own, like speedlights.
Just because you’re on a budget, doesn’t mean you can’t produce top-notch imagery. My goal with this article is to show you how to build a studio on a budget – you’ll see what equipment we used, how we used it and where to buy it as well as offer sample images taken in the budget studio. Our budget studio offers something for everybody – it has the ability to be configured for portrait photography, product photography and videography as well as being totally mobile for on-location shoots. This studio is very versatile and the fact that it’s cheap (only in price), makes it all the better.
As you grow and your photography grows, the studio can grow as well. This studio is more than a “starter kit”, it’s a fully functional set-up that you can be proud of, as well as be proud of the images you’ll produce in it.
Lighting
a. Speedlights
Let’s start with the heart of the studio, the lighting. Most photographers already own several speedlights and the great thing is that they’re perfectly fine for use in the studio as well. Speedlights are relatively cheap (in comparison to professional strobes), they are small, easy to use and use readily available batteries. Quality speedlights can be triggered several ways, but the most common and easiest way is to trigger optically. If you shoot Nikon, you can trigger your speedlights using your camera’s on-board flash (for camera’s that have an on-board flash) using Nikon’s Creative Lighting System, which works wonderfully (I use it all the time). You can also trigger your Nikon speedlights with a commander module like the SU-800, which triggers your Nikon speedlights via an infrared signal. There are also third-party triggers, such as Pocket Wizards.
If you’ve decided to use speedlights, you’re going to need a way to employ them. For the studio, I went with the Impact Digital Flash Umbrella Mount Kit from B&H Photo Video ($98.95USD). This kit comes with everything you’ll need to get started and allows the use of 2 speedlights. I found the kit to work extremely well and can be used in the studio, or in the field. This kit is only limited by your speedlights and your imagination.
b. Continuous Lighting
Another popular form of studio lighting is continuous lighting. There are several form of continuous – Incandescent, LED and Florescent. Depending on my subject, I’ll often use incandescent continuous lighting (babies, for instance). I found the incandescent Impact Floodlight Umbrella Kit ($74.95USD x2) to be great, especially for the price. You’ll need 2 of these to complete the set. These are durable, simple and effective. No-nonsense and simplicity is the name of the game here and this kit delivers, without fail.
Background
a. Background Support
A very important aspect of any studio, is the background set-up. I need a background set-up to be easy to set-up and break-down as well as to be totally mobile. For our budget studio, I chose the Impact Background Support System ($99.99USD). It’s light, sturdy and is totally mobile. You don’t really need more than this for a background support system, regardless of how much you want to spend. This background support system allows the use of different backgrounds, which are very easy to change out. The system can also be configured in several different sizes, depending on what you’re using it for. This background system also comes with a durable carrying case, so the background system can easily be broken-down and moved.
b. Backgrounds
Now that we’ve picked a great background support system, we need some backgrounds. Luckily, there are several to choose from and vary from color to color. Impact Black Muslin Background 10′ x 24‘ ($114.95USD), Impact White Muslin Background 10′ x 12′ ($58.95USD) and Impact Chroma Green Muslin Background 10′ x 12′ ($58.95USD) are your most common colored backgrounds. I’ve found these particular backgrounds to be of great quality, while remaining very affordable.
Tripod / lighting stands / reflectors / Posing Stool
a. Tripod
We all know that the tripod you use is very important in your day-to-day photographic endeavors. We have been conditioned to think we have to pay hundreds of dollars for a quality tripod; while this is usually true for specialty tripods and accessories, this doesn’t mean you can’t get a good general-use tripod at an affordable price. For this project, I went with a Oben 4-section Aluminum Tripod w/BA-0 Ball Head ($119.95USD). Don’t let the price fool you, this tripod is very sturdy and is well made from quality materials. At this price, this tripod is a steal. I honestly couldn’t believe the quality when I started using this tripod, which is why it made the list for this project. It easily rivals my high-end tripods in quality and craftsmanship and has turned into my favorite general use tripod!
b. Lighting Stands / Misc Stands
A good studio needs lots of stands. Whether it be for extra lighting or reflectors. I chose the Impact Multiboom Lightstand and Reflector Holder -13″ ($79.95USD), Impact Master Centrury C Stand Kit with 42″ Riser, Grip Head and Arm Chrome 10.75′ ($128.95USD) and the Impact Air-Cushioned Heavy-Duty Light Stand Black – 13′ ($69.95USD). These stands are all heavy-duty, sturdy and can be adapted to do just about anything you’d need in your studio. Of course, if you find you need more stands, you can always double-up on a few of these relatively cheap. For the purpose of getting the stands needed as a bare minimum and to keep the studio costs down, I chose to use one of each stand listed above.
c. Reflectors
The great thing about a good reflector is the fact that it can be used in the studio and in the field. I’ve found a good combination reflector to be perfect for both purposes. For this project, I chose the Impact 5-in-1 Collapsable Oval Reflector – 42 x 72″ ($94.95USD). This multi-purpose reflector is big, powerful and comes with plenty of options. As with all of the products I’ve listed, this reflector is built very well. It also comes with a carry case that the reflector collapses into.
d. Posing Stool
Of course, a studio can’t be complete without a good posing stool. For this, I chose the Impact Posing Stool 20-30″ ($58.95USD). This stool is well-made and features a pneumatic control system for raising and lowing the stool.
e. Product Photography
If you plan on doing any product photography, you’re going to need a light box/shed of some sort. I used an Impact Digital Light Shed – Extra Large – 24x24x36″ ($63.95USD). This thing is awesome and comes with everything you need to get going. I highly recommend this light shed and it’s extremely affordable.
Miscellaneous Equipment
a. Wireless Remotes
It’s always a good idea to have a good wireless remote to remotely trigger the shutter on your camera. The obvious choice for me was the Vello Wireless ShutterBoss Timer Remote ($99.50USD). This remote can be used wirelessly or wired. This particular remote package comes with a Nikon 10-pin connector, so if you don’t have a camera that can utilize this connection (like a D7000 or D5100), you’ll need a different cable, which can be purchased. This remote works extremely well and features a great range (up-to 250′) and configurable channels (99 possible channels).
b. Cases for equipment
Now that we have all of this equipment, we need to be able to safely move it from place to place. Most of the gear listed here comes with its own carrying case, but not everything does. You’ll need to find a way to transport this equipment around safely. While there are several products on the market for carrying and protecting gear, they usually come with a hefty price tag. In my search for a good alternative, I came across this case, the Pearstone Pro Camcorder Case with Wheels ($179.95USD). I chose this case because it’s easily configurable. Just because it says “Camcorder Case” on it, doesn’t mean it won’t serve other purposes; this case is very large and can carry a lot of equipment.
Conclusion
Now that we’ve covered the basic equipment needed to build an awesome studio on a budget, let’s total up the costs.
Grand Total: $1477.79.
Now, of course you can omit any of the equipment you don’t need or already have. Again, the good thing about this set-up is its ability to grow as you grow.
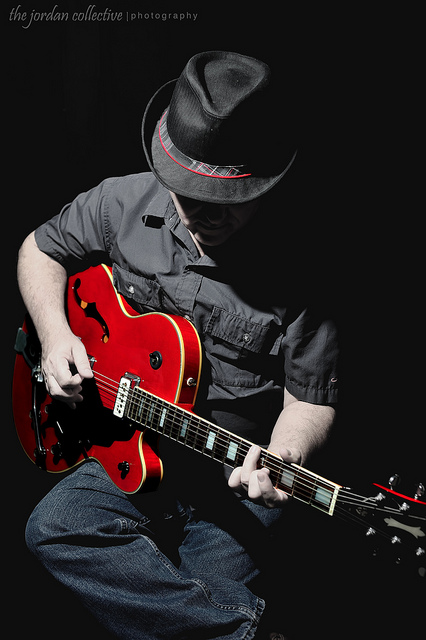
The images below were all taken inside the “Budget Studio”, using the exact equipment shown above. I hope you’ll agree, this studio is awesome (especially for the price).


