Northern Lights chasing in Iceland with the Nikon D810 is by Jonathan Zdziarski (website | blog | 500px | Twitter):
There’s nothing quite as magical as seeing a bright green and pink Aurora Borealis dancing in the sky. One of the best things about Aurora photography is that it’s always changing; there’s always a new dance to capture, and plenty of foregrounds to shoot from. My wife and I have been Aurora chasing for a few years now, and have captured her in Norway, Iceland, and back at home in New England. Along the way, we’ve picked up a few tricks, and gotten some practice in taking astrophotography in between.
Solar experts are saying that 2016 will be the last year we see the Aurora this intense for another decade, as the solar cycle is trending toward a less active stage. If you’re planning on chasing the Aurora, now is the time to do it.
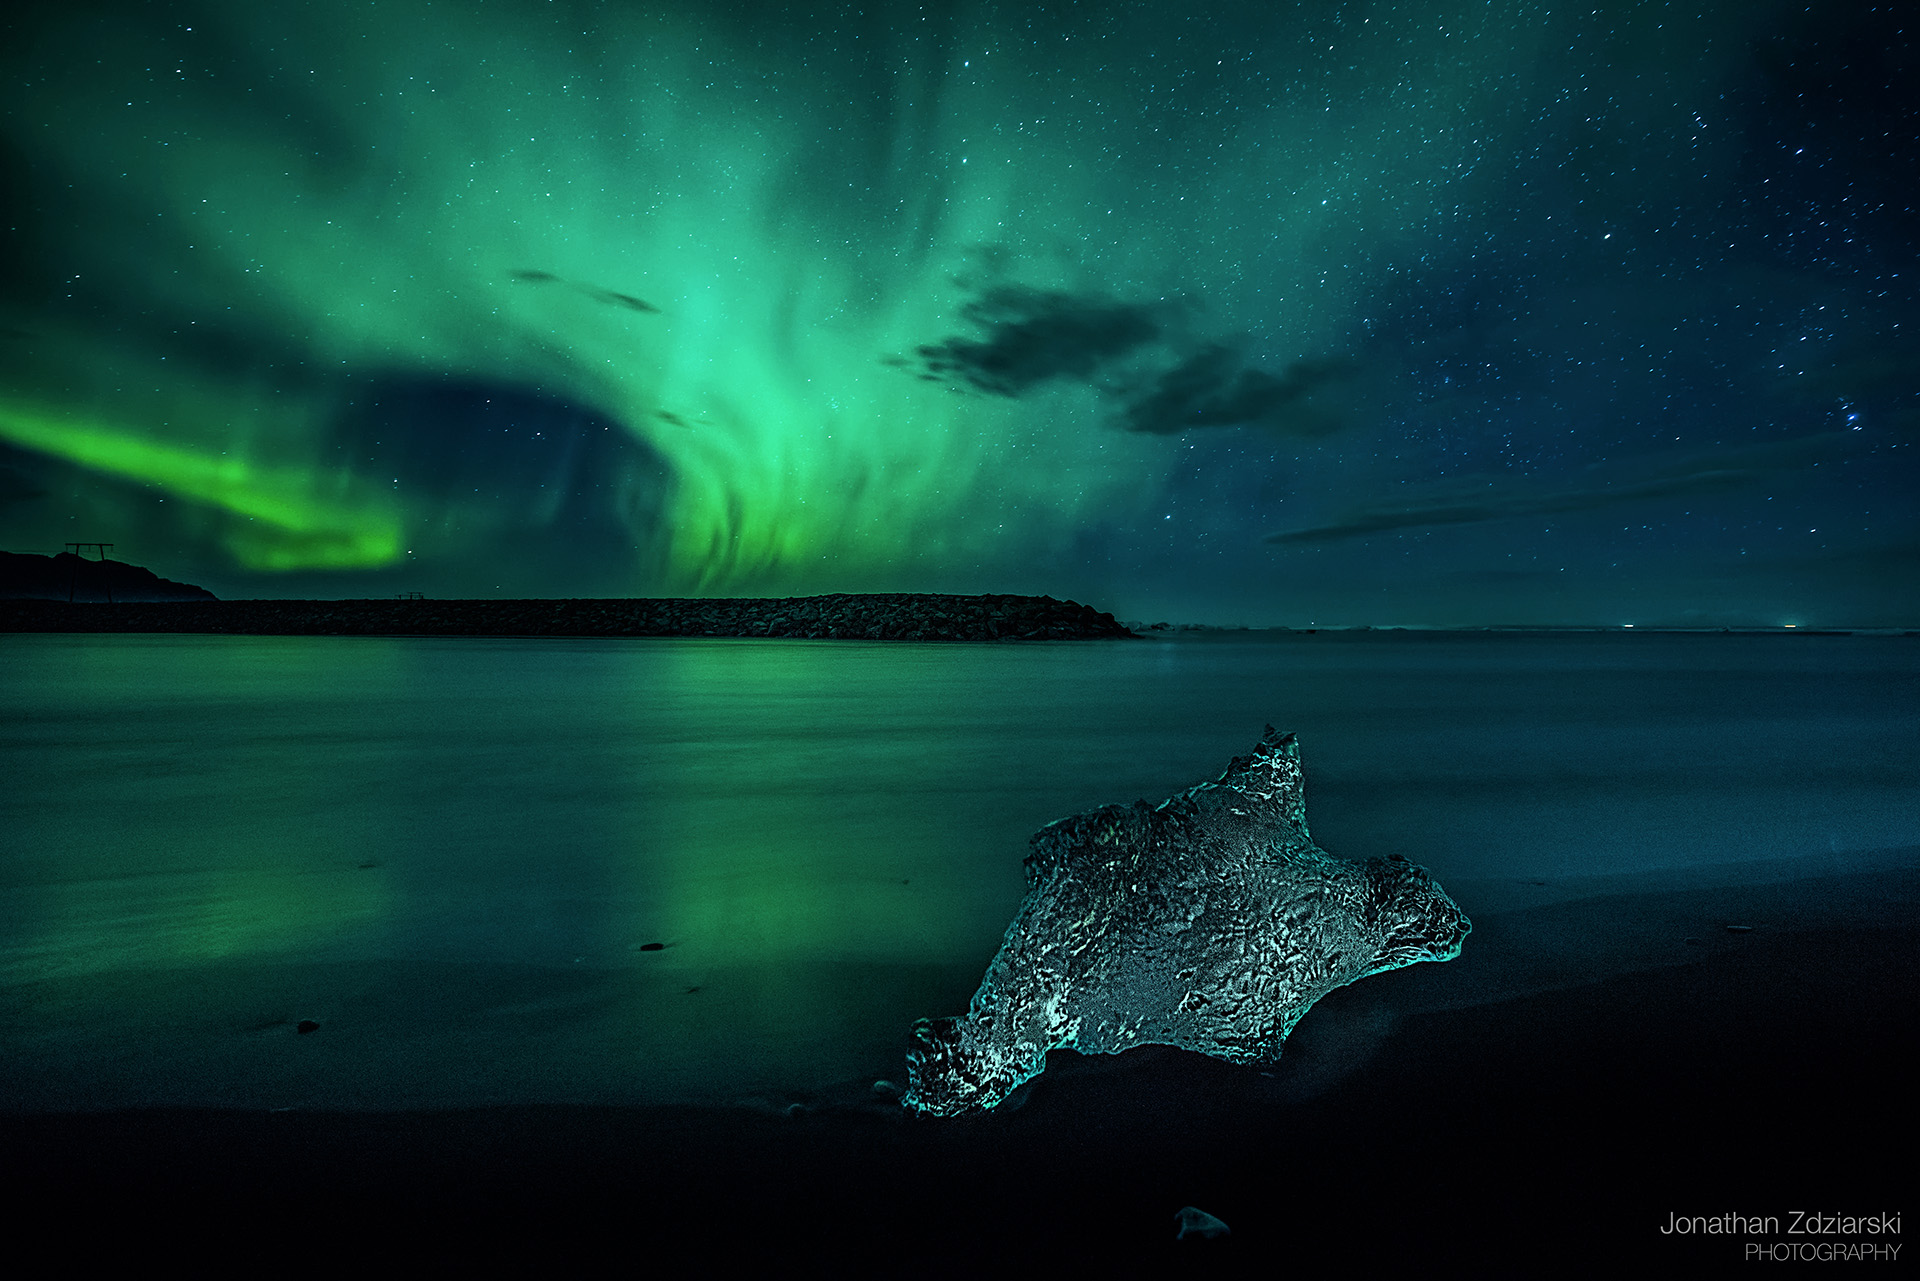
Alien Ice
Zeiss 15mm, f/2.8, 13+30s, ISO 1600
For Beginners: Night Exposure Primer
If you’re new to night photography, you need to be able to get a few things out of your camera in order to shoot the Aurora successfully. Shooting the Aurora requires manual mode camera settings, primarily because the computer inside of the camera isn’t smart enough to expose properly for the Northern Lights in any of its auto modes. You can probably play around with exposure control to get “something” out of it, but manual mode really gives you the flexibility to adjust the shot as you please.
The Aurora varies in brightness, and so the game, in short, is this: to let the camera sit on a tripod and let in enough light so that the Aurora shows up in your photo, without blowing out the background.
Exposure is a “recipe” consisting of these ingredients:
Shutter Speed: This is how long you let light into your camera. To shoot the Aurora, you’ll leave the shutter open for several seconds to let enough light in.
Aperture: This is how wide your lens’s iris opens; the wider it opens, the more light it’s going to let in. A smaller f-number gives you the wider aperture. Typically, you want a lens that can shoot at f/2.8. Any wider, and your depth of field will be so shallow that part of your frame might be blurry (or the sky, if your focus is a tiny bit off). Any narrower, and not enough light will come into the camera. NOTE: While f/2.8 is ideal, I’ve seen pictures turn out as narrow as f/4, you’ll just have to boost one of the other two ingredients.
ISO: This is how sensitive you set the camera’s sensor to be to light. The higher the ISO, the grainier your picture, so you want this to be as low as you can get away with. Typically, Aurora shots require around ISO 1600 or even 3200, although if it’s really bright, I’ve turned my ISO as low as 200 and gotten good results. That is atypical, though. Most of my shots are ISO 1250 or 1600.
All of these three ingredients affect how much light your camera takes in during a single shot. If it takes too much light in, your shot can be overexposed. Too little, and the Aurora will be too dark.
Think of exposure like giving medicine to a hospital patient: the goal is to get the right amount of medicine into them. The ISO is how strong the medicine is. The shutter speed is how long the IV drip is running for, and the aperture is how wide open the IV drip is flowing. You can kill your picture if these aren’t at least reasonably set up to deliver the right amount of light for the shot.
Most cameras, when put in auto mode, try and expose for the scene, and aren’t smart enough to know that you’re trying to shoot the sky. If you leave your camera on auto, you’re likely to just shoot a black sky. Manual mode lets you boost the amount of light coming in by manually changing these three things.

Spiritual Warfare Zeiss 15mm, f/2.8, 20s, ISO 1600
Equipment
I can’t tell you how many times we’ve run into someone back at a hotel who saw a beautiful Aurora and came back with photos of darkness because their mobile phone or tablet didn’t pick it up. While the Aurora can be quite bright to the naked eye, mobile devices just don’t have the ISO range to pick it up. Most iOS devices’ sensors can only stretch to about ISO 640, and don’t have a long exposure setting by default. You can’t just take an Instagram of the Aurora, unfortunately. I’ve heard some people, with use of a long exposure app, have been able to get their camera phone to shoot something, but I wouldn’t recommend trusting such a unique and fleeting moment to a cellphone. There’s nothing more depressing than spending all that money on an amazing vacation, being surrounded by a gorgeous Aurora, then getting home and having terrible photos. I advise spending the money on a good camera system.
Any good DSLR (and some mirrorless cameras), with a manual exposure mode, should be sufficient to capture a good Aurora. (The only reason I say “some” mirrorless cameras is because many of them are completely unable to focus or even do a live view in the dark, whereas a DSLR allows you to see through the lens to focus rather than on a screen). I travel with a pair of Nikon D810s. While the D810 doesn’t have the highest resolution available, it is the camera with the best dynamic range available (even over above the Sony a7R II and Canon 5DS). Dynamic range is very important when doing any kind of night shooting, as exposure is often a game of guesswork. Having good dynamic range means the ability to pull out shadows from underexposed photos, and recovering highlights from overexposed ones. For this, the Nikon D810 is king. Dynamic range suffers as you approach the higher ISOs as well, so squeezing every bit of DR that you can out of your camera can really come in handy. It’s not a must – my wife shoots with a Canon 5D3 and does quite well, but she’s also more limited in post processing capabilities and so takes a wider range of exposures to be confident in the results. D810’s sensor itself is top notch, only slightly bested by the Sony a7R II, however worth the trade-off in getting better dynamic range, great glass, and a proven track record.
One other thing you’ll need is a good tripod. I use a carbon fiber tripod and Really Right Stuff BH-40 ball head – in Iceland, we are subject to gusts of wind (as well as waves by the water), and so having a good solid tripod with steel spikes can really help to produce sharp photos. You’re going to be doing long exposures, of anywhere from a few seconds to a few minutes, and so you’ll either need a tripod or to rest your camera on a rock in order to avoid irreparably blurry photos. Resting your camera on a rock by the ocean may not work out so well.
The Dragon
Zeiss 15mm, f/2.8, 10s, ISO 1600
While most Aurora shots don’t need to exceed the camera’s maximum 30 seconds to shoot the Aurora itself, you’re likely to end up with a very dark foreground unless it’s reflecting off of something like water. If I’m shooting something with a more defined foreground, I’ll typically shoot a second, longer exposure to capture it in a separate frame (I’ll explain merging later in this post), and that can take a few minutes of shutter time. For this, you may need a remote timer for your camera. Some cameras (such as the D810) have a manual mode that can do >30s long exposures without a timer (on the D810, it’s designated as “–” past bulb mode), however having a timer will give you less arbitrary exposure times.
Lastly, a good lens makes all the difference. I shoot the Aurora primarily with a Zeiss 15mm f/2.8 Distagon, although I’ve taken a few with the Nikon 14-24mm as well. I also use the Zeiss 21mm when the occasion calls for it. The Distagon is not a cheap lens, but has many benefits to night photography. A wide open prime at f/2.8, it is sharp from corner to corner and has very low coma. This is very important when you want the pin points of the stars in the sky to look sharp, where other lenses will show stars as blobs in the corners. It has very little distortion, and while the distortion of other lenses is often correctable, the result of correcting it is that you stretch out stars and other small artifacts.
The 15mm and 21mm Zeiss Distagon lenses also have a manual focus with a hard stop at infinity that does a good job stopping where it needs to. Infinity can be a tricky business, and depending on the materials used in the lens, true “infinity” focus can even vary with temperature. This is true of the Nikon and Canon lenses (and others) made with plastic or fluorite components. Zeiss lenses are all metal, and to my knowledge do not use fluorite lens elements (which can thermally expand, shifting focus). My other two Distagon lenses (25mm f/2 and 35mm f/1.4) aren’t quite as spot on at infinity, and so I think some of my success with the 15mm and 21mm at their infinity stop may be due to the depth of field at f/2.8 allowing it to work.
It’s always best to manually focus by eye when you can, but the Zeiss hard infinity stop is really helpful when you’re groping around in the dark, and can’t see a thing through your viewfinder; it’s reassuring to know that (with these two lenses, at least) you don’t have to mess around with your focus – you just turn the focus ring until it stops. I’ve heard some people in forums claim that it isn’t true infinity, but I’ve had very good results using it with these two Distagon lenses. Much of it may still depend on environmental factors – the crisp cold night air certainly helps to prevent any lens elements from expanding or causing refraction problems, but I suppose shooting the same lens in tropical climates could potentially yield different results. At the very least, Zeiss’ stop should get you good results as narrow as 2.8 in cold temperatures – probably on all Distagon lenses, but I wouldn’t rely on it for anything wider than f/2.8. I’m sure someone could argue that a tiny bit of fine tuning is still necessary to get the ideally perfect focus, and this may be more noticeable in daylight. For low-light, however, the infinity at least works “well enough” for the many gallery photos I’ve printed, and I’m more likely to have issues with star trails or the sand shifting underneath my tripod than I am focus.
This all sounds like a lot of expensive gear – if you’re just looking for touristy type memories, you can get away with an inexpensive DSLR and tripod, and spend less than $1,000. If you’re looking to produce gallery quality photos, obviously you get what you pay for in terms of equipment. If there is a law of diminished returns in photography, it’s buying expensive gear that you don’t know how to use… I recommend getting whatever gear is consistent with your skill level.
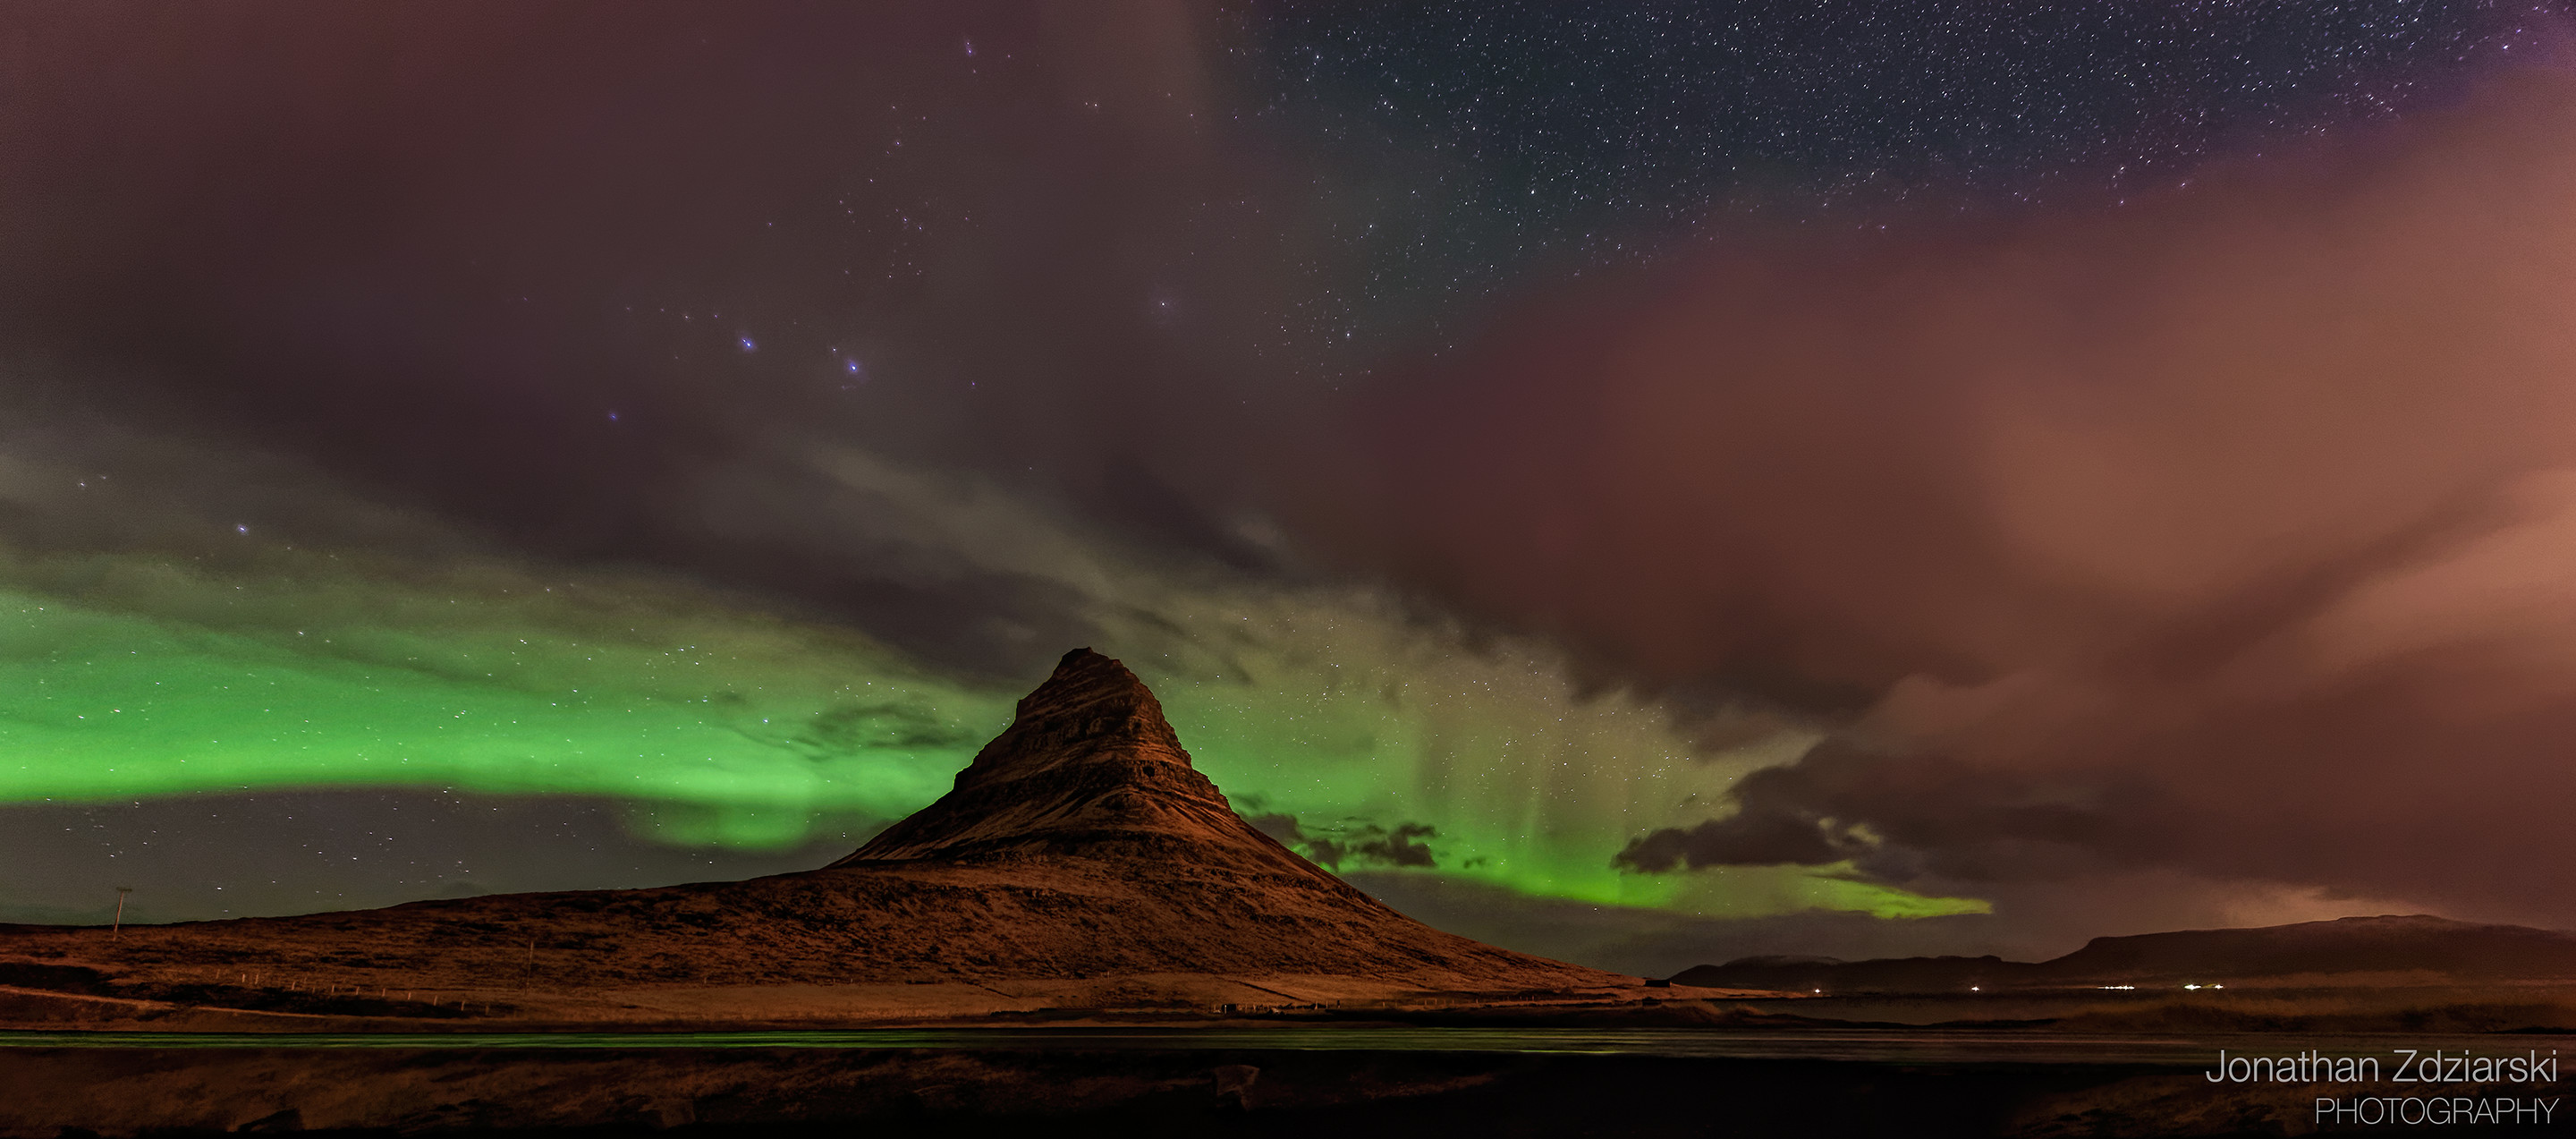
Aurora Over Kirkjufell
Nikon 14-24mm, 14mm, f/2.8, 15s, ISO 3200
Tracking the Aurora
The Aurora is most active in the fall and winter months. People often say that it has to be cold, but I’ve found this to be only because the cold seems to drive away the clouds to create a crisper sky. The Aurora has shown up for us on evenings when it was as warm as 50F. Even the weather guys can’t consistently predict the Aurora, so I wouldn’t put much weight on such advice. The slightly more reliable way to track the Aurora is to check these websites:
Space Weather Live Aurora Forecast http://www.spaceweatherlive.com/en/auroral-activity/aurora-forecast
University of Alaska Geophysical Institute http://gi.alaska.edu/AuroraForecast/NorthAmerica
NOAA 3-Day Auroral Forecast http://www.swpc.noaa.gov/products/aurora-3-day-forecast
NOAA Real-Time Aurora Map http://services.swpc.noaa.gov/images/aurora-forecast-northern-hemisphere.png
The forecasts can sometimes be hit or miss, but they’re a reasonable guide. It’s always good to keep an eye on the real-time map, as sometimes unexpected spikes in Auroral activity take place, and they will be visible only on the real-time map. Like I said, they still can’t predict it well.
Checking the weather forecast is important too, of course. If it’s going to rain, you likely won’t see much of the Aurora. In Iceland, the rain can let up for short periods of time, however, and give you clear skies long enough to view it. The shot Aurora Over Kirkjufell (above) was taken in between hail storms, in which our car was getting bombarded with wind, hail, and rain… then five minutes later the skies were clear and it looked like it was going to be a nice night. We got off maybe give photos before the hail storms started again.
The most important tip I can give you when dealing with the weather is to never give up the evening. Storms unexpectedly clear, pockets of clear sky can creep by, and if you’ve given up and are lounging in the hot tub, you’re going to miss your chance.
Hotel Planning
If you’re planning on shooting the Aurora over a specific feature (such as a waterfall or near water), it’s a good idea to stay at a hotel close to your spot. Even on a bad night, the Aurora may still appear for 10-20 minutes, before being covered by clouds. We stayed at Hotel Gullfoss for one evening, which is a five minute drive from the massive Gullfoss waterfall. Sure enough, we were able to hike out to the waterfall and shoot for an hour before the cloud cover returned and the rain began again. A clear sky was not on the forecast anywhere for that night.

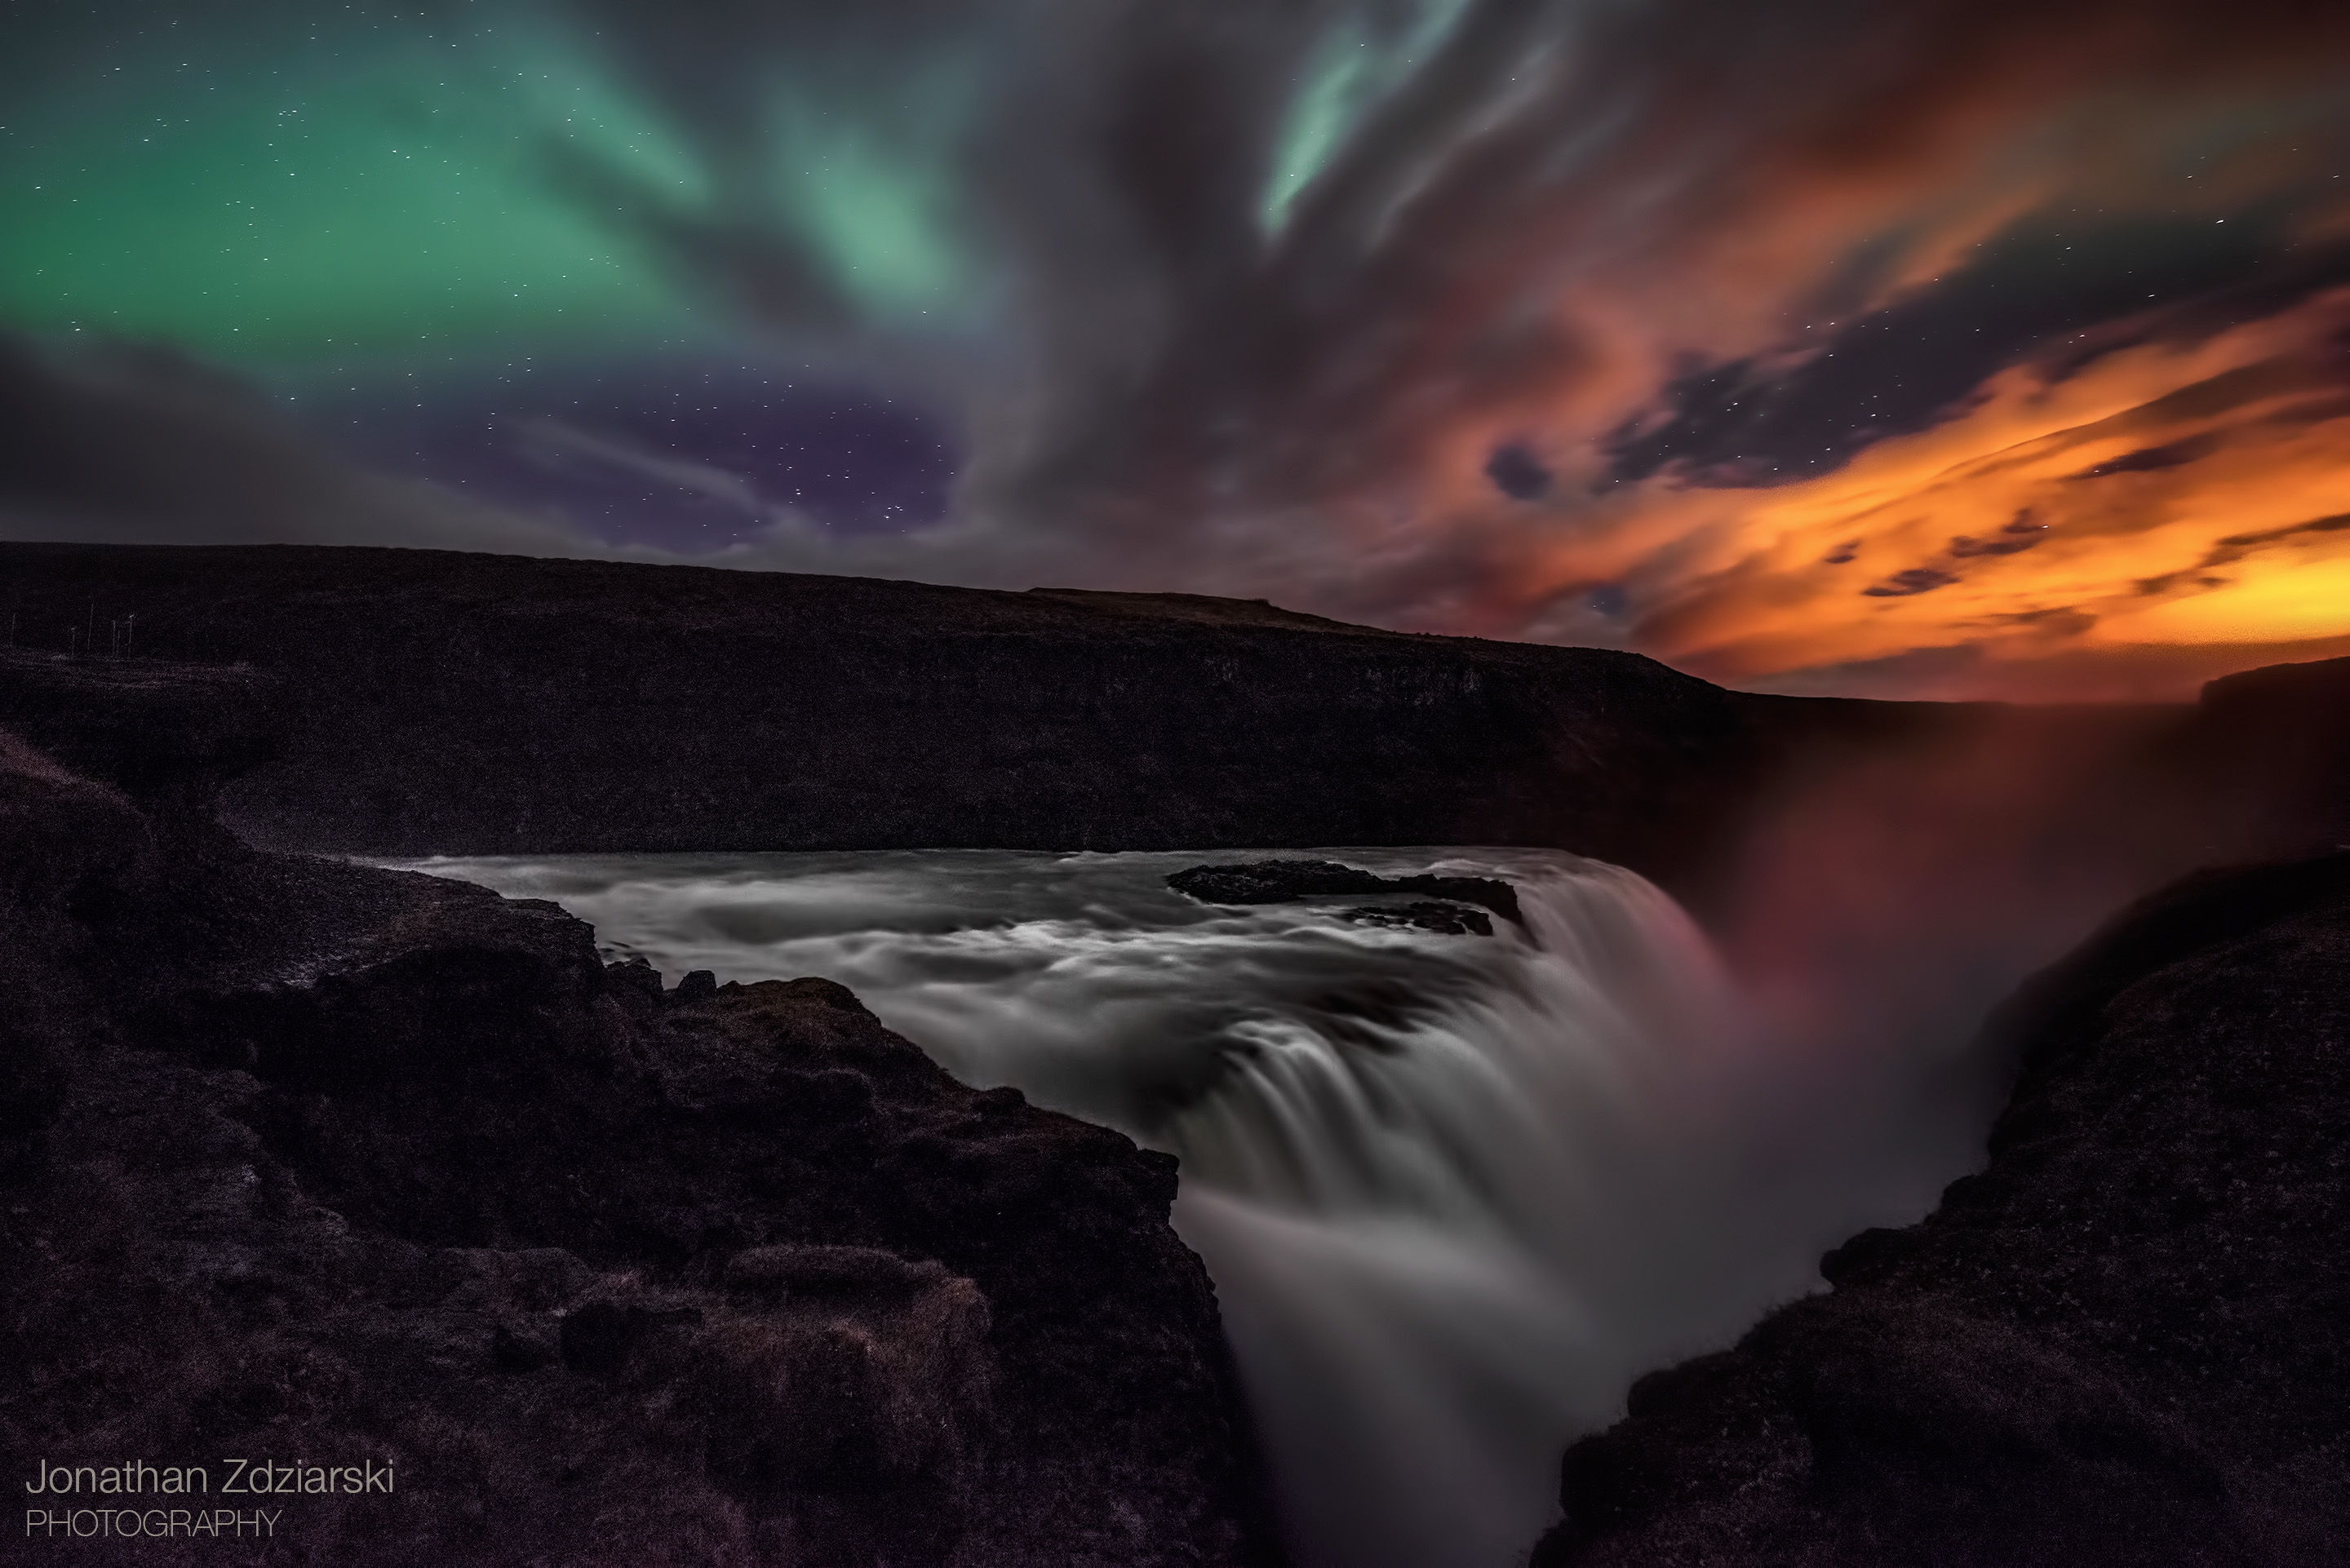
Dancing Over Creation
Aurora over Gullfoss Waterfall
Zeiss 21mm, f/2.8, 30s+237s, ISO 1600
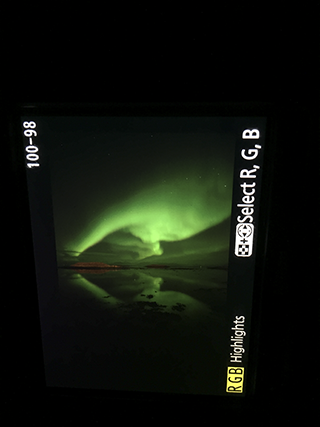
While in your hotel room, you can periodically check for the Aurora with your camera. You probably won’t see it with the naked eye since they’re not adjusted. Instead, aim your camera out the window and shoot at f/2.8, ISO 3200, 10s. Just rest it on the window sill or hold it – it doesn’t really matter if it gets blurry. If you see any green, then you know the Aurora is getting charged up outside, and you can make your way to your shooting location.
Another good place to stay if you’re in the area is Hotel Höfn; this hotel is at the end of a peninsula, with a nice rocky beach shore just across the street and down a short path. The water here is nice and calm, and makes for some great reflections.
Composing the Shot
When shooting the Northern Lights, having a strong foreground can really make for a great shot. There is no short supply of good Aurora photos with no foreground, but watching her dance above the water, or a mountain, or something discernible, really adds a sense of scale to the photo. Some of my favorite places to shoot the Aurora are:
- Over still water, from the shore of a lake, pond, or lagoon
- Over a waterfall where you’ll get a nice sheen on the water
- Using the silhouette of trees or a mountain as a backdrop
- Any landscape you’d normally shoot during the day, that has high enough contrast to see some texture in the terrain.
Most compositions I see are typically 2/3 sky, 1/3 foreground, or 50/50, however as with everything else, it all comes down to what you like. Some of my favorite shots are 2/3 foreground, 1/3 sky, but it works with the reflection.

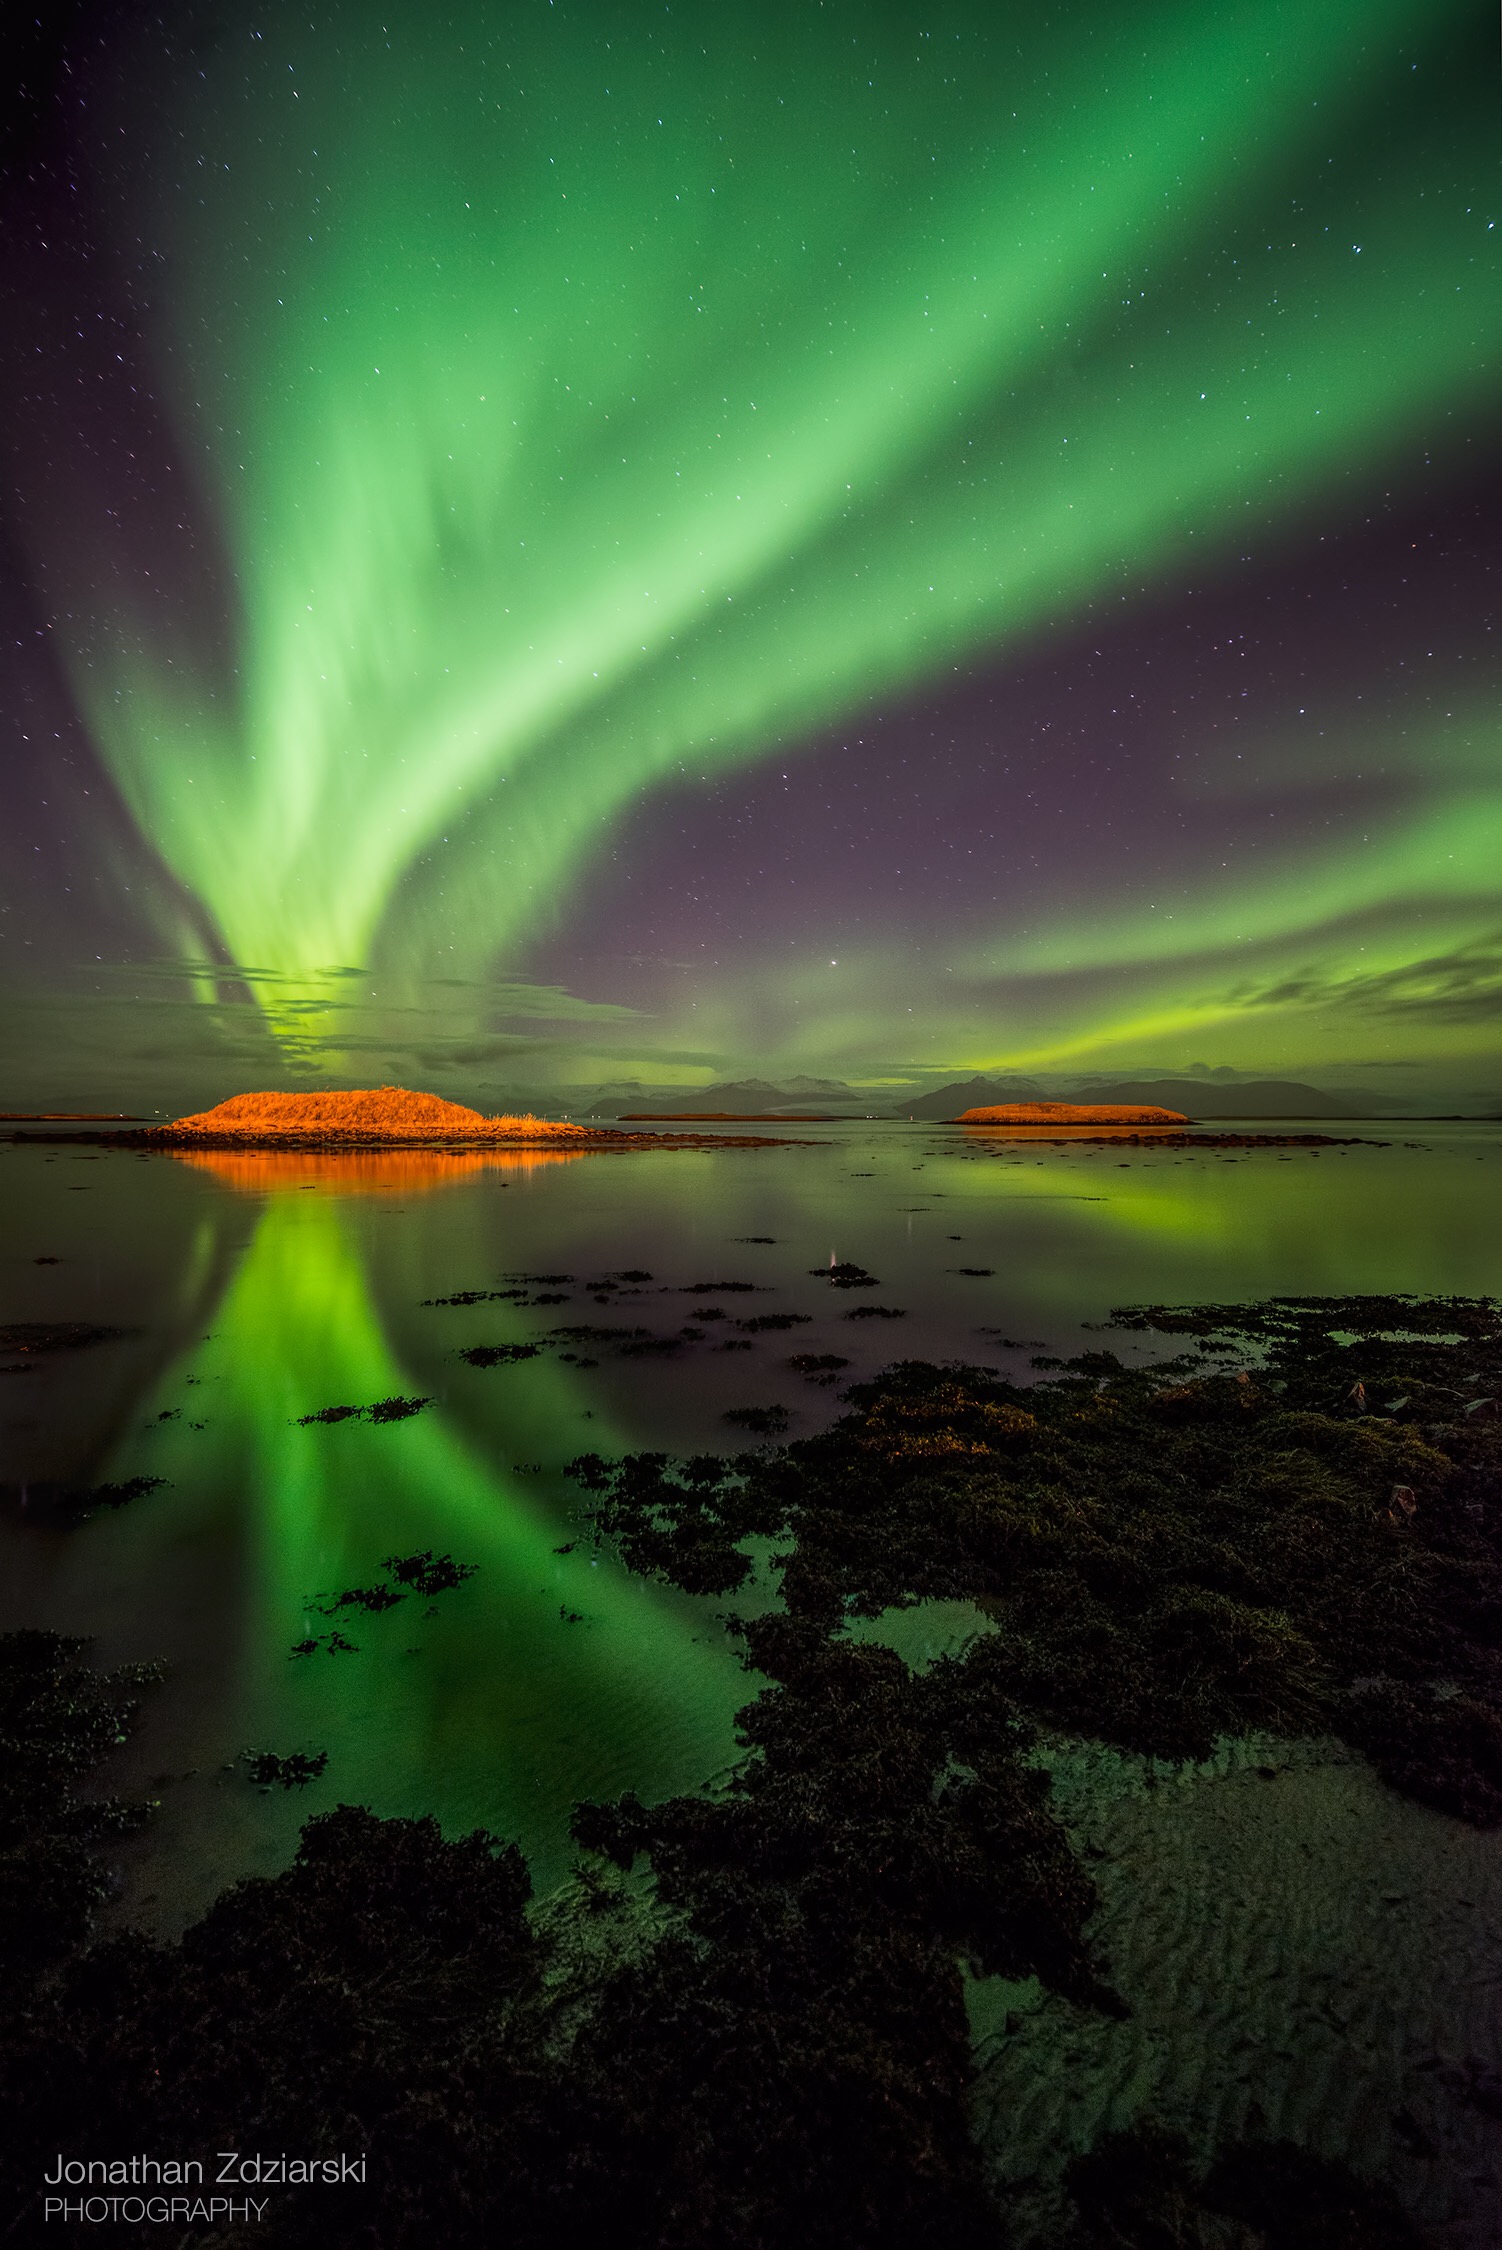
Horseshoe
Höfn, Iceland
Zeiss 15mm, f/2.8, 6+30s, ISO 1600
When you’re near still water, look for the reflection of the Aurora. Especially when she’s dancing, you’ll find that shooting at just the right angle can make the reflection a fantastic leading line into the rest of the shot.
Turning your camera vertical will give you more sky to work with, or can also help you to bring the foreground in more dramatically when using a wide angle.
Focusing
Focusing can be tricky; the goal is to focus out to infinity. If you have an auto-focus lens, it’s likely going to be too dark for the auto-focus to kick in, and so it will end up hunting, which will leave you out of focus. My wife shoots with a Canon 24-70, and so we’ve had a lot of practice focusing her lens. Unless you’re willing to spend the money on a Zeiss, I recommend one of the following methods, they’ve worked well for us in the past:
- Stars Approach. Turn the lens to manual focus, compose your shot, then turn the focus ring until the stars become tiny pinpoints. Take a test shot, then zoom in at 100% on your screen to ensure that you are really in focus.
- Flashlight Approach. Figure out what the maximum focusing distance of your lens is. If you’re shooting a wide angle, it’s probably around 15 feet. Now use a bright flashlight to shine light on a tree, rock, or anything past that range, and use your camera’s auto-focus to lock focus. Once you’ve done this, immediately switch the lens to manual focus, otherwise it will hunt again. Take a test shot of the sky, then zoom in at 100% on your screen to ensure that you have a solid focus.
- Find Something to Focus on Approach. As long as you exceed the maximum focusing distance of your lens, you can focus on anything you want off in the distance. If there’s a lit building behind you, that works, or if your car’s clicker will work from where you are (and it’s far enough away), you can click the lights on for a minute to focus on it with auto-focus…. then switch to manual focus, take a test shot of the sky, and zoom in at 100% on your screen to ensure you have solid focus.
Every now and then, you’re going to want to check your focus to make sure it’s still good. You’re going to likely be shooting at f/2.8 (to let the most light in), and so your depth of field will be quite shallow. If you’re not at infinity, you could end up with blurry photos. What looks in focus on a 2 inch screen may be incredibly blurry, so zoom to 100% often.

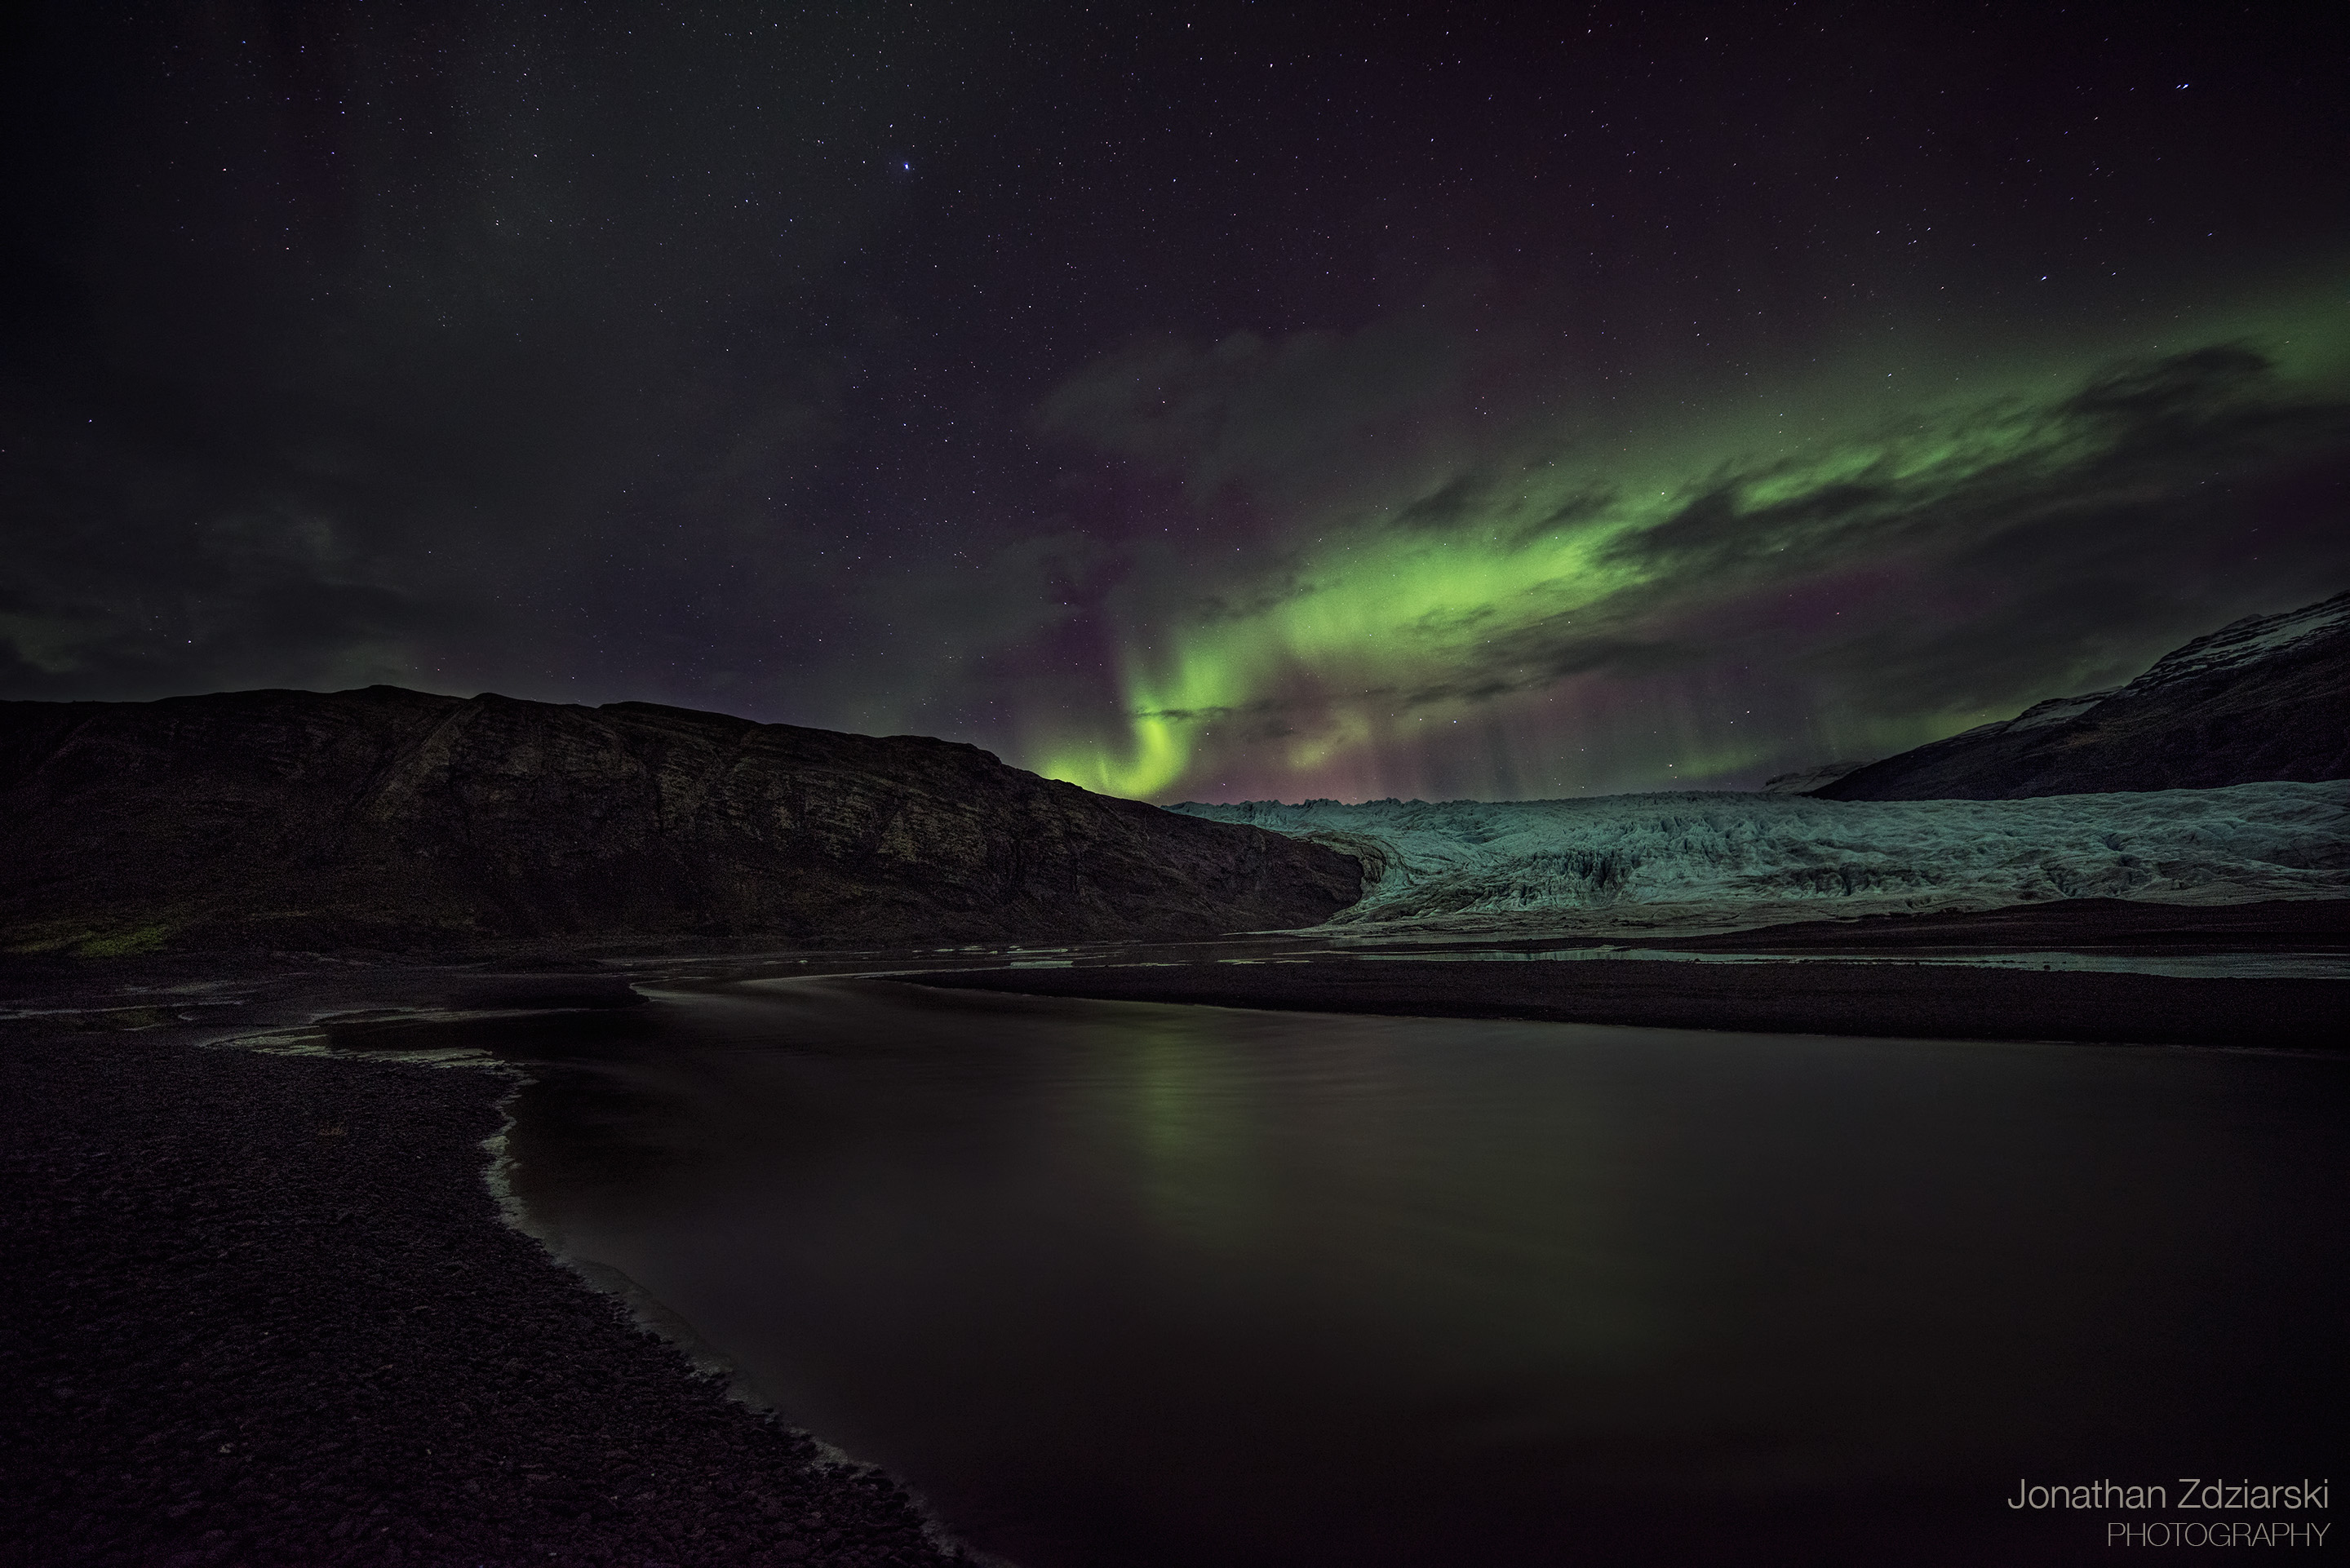
Striped
Fláajökul Glacier
Zeiss 15mm, f/2.8, 30s, ISO 1250
Exposure and White Balance
Depending on the brightness of the Northern Lights, you’ll be anywhere from a few to 30 seconds. The shorter your exposure is, the more defined the Aurora will likely be (unless it’s behind clouds, in which case you’ll just have green clouds). Longer periods of time will get you a creamier Aurora. I recommend starting out with f/2.8, ISO 1600, 15s, and then fine-tune from there to get the right exposure. It is possible to blow out the Aurora highlights, so make sure to turn on your blinkies.
A note on ISO: The higher the ISO, obviously the grainier the photo. On very bright nights, you may be able to drop your ISO considerably and shoot longer exposures. One night, the Aurora was so bright, I was able to shoot her at ISO 200! You’re going to get the cleanest photos with the lowest ISO; the trade-off is that you’ll be shooting longer, so you’ll end up with a creamier Aurora. Take several shots at different settings, and figure out what you prefer.

Prancer
Zeiss 15mm, f/2.8, 15s, ISO 400, Single shot
Another benefit to shooting at low ISO, when possible, is that you increase your dynamic range, making it easier to pull out shadows without grain. The above shot, Prancer, was shot at ISO 400; while I did take a second exposure for the foreground, I didn’t feel the need to use it. The shadows pulled quite nicely.
As for white balance, I strongly advise shooting in raw. Even with the proper white balance, you’re going to want to tweak it when you get it into Camera Raw or Lightroom. I will either shoot with a 2800K white balance (if there is a lot of light pollution), or AWB if the Aurora is bright enough, and however even if you nail the greens, there is so much green surrounding you that the true colors of the foreground tend to get bleached out. I tend to slide the tint up toward magenta (the opposite of green) a bit to reign in the greens and bring back the rich crystal blues of the icebergs, for example. I tend to also drop the AWB’s color temperature a tad to bring back some of the blues. If you don’t like what that’s doing to the rest of the photo, there’s an often unused “Camera Calibration” tab in ACR (right between ‘fx’ and your presets) with a tint slider just for shadows. You can slide that over toward magenta without altering the photo as much.
Exposing for the Foreground
While shooting the Aurora, be sure to also expose some longer shots for the foreground. I typically shoot two separate exposures, and then blend the two together in Photoshop using either Auto-Blend Layers, or a simple mask. As a personal ethos, I don’t believe in light painting. (I’ve tried it. It feels artificial. Maybe useful for very limited effects). So some exposures may take as little as 30s to get the foreground, while others may leave me standing there for 5-10 minutes. In my opinion, it’s worth it. I also recommend shooting the foreground at a lower ISO (800 or below), so that it’s not so grainy. You can use a lot of noise reduction on the Aurora, but notsomuch on the foreground.

Reflecting on Jökulsárlón
Jökulsárlón Glacier Lagoon
Nikon D810, Zeiss 21mm, 15s, ISO 800
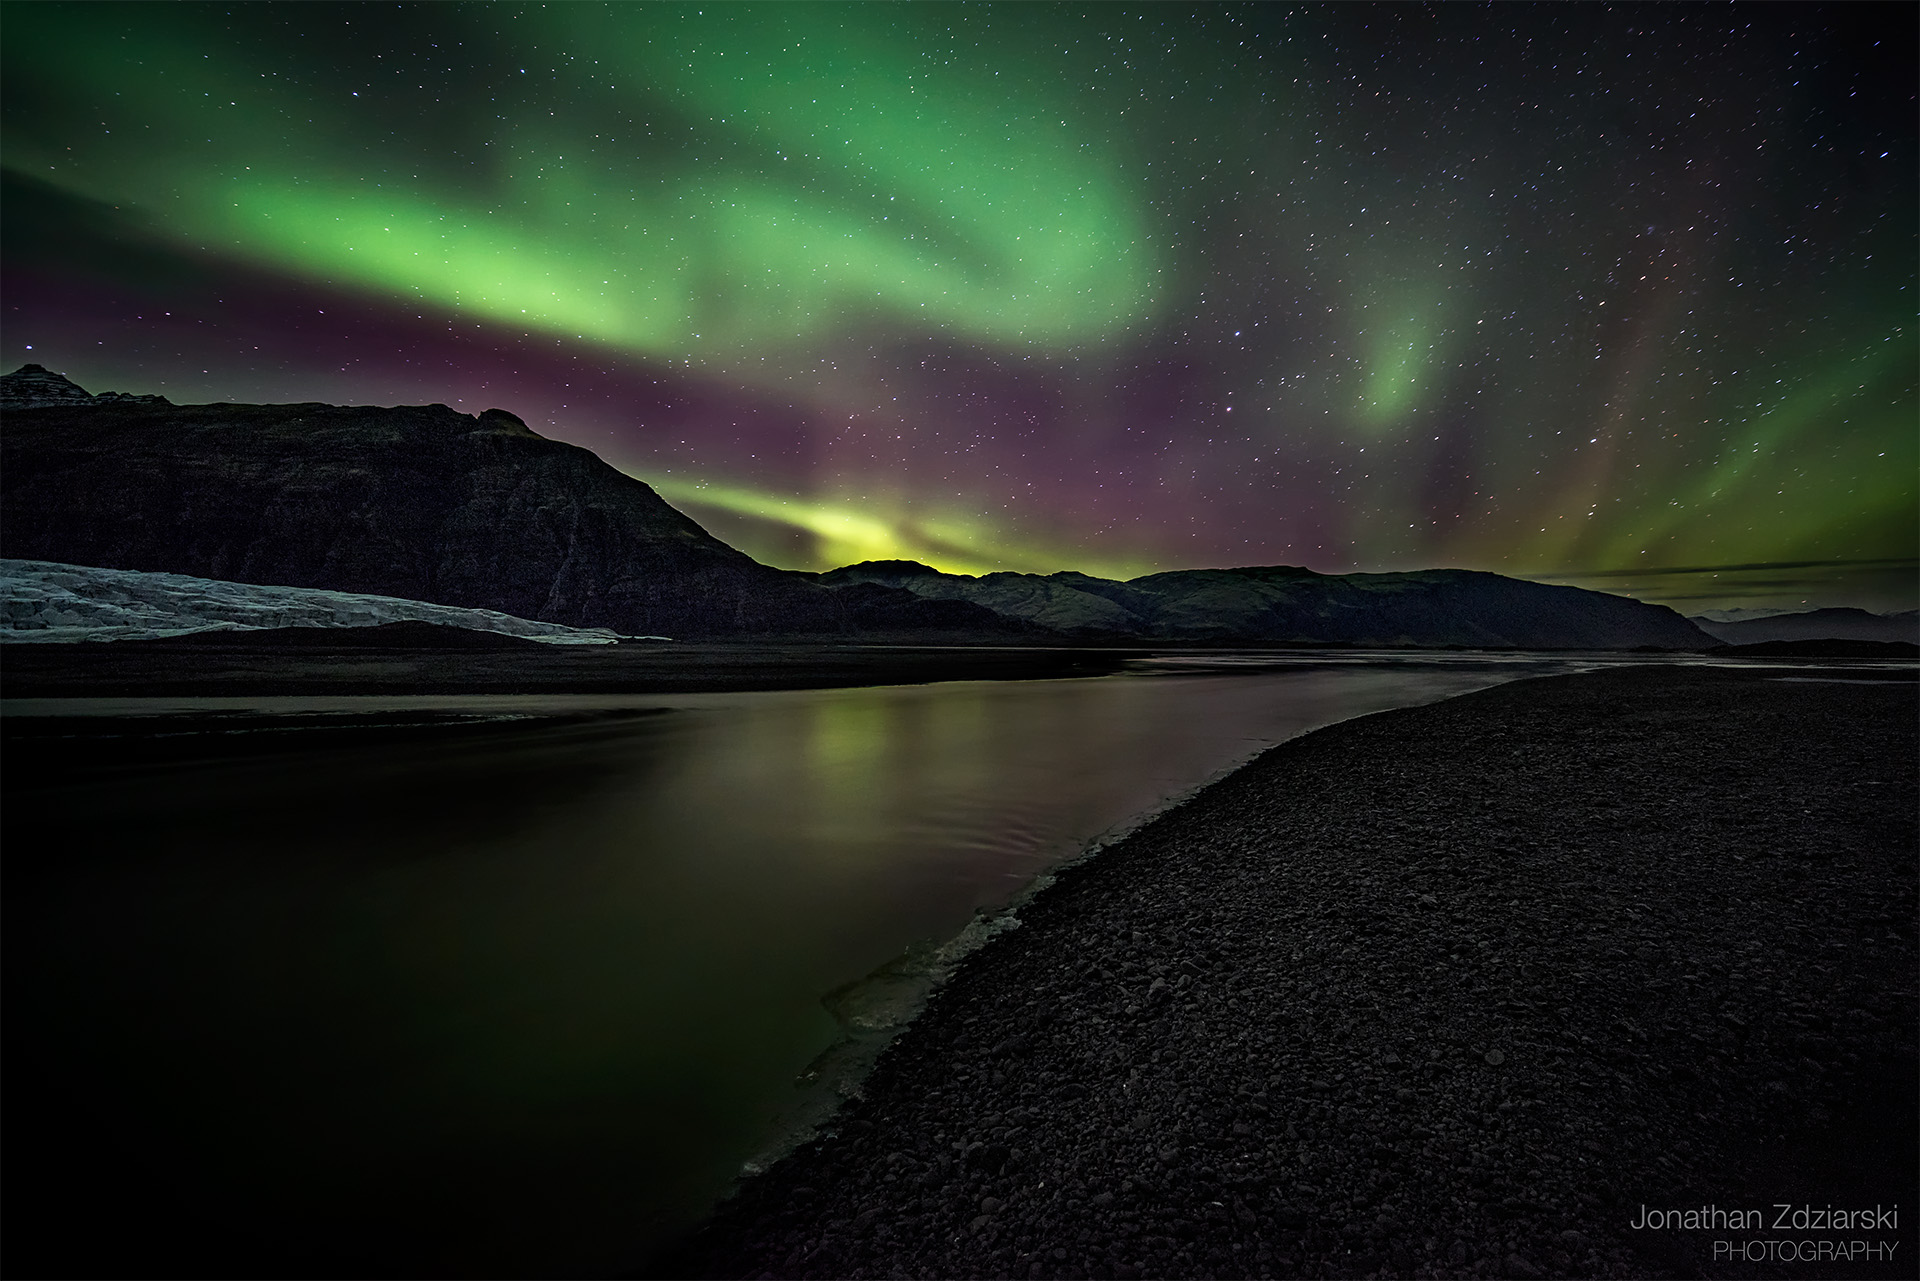
Aurora over Fláajökul Glacier
Zeiss 15mm, f/2.8, 10+78s, ISO 1250
In manual mode on the Nikon D810, you can move the shutter speed past bulb to get “–” on the display. If you haven’t read your manual, this is actually a really cool feature. You can press (and release) the shutter once to begin the exposure, then press it again when you’re ready to end it. You can sit there as long as you want exposing in the mean-time, without a timer. While I wouldn’t recommend this with a telephoto shot, you’re not going to notice any camera shake doing this with a wide angle. It’s especially harmless if you set a timer and exposure delay mode to start the exposure, as you should be doing anyway 🙂
Focus Stacking
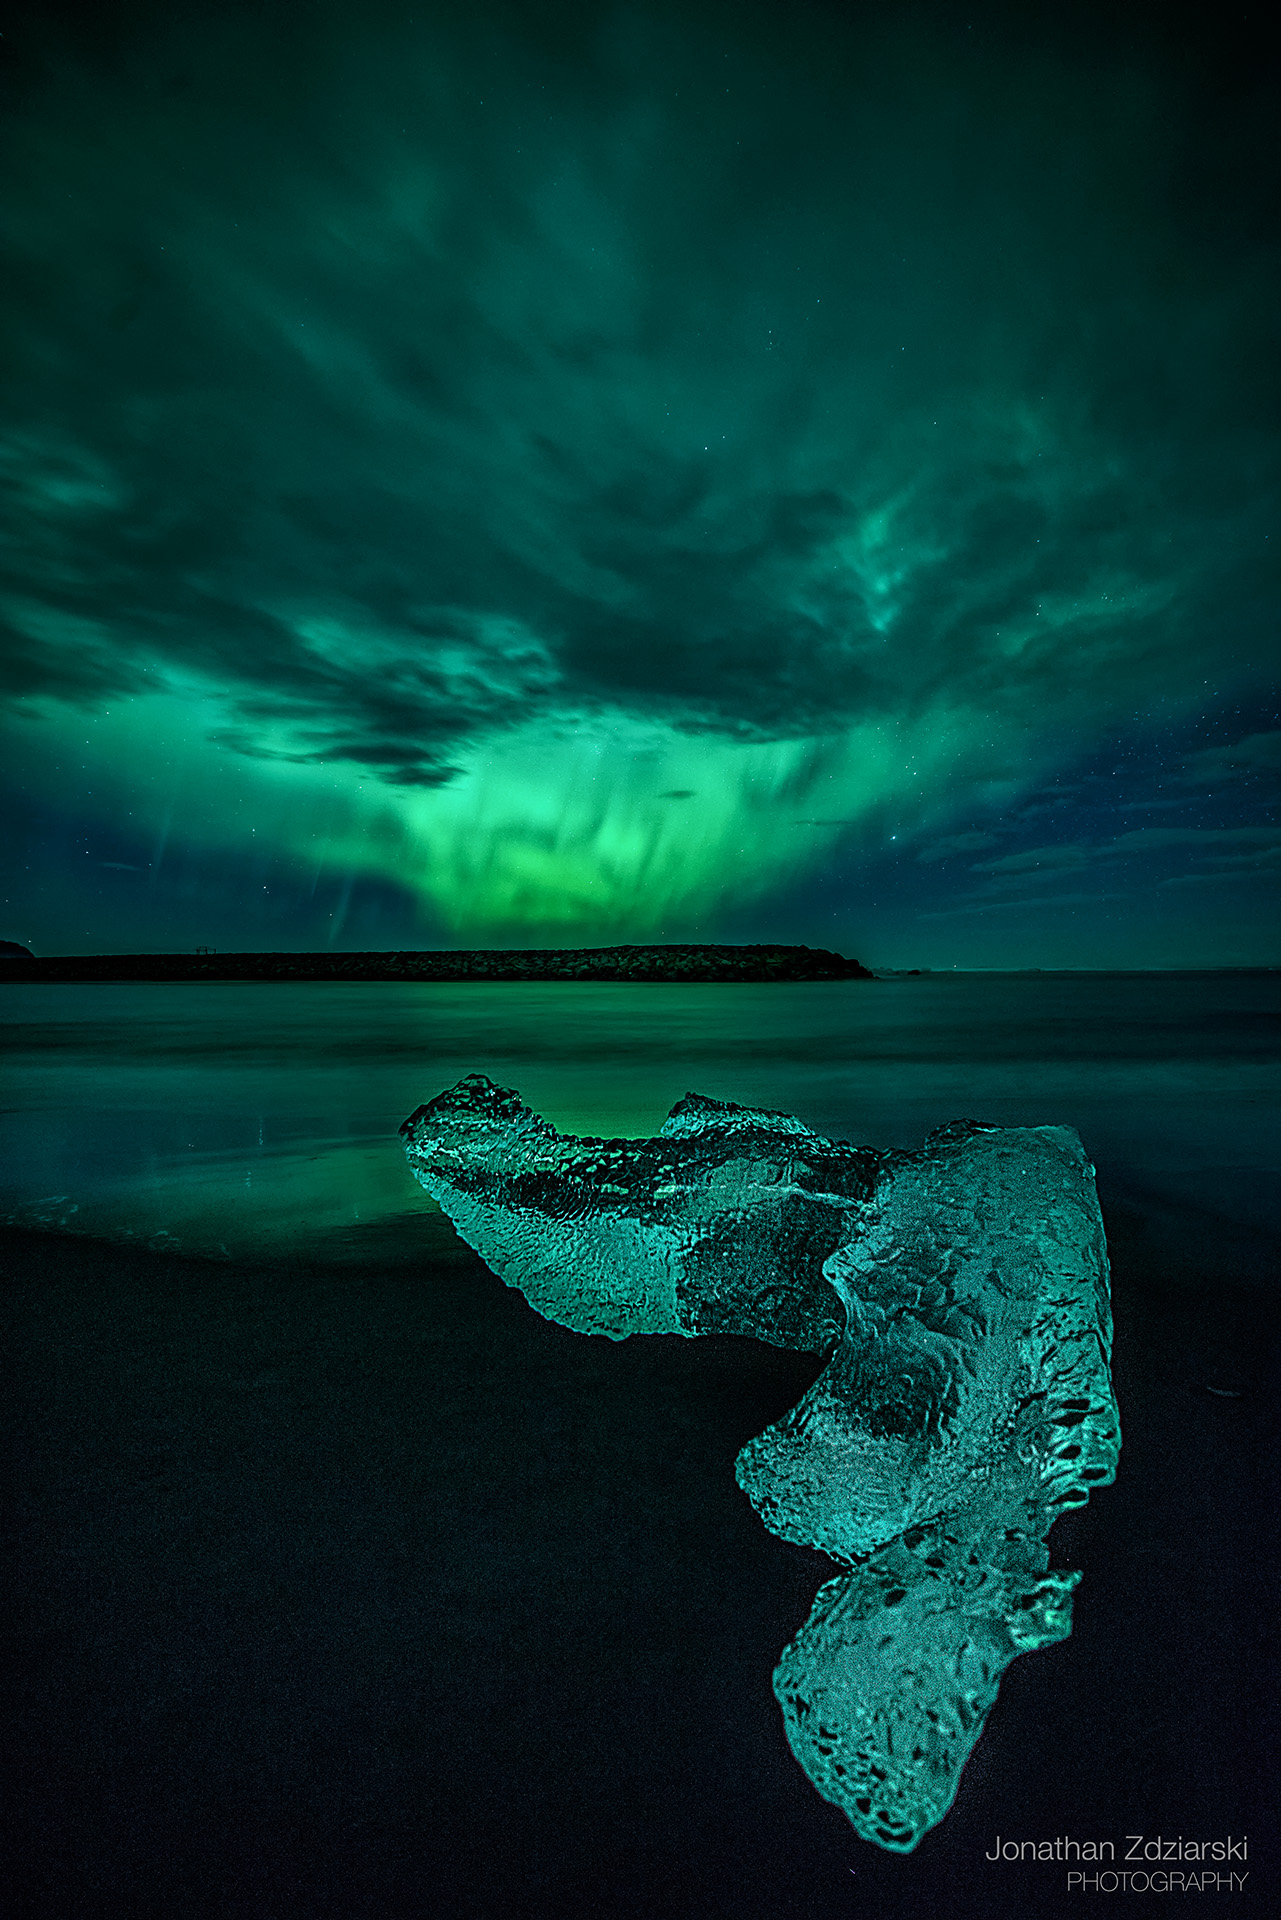
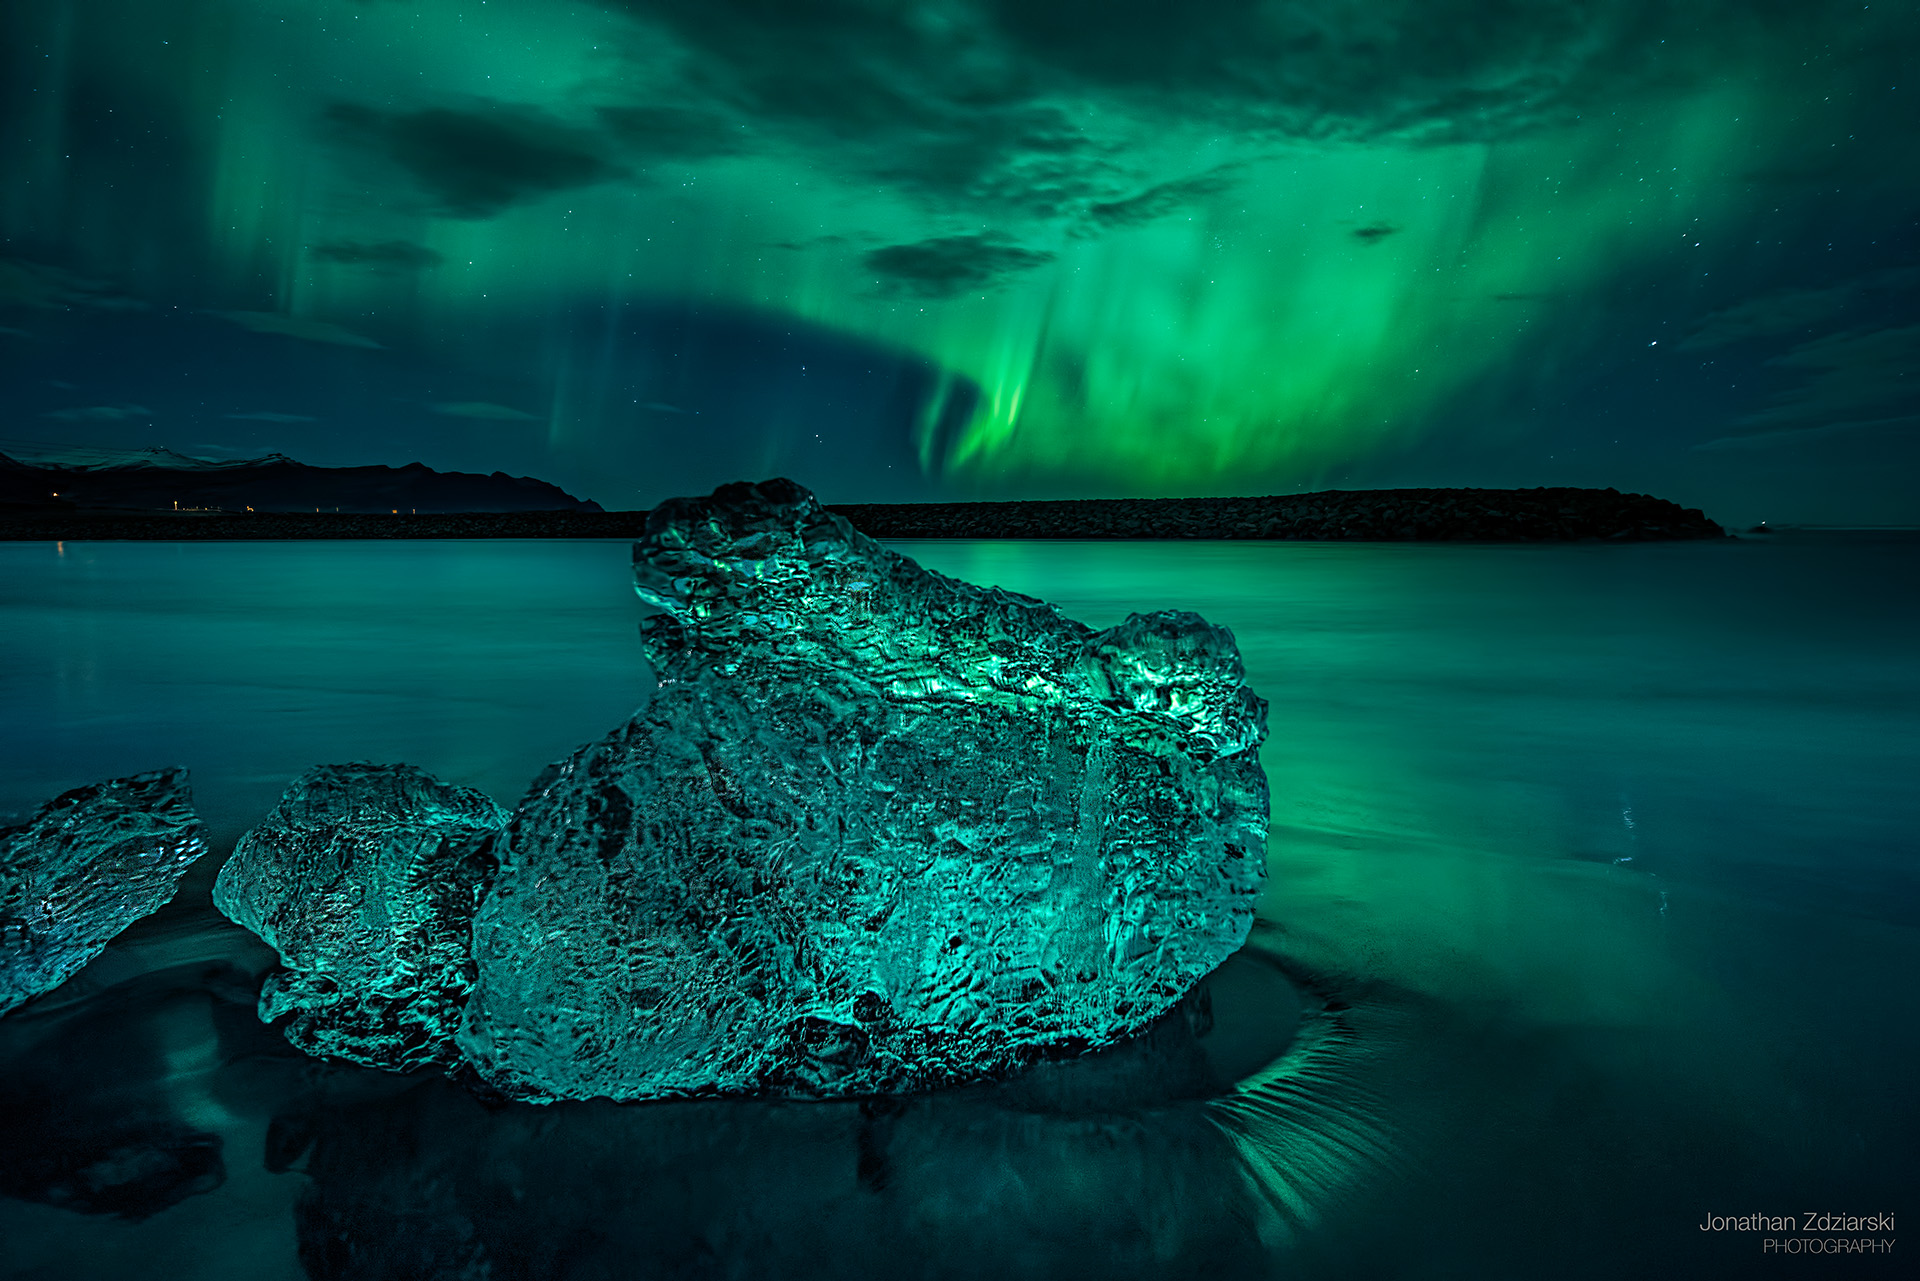
One night, when the Aurora was very strong, we drove out to the black sand beaches across from Jokulsarlon glacier lagoon, and took some shots of the Aurora lighting up the ice. Getting such a strong foreground required some focus stacking. This is where you take two shots: one for the Aurora, and one for the foreground, and change the focus of the second shot so that the iceberg was in focus. You can then use Auto-Blend Layers or masks to blend them together in Photoshop.
Green Flame Zeiss 15mm, f/2.8, 8+25s, ISO 1600
Without focus stacking like this, close up iceberg shots would have ended up blurry (and in fact, show up blurry in the first shot, but not the second).
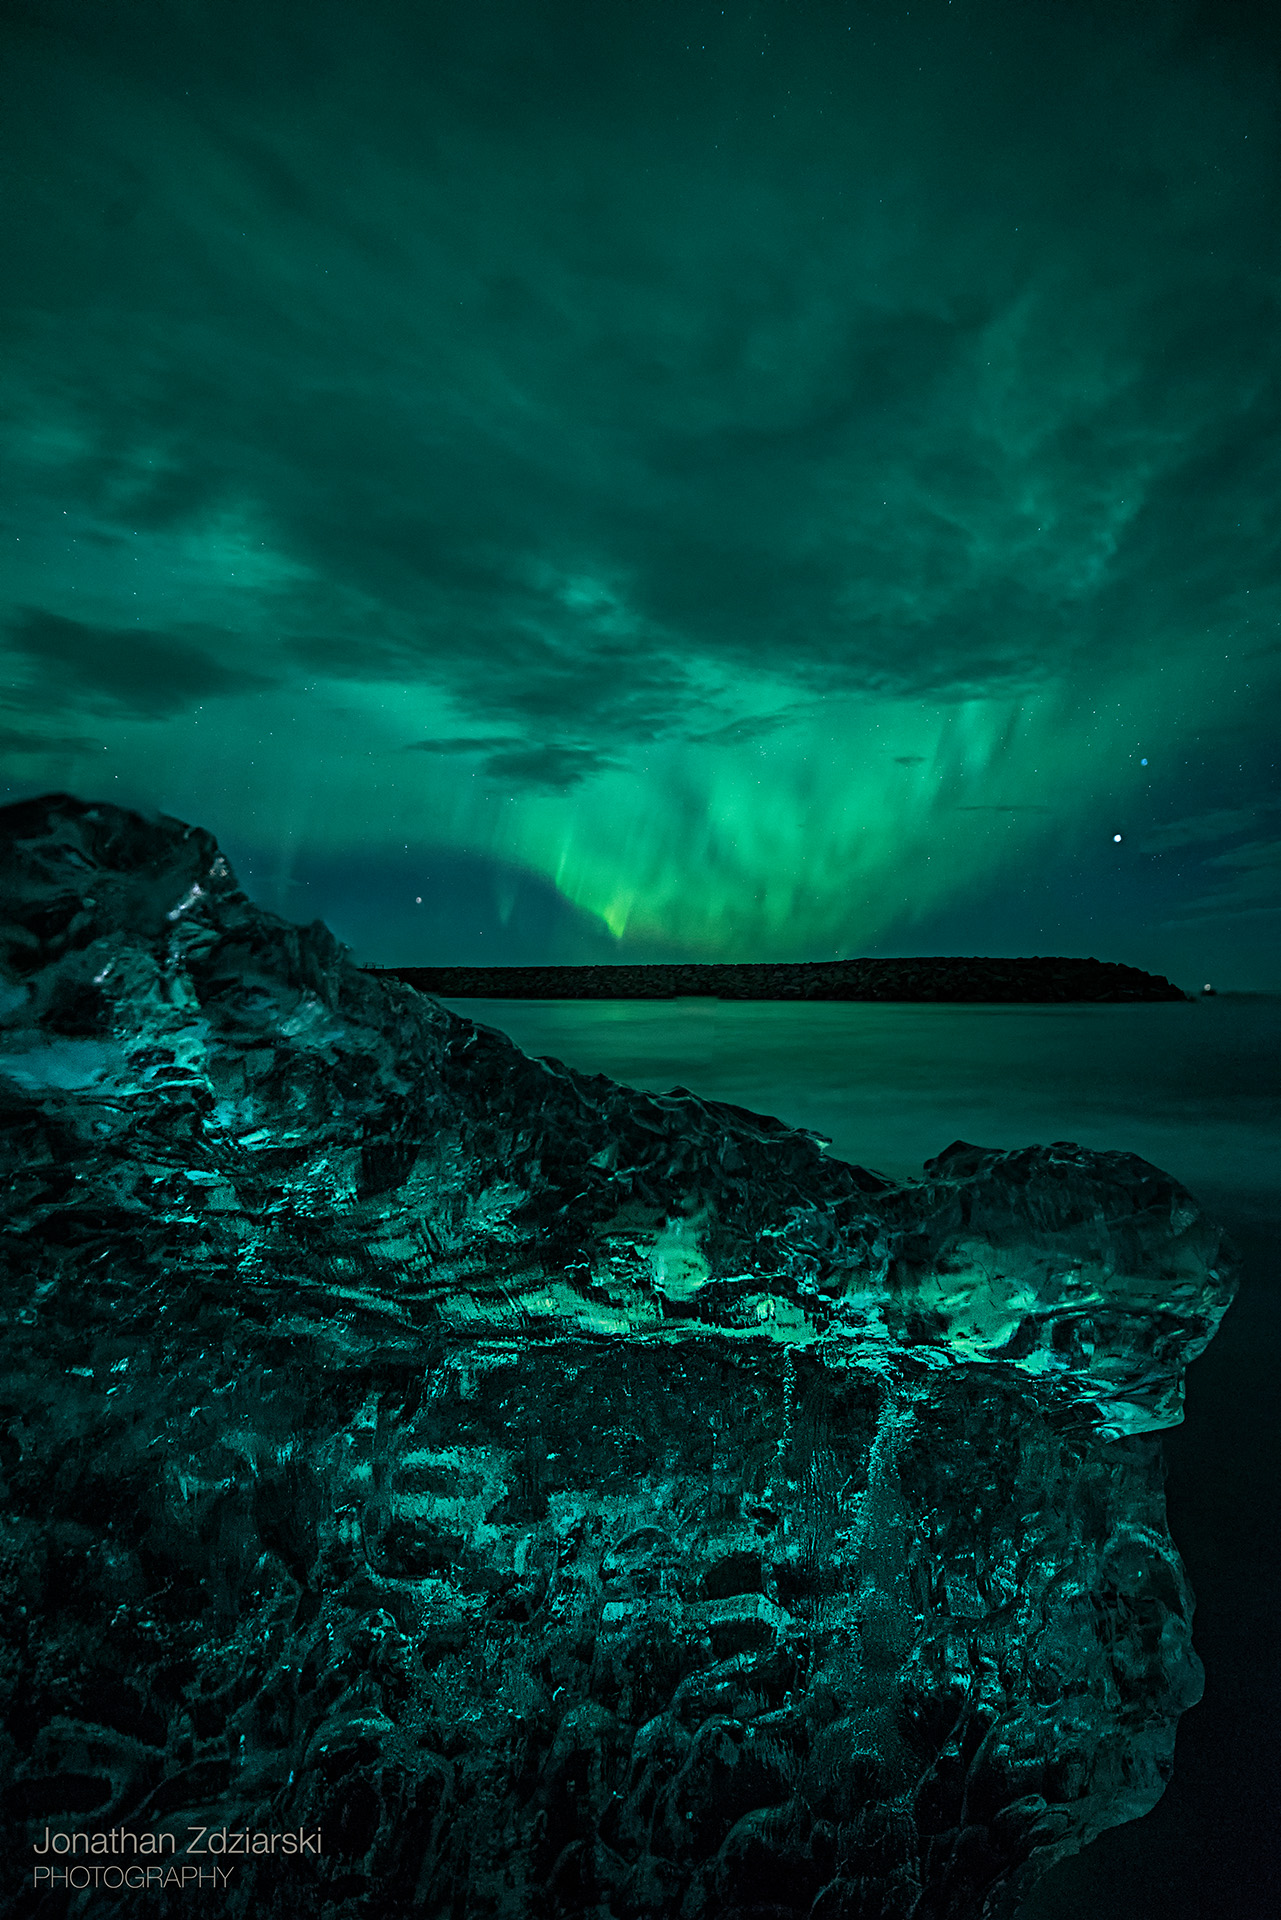
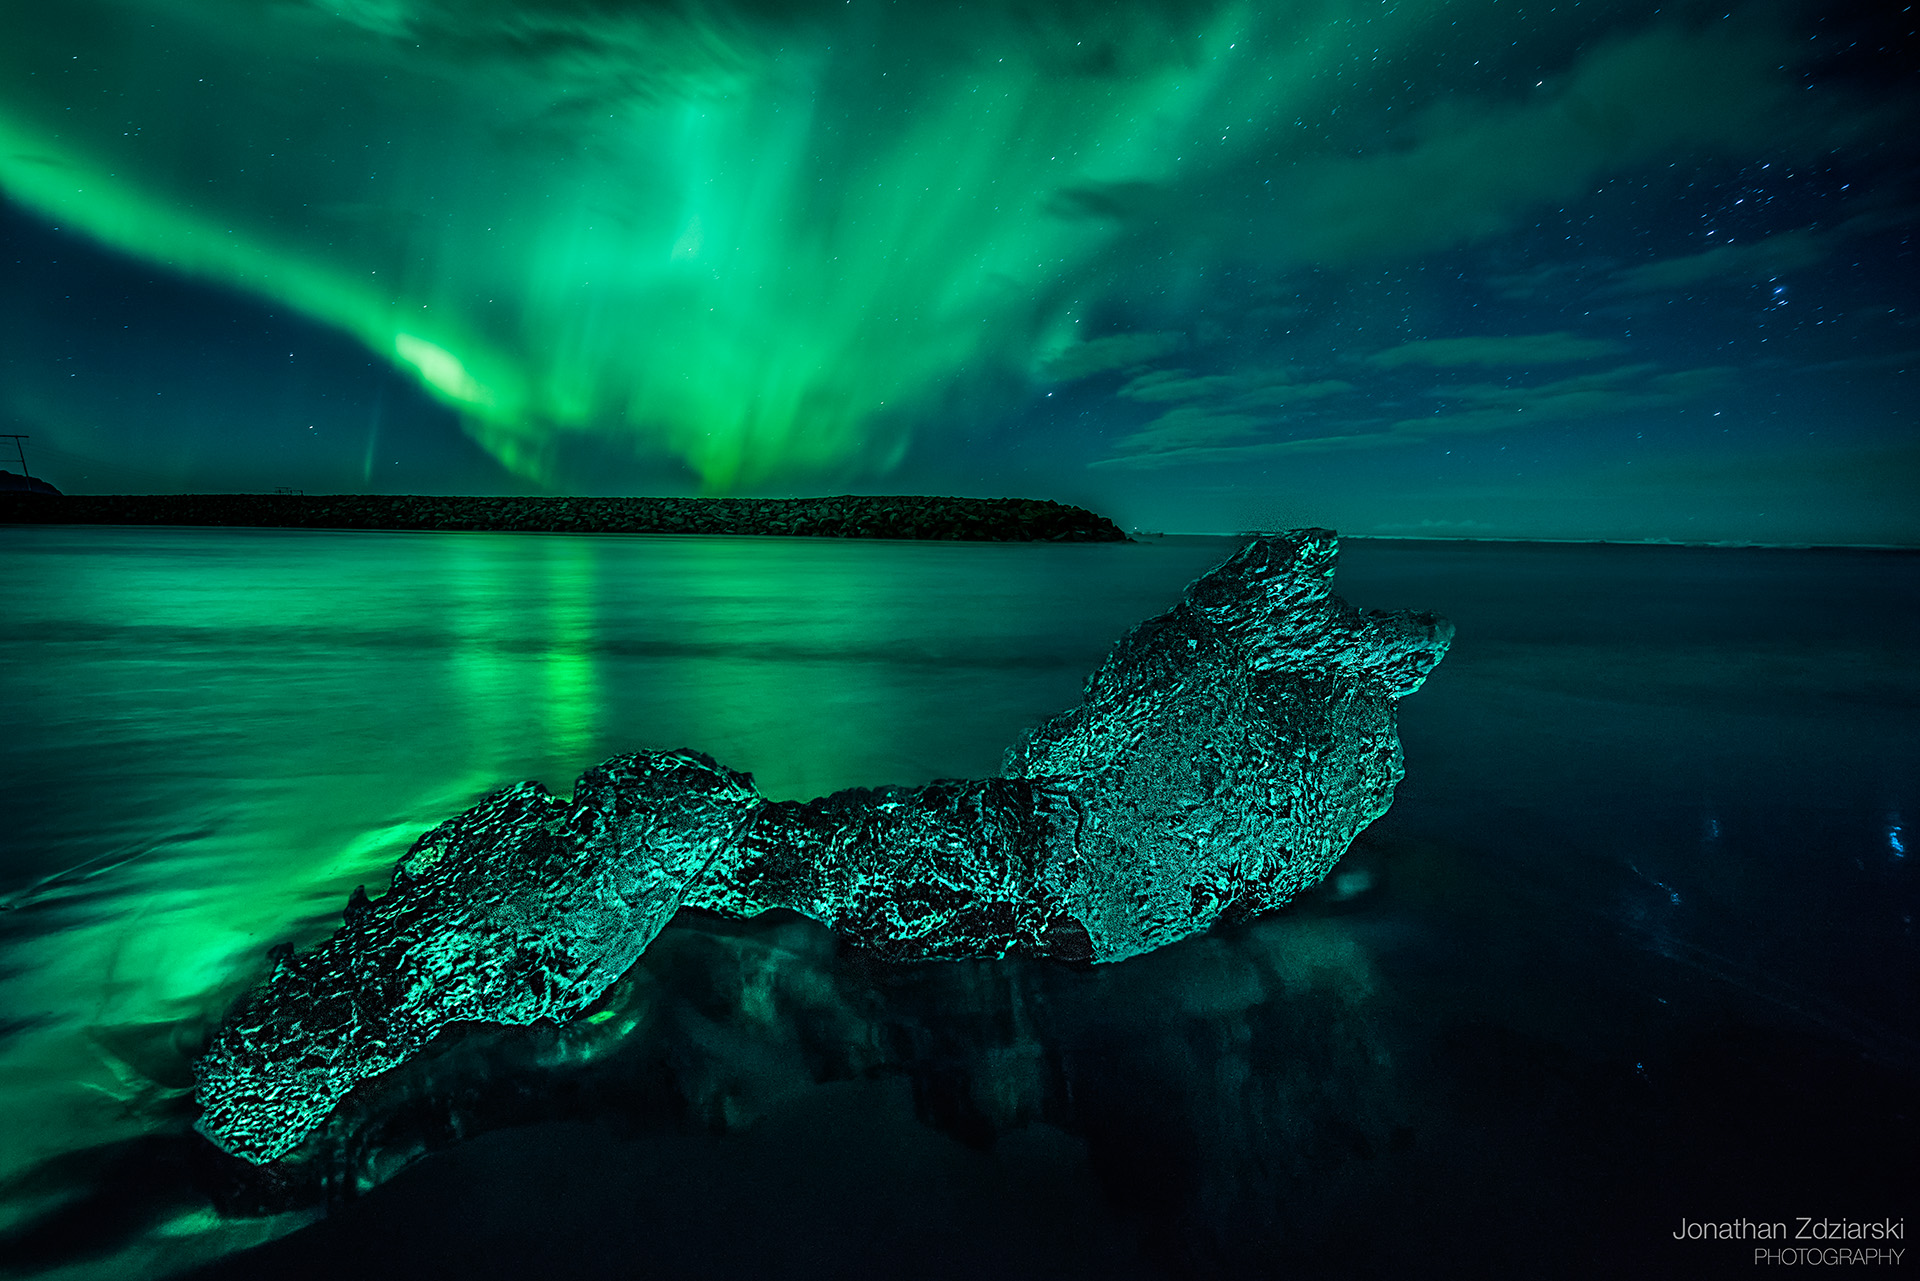
Ice Torch
Zeiss 15mm, f/2.8, 10+20s, ISO 1600
Light Pollution
Just as you’d need to overexpose a shot to capture the foreground, you may find that you need to underexpose a shot in order to tone down surrounding lights in the area. I’ve seen several professional photos where the photographer forgot to underexpose a frame for this; the lights always seem to draw the eye away from the real feature of the shot.
Cutting your shutter time (or better, your ISO) in half should get you somewhere in the ballpark; be sure to review your images to see what it takes to take the edge off of any background lights. You can then blend this with your Aurora shot to get a well balanced final.

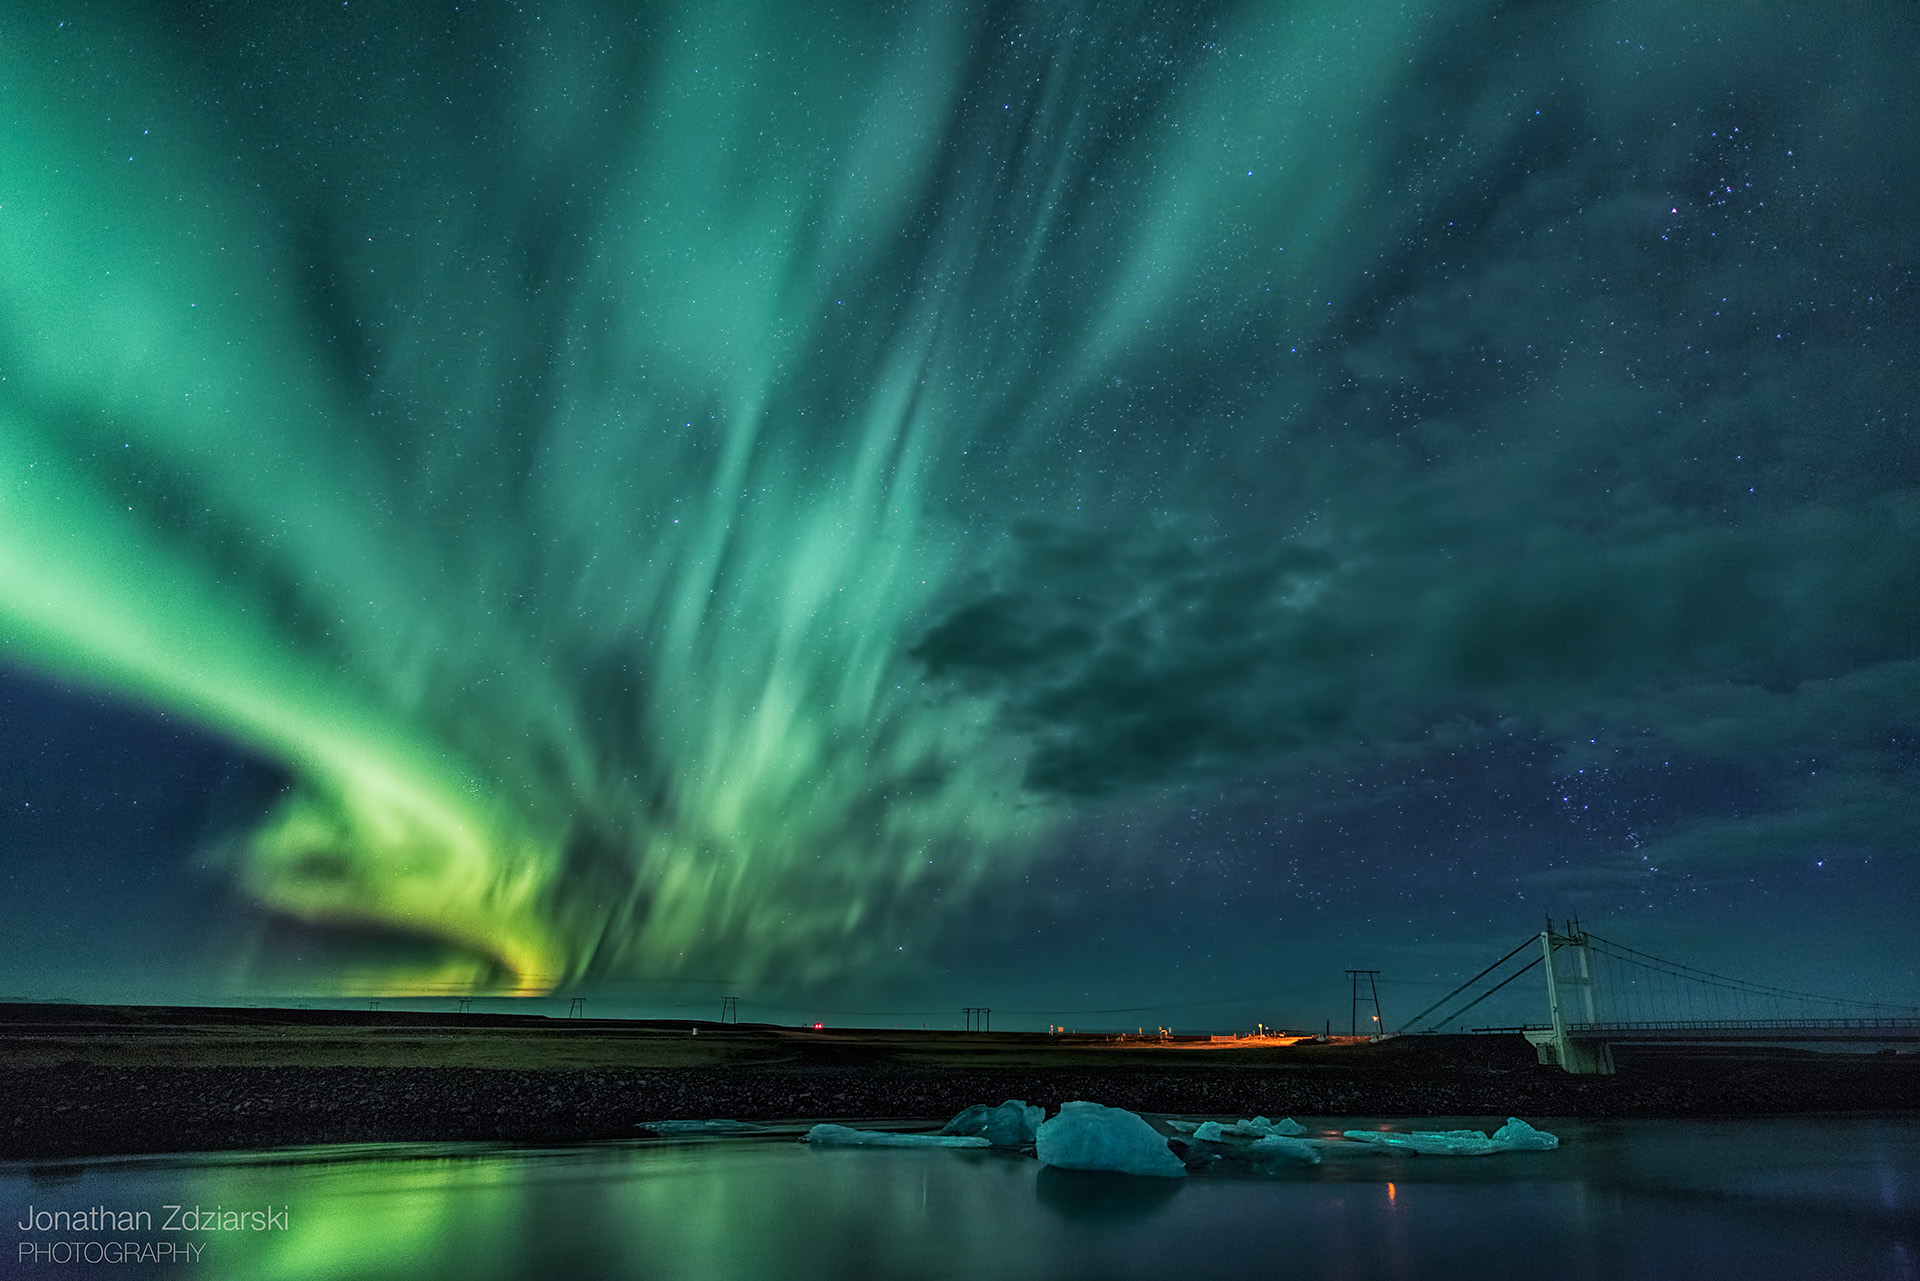
Bridge Over Glowing Waters
Jokulsarlon Glacier Lagoon
Zeiss 21mm, f/2.8, 10s, ISO 1250
Processing
If you’re doing it right, you should already have a decent shot to work with straight out of camera.
At this point, most of your processing will likely consist of camera raw tweaks: adjusting the white balance / tint to bring in the colors of the foreground, whites (to raise or lower the intensity of the Aurora), shadows (to bring out the foreground), and clarity (to add definition).
A few other things you’ll want to consider in processing are to turn sharpening to around 25%; now option+click+drag the Masking slider until only the stars and some of the foreground are masked in white. This will sharpen these things, but leave the Aurora alone. Of course, if you’re shooting ice or some other strong foreground, you’ll want to selectively sharpen for that. Ice sharpens well with a strong unsharp mask.
You may also consider using Photoshop’s noise reduction. I recommend processing the foreground and the Aurora separately for noise reduction, even if you’re using the same image file. Reason being, you can be more aggressive with the Aurora than you can with the foreground.
To merge two images together, copy one photo’s background as a new layer into the other. You can then try the Edit > Auto-Blend Layers tool, although that only works some of the time. I quite prefer doing it by hand using masks. Simply click the mask icon to create a mask, then paint black or white onto it in parts you want to either reveal or conceal.
Lastly, you might consider reading my article on luminosity panels. I use this technique to make targeted adjustments to various levels of shadows, midtones, and highlights, allowing me to fine-tune the photo’s balance.

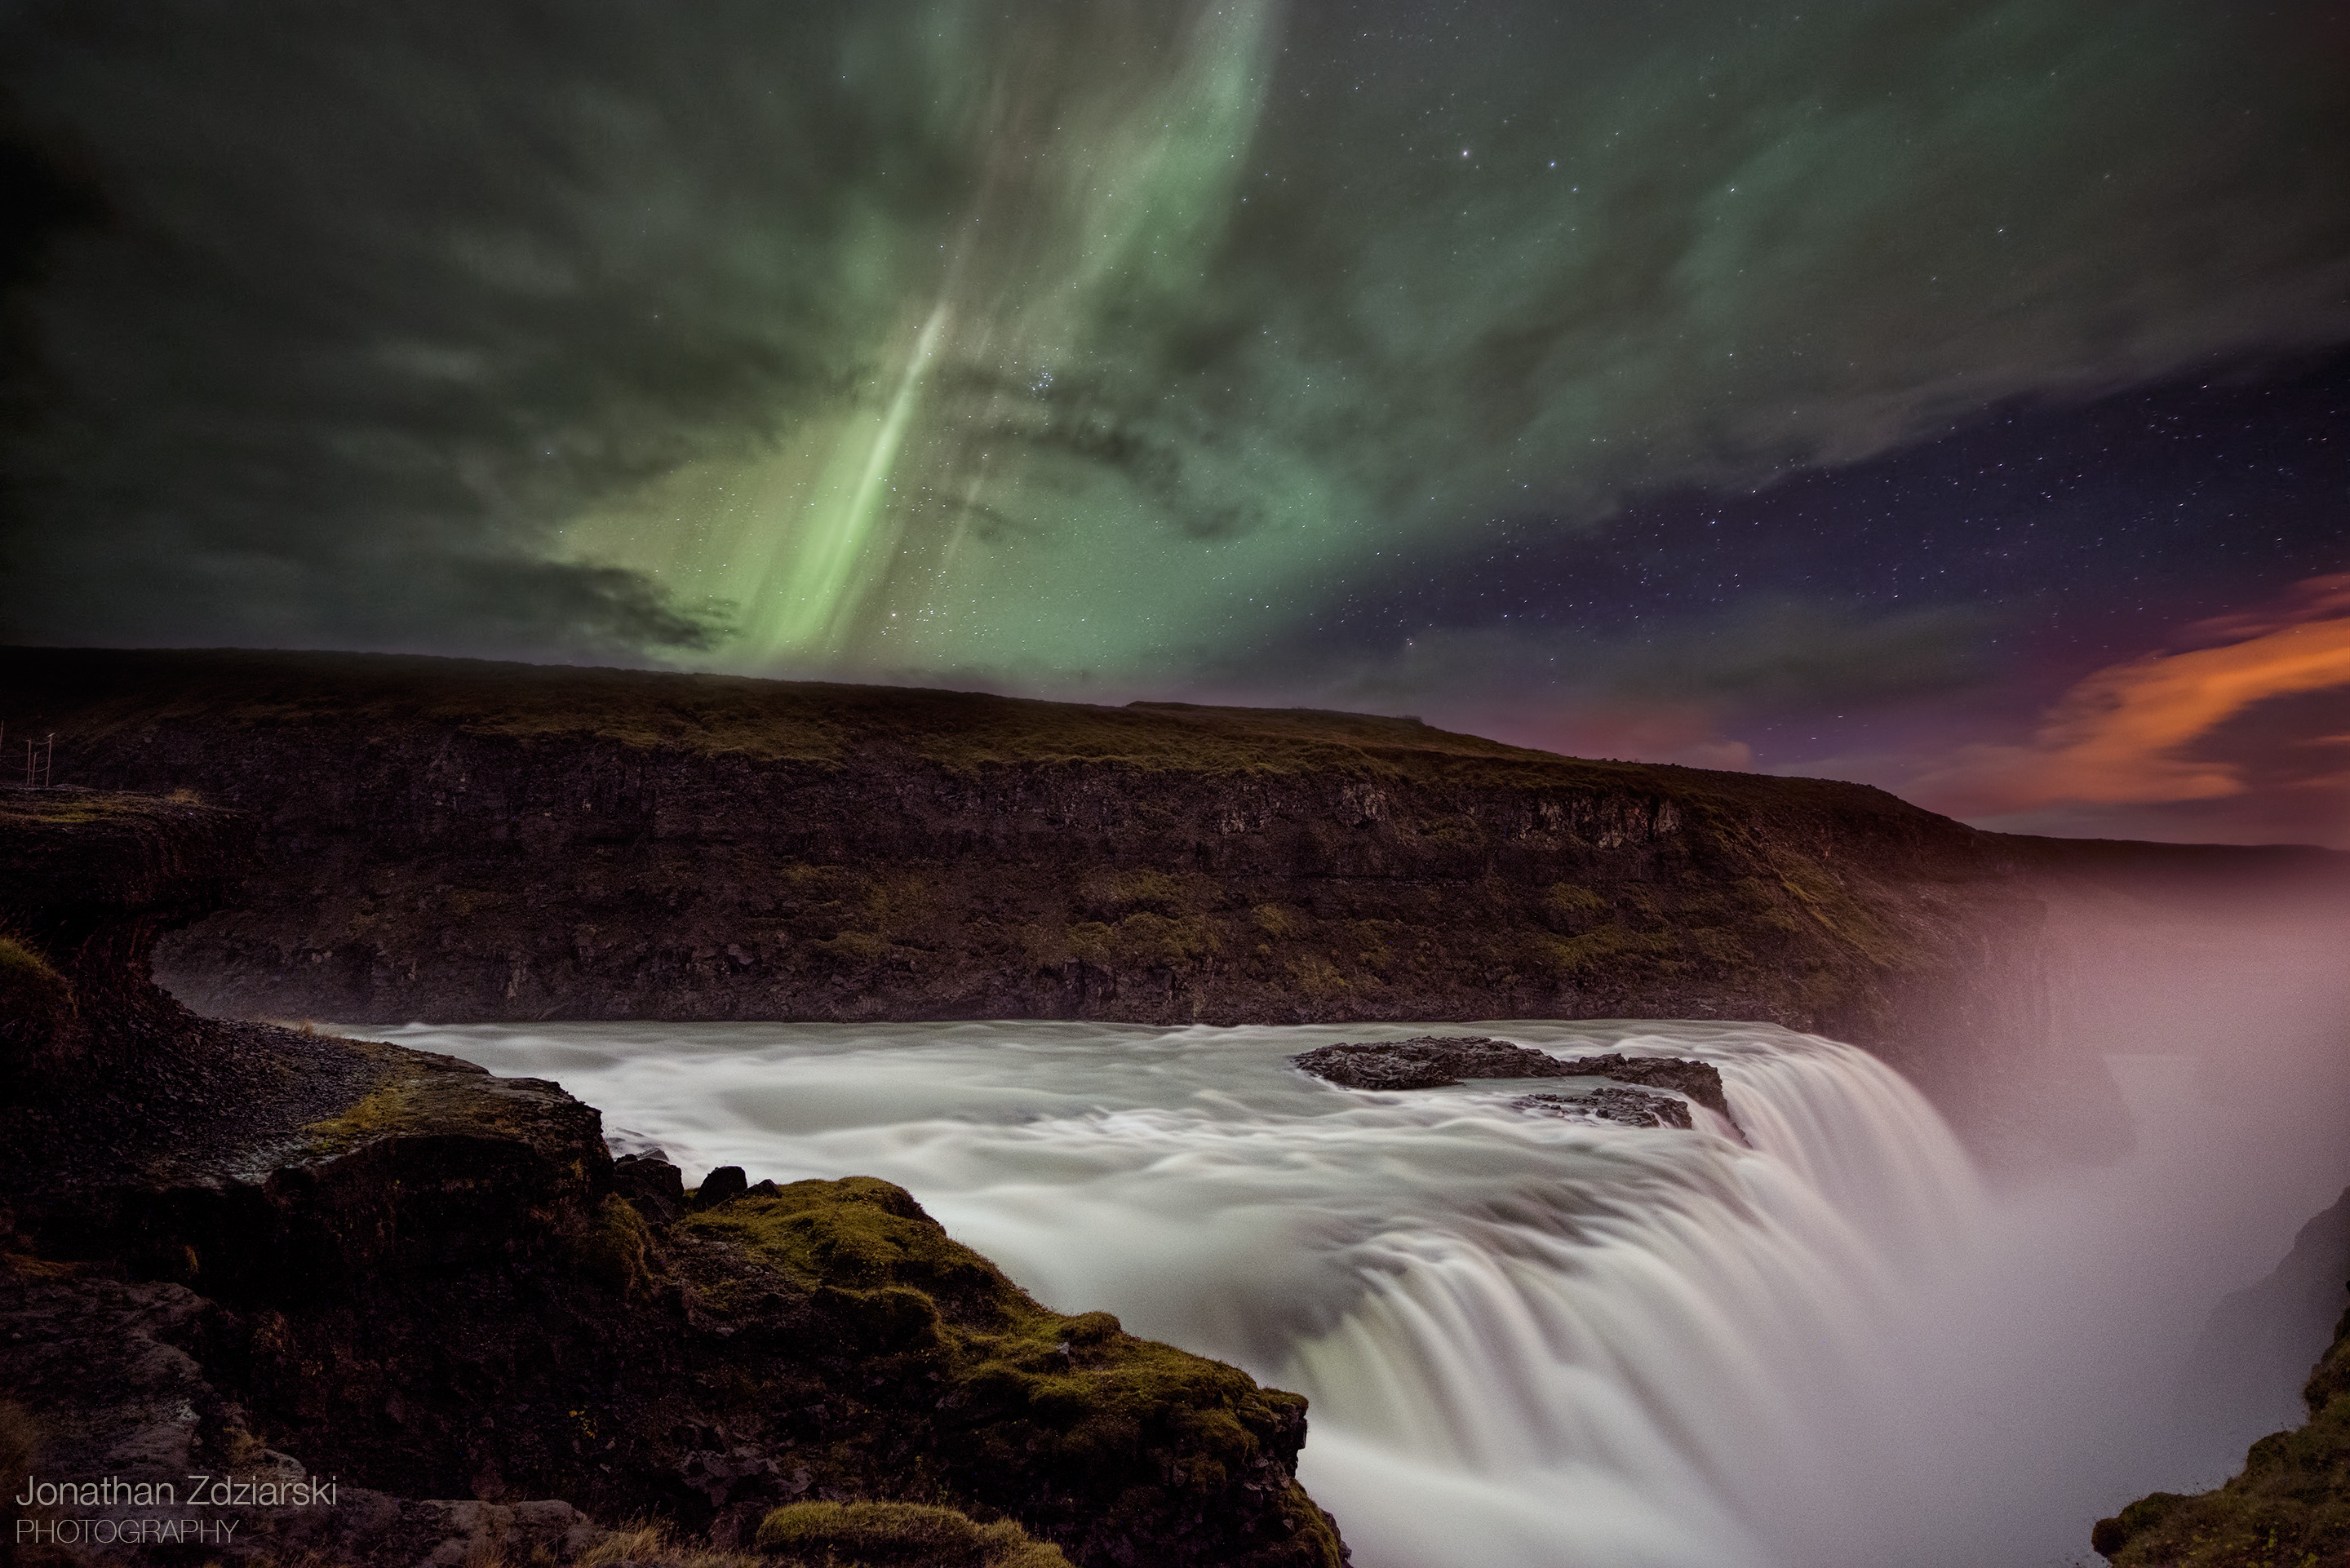
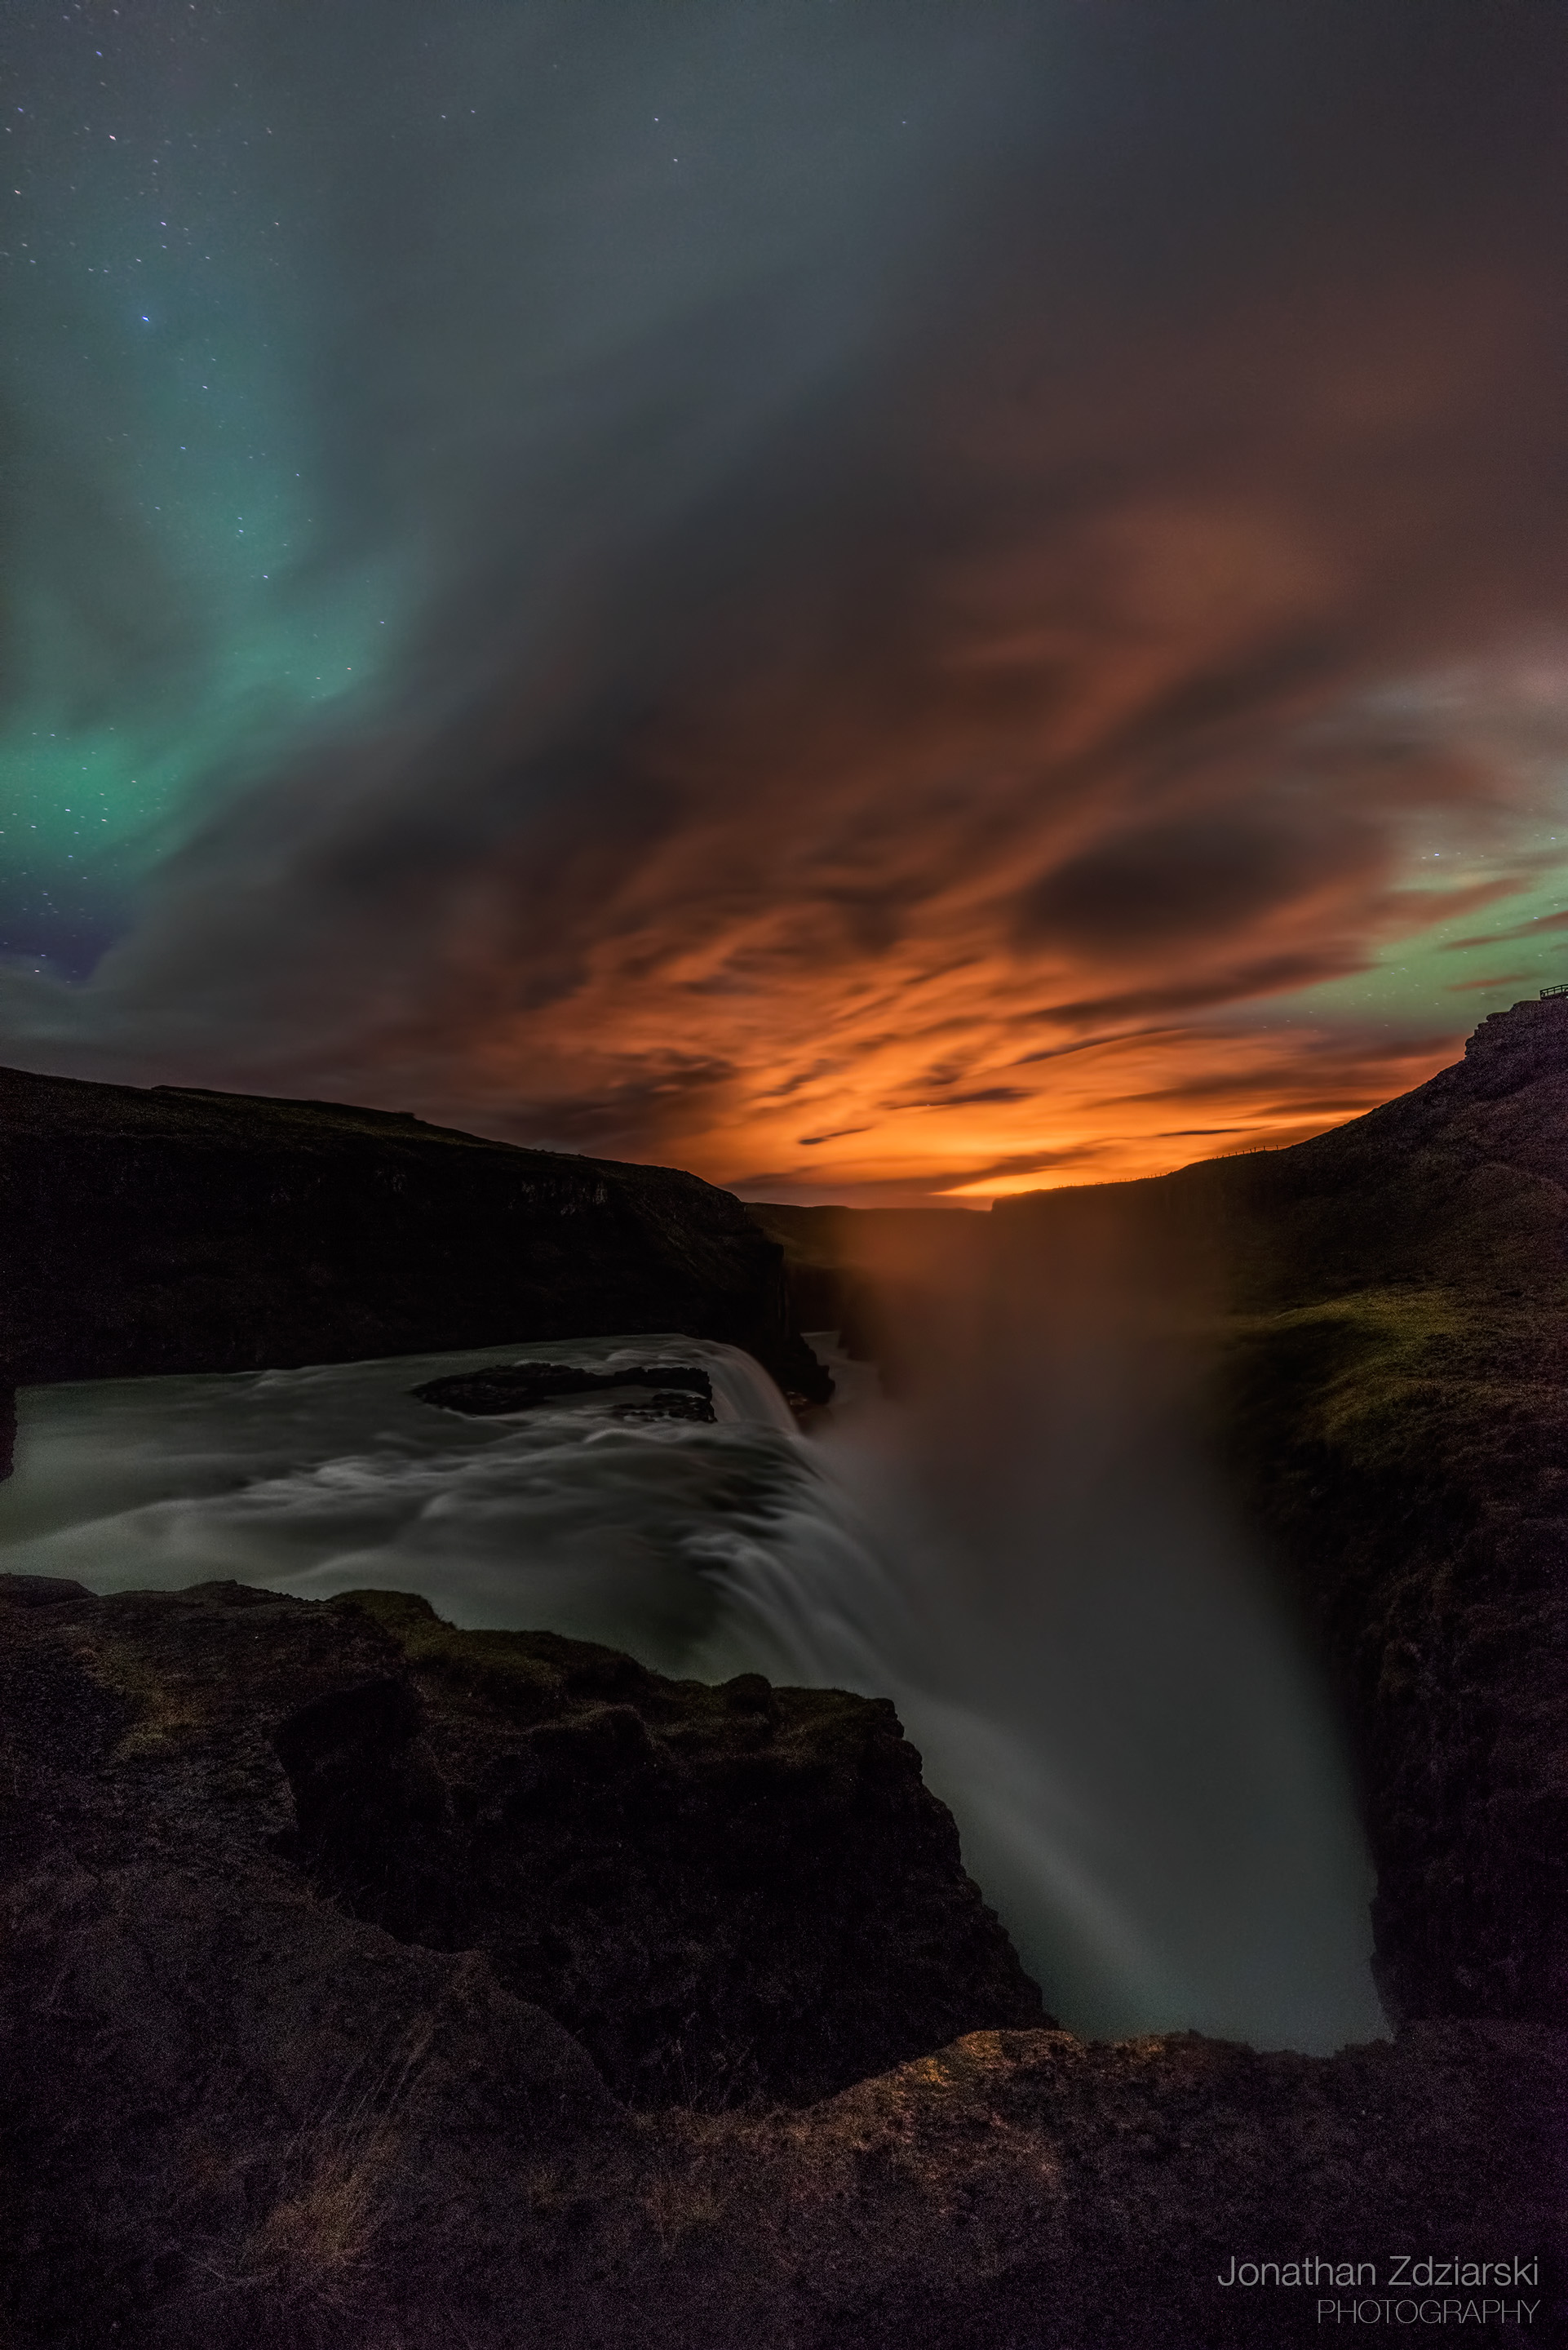
Opposing Forces
Aurora over Gullfoss Waterfall
Zeiss 15mm, f/2.8, 30s, ISO 1600
Color Correction
If the Aurora is particularly bright, the green may drown out the colors from the rest of the photo. Adjusting the white balance and tint when loading your raw into ACR will certainly help to subtly bring back some of the original colors. Additionally, you can use Photoshop’s Color Balance tool as well as ACR’s brush adjustment tool to make deeper corrections, if necessary.
One of the most useful tools I’ve applied has been using Threshold combined with Levels to reset the black and white points of the image. Brent Paull has a great tutorial on using Threshold. This typically restores the depth of the original colors, but can initially make the photo extremely grainy because it’s too brightened up. Further adjustments to levels can help to bring the photo back to its native brightness levels, while leaving the richness of the colors.
Another thing I’ve noticed is that the magentas can sometimes creep into your photo by using this method, turning blues to purple. You can use channel mixer to remove some of the reds and restore a blue sky, instead of a purple one (although purple and green does look pretty cool together).
Printing
I’ve tried several different inkjet processes through various labs and photo finishing companies – none of them have been able to retain the green and blue highlights to my satisfaction. The Epson printer and paper did a halfway “decent” job on the greens, however completely clipped the blue highlights. Other labs would clip the greens, leaving the Aurora like a blob. Neither were suitable for gallery or customer prints. I tried calling Epson several times, but was unable to even reach someone who spoke English well enough to understand my questions.
The best process I was able to find was using a lab’s chromogenic process on darkroom paper (Fuji Crystal Archive). The Chromira prints offered by West Coast Imaging filled the bill here, and they were able to run all of my Aurora shots flawlessly and quickly for an upcoming gallery. It’s been argued that inkjets have a wider gamut than chromogenic, and that may or may not be true, but when it comes to these specific highlights, it seems that all inkjets I’ve tried fall short.
When adjusting your Aurora photos for print, be sure to use your printer (or lab) color profile and soft proof it in Photoshop. Also be sure to turn on the Gamut Warnings option so that you can see all the areas (highlighted in gray) where your highlights are likely to clip. This can really help to get a decent looking image for print, even if you don’t want to pay top dollar for c-prints.
Safety
Be careful, and always carry a bright flashlight with extra batteries. If you’re in unfamiliar territory, bring a hiking stick with you. Even if there’s no snow on the ground, I strongly advise cramp-ons or ice bugs. Just hiking around the Flaajokul glacier left a lot of slippery frost on the rocks in the evenings.
Be especially careful to watch the tides when shooting on a beach. The tides in Iceland can be downright deadly, and if they don’t kill you the current will. The beach we shot on had eaten a car the year prior, and they never found the car. I always recommend unpacking the gear you’re going to use, then wearing the rest on your back, so you’re ready to run if need be – this has saved my gear (and my rear) a few times.
If you happen to shoot icebergs, like we did, be especially careful around those that are still floating. These chunks weigh thousands of pounds, and one nasty wave can throw one on you.
Always do this with someone else, and even consider bringing a guide with you who knows the area.

Growl
Zeiss 15mm, f/2.8, 15s, ISO 1600
Other Tips
Do a lens check with your flashlight every ten minutes or so, to make sure that mist from waterfalls / waves / etc has not misted up your lens. Otherwise, you stand to lose your entire evening’s worth of photos.
Once you get back to the hotel, let your lens and camera dry off and come up to temperature before attempting to remove the lens. Otherwise, you run the risk of leaving sensor spots either from condensation or from direct contact with water. This is especially true if your camera has been near waterfalls.
We haven’t had any problems with our lenses fogging up, but some other night photographers have discussed this in their own blog. I think the trick is to buy good quality glass, firstly, but also to give your camera and lens a chance to acclimate to the outdoor temperatures before removing the lens cap. If you’re keeping your hotel room a tropical rainforest, you’re most likely going to experience fogging when you go into the cold. Give your cameras just a little bit of time to get used to the cold weather. If you do fog up, just wipe it off and keep shooting – eventually it will adapt. I suppose defective lenses (or really cheap lenses) might have this problem more often… if you run into this, one photographer I know of apparently used hand warmers to keep the lens warm. This seems counter-productive to me, as you want the lens to cool down to ambient temperature so that it doesn’t fog up… this seemed to work for him at least.
Always bring extra cloths, as they become useless should they get wet after wiping down a misted lens a few times.

Fountains of Fire
Zeiss 15mm, f/2.8, 30s, ISO 1250
Have Fun!
The most important thing is to have fun. Having some great photos to take home is awesome – but don’t forget to take some time to just sit with your honey and watch the Aurora dance. It’s quite a spectacle!
You can view the rest of my Iceland gallery (and other galleries) here: http://photography.zdziarski.com/?page_id=2
You may also be interested in my blog post, “A Crash Course in Astrophotography” http://www.zdziarski.com/blog/?p=5351
This post was originally published here. If you have an interesting idea for a guest post, you can contact me here.